


How to Configure Reboot schedule and Wi-Fi Scheduler function of Omada Controller
There are two different schedule functions on Omada controller. One is reboot schedule and another is scheduler.
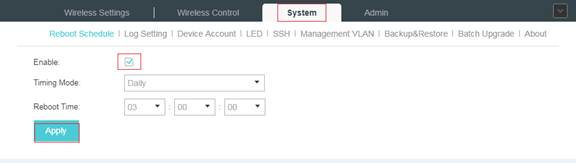
- Reboot Schedule
Function: You can reboot all the EAPs in the network periodically as needed.
Here are the configuration methods of Reboot schedule on Omada Controller:
Select System->Reboot Schedule->Enable, then set the Timing Mode and Reboot time and click Apply.
- Scheduler (Wi-Fi Schedule)
Function: With the Scheduler, the EAPs or its’ wireless network can automatically turn on or off at the time you set. For example, you can use this feature to schedule the radio to operate only during the office working time in order to achieve security goals and reduce power consumption. You can also use the Scheduler to make clients can only access the wireless network during the time period you set in the day.
Here are the configuration methods of Scheduler on Omada Controller:
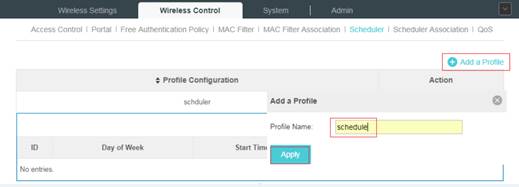
1) Select Wireless Control->Scheduler->Add a Profile->Apply
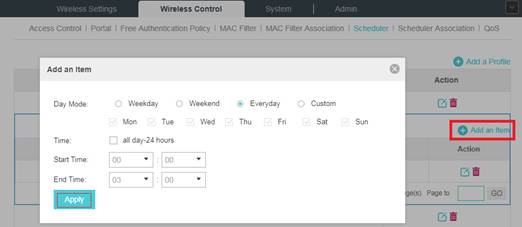
2) Select Add an Item-> configure the parameters to specify a period of time->Apply
3) Go to Wireless Control->Scheduler Association
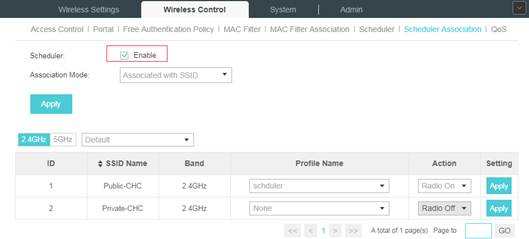
- Check the box to enable Scheduler function.
- Select Associated with SSID (the profile will be applied to the specific SSID on all the EAPs) or Associated with AP (the profile will be applied to all SSIDs on the specific EAP). Then click Apply.
- Select a band frequency (2.4GHz or 5GHz) and a WLAN group.
- In the Profile Name column of the specified SSID or AP, select a profile you added before in the drop-down list. Select Radio Off/Radio On to turn on or off the wireless network during the time interval set for the profile.
- Click Apply in the Setting column.
Note: You can also use Scheduler function in standalone mode of EAP.
Ez a GY.I.K. hasznos volt?
Véleménye segíti az oldal fejlesztését
4.0-F_normal_1593323233431q.png)

4.0-F_normal_1593323206680k.png)