


Using Omada controller to configure multiple SSIDs with different VLANs on TP-Link Omada EAPs and Switches to work with a non-Omada gateway(Multi-Net NAT supported)
Usage Scenario:
In certain cases, you may need an Omada Switch or EAP to cooperate with a gateway that is not compatible with the Omada Controller. This FAQ will help In such situations where you may need to configure Multi-SSIDs with different VLANs.
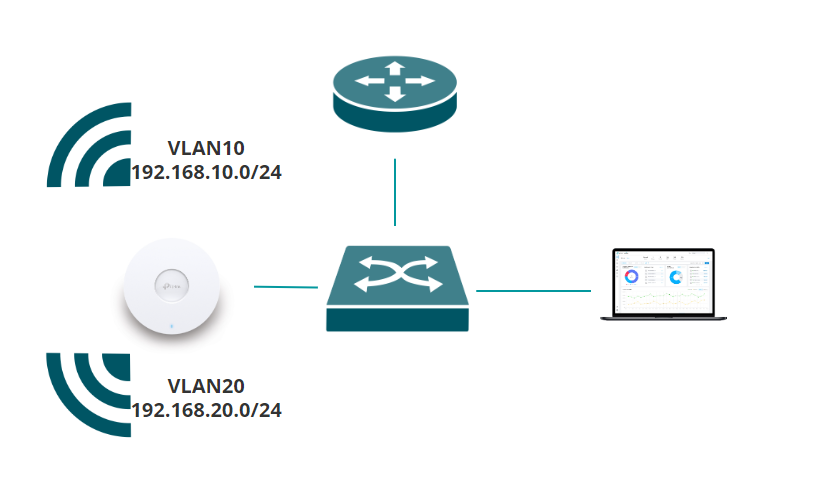
The following topology is used as an example.
Note: To make the network work properly, please make sure your router supports Multi-Net NAT. If it does not your Multi-SSID with different VLANs may not work as expected.
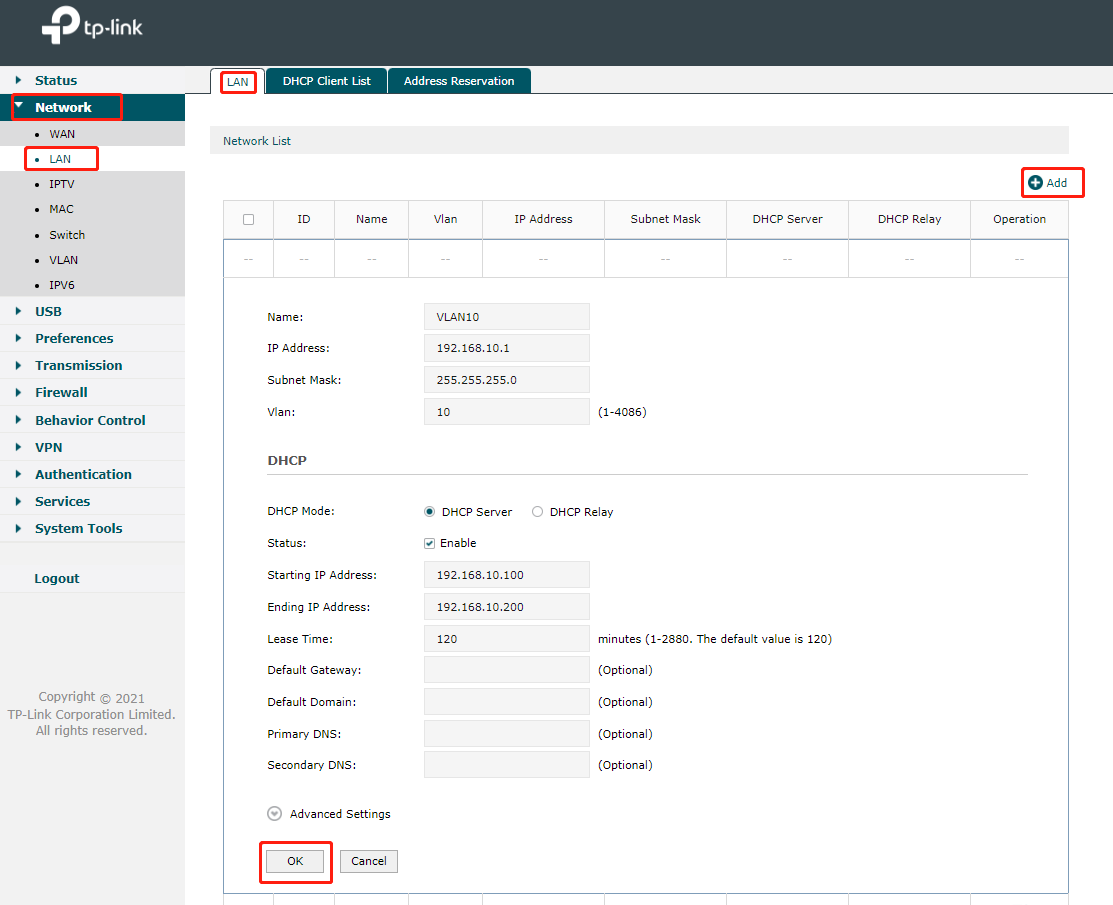
Step 1. Create VLAN interfaces on the router
Using an ER7206 in standalone mode as an example. If you use a third-party router, please make sure it supports Multi-Net NAT and can create different VLAN interfaces.
Go to Network > LAN > Network list to add VLAN interface 10 and 20.
Create VLAN interface 10:
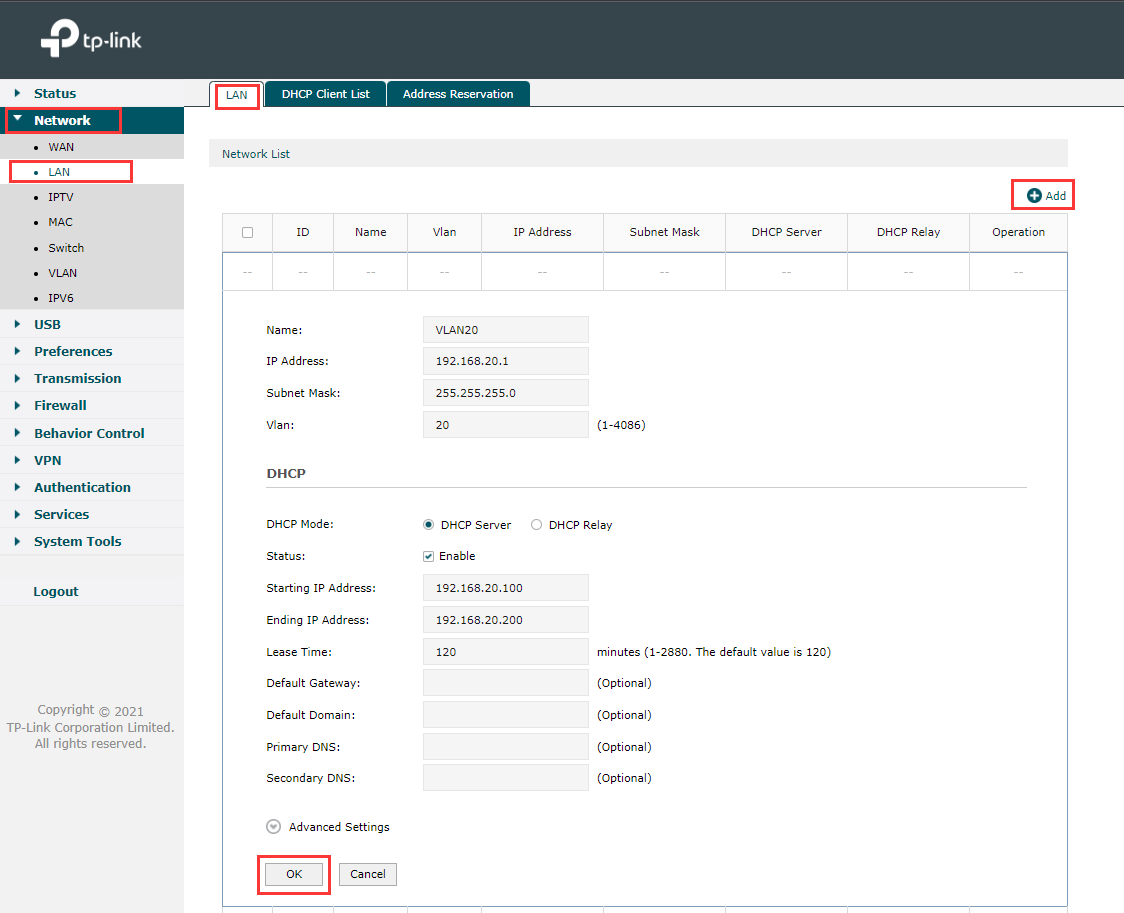
Create VLAN interface 20:
The page will then display the two VLAN interfaces that we need.
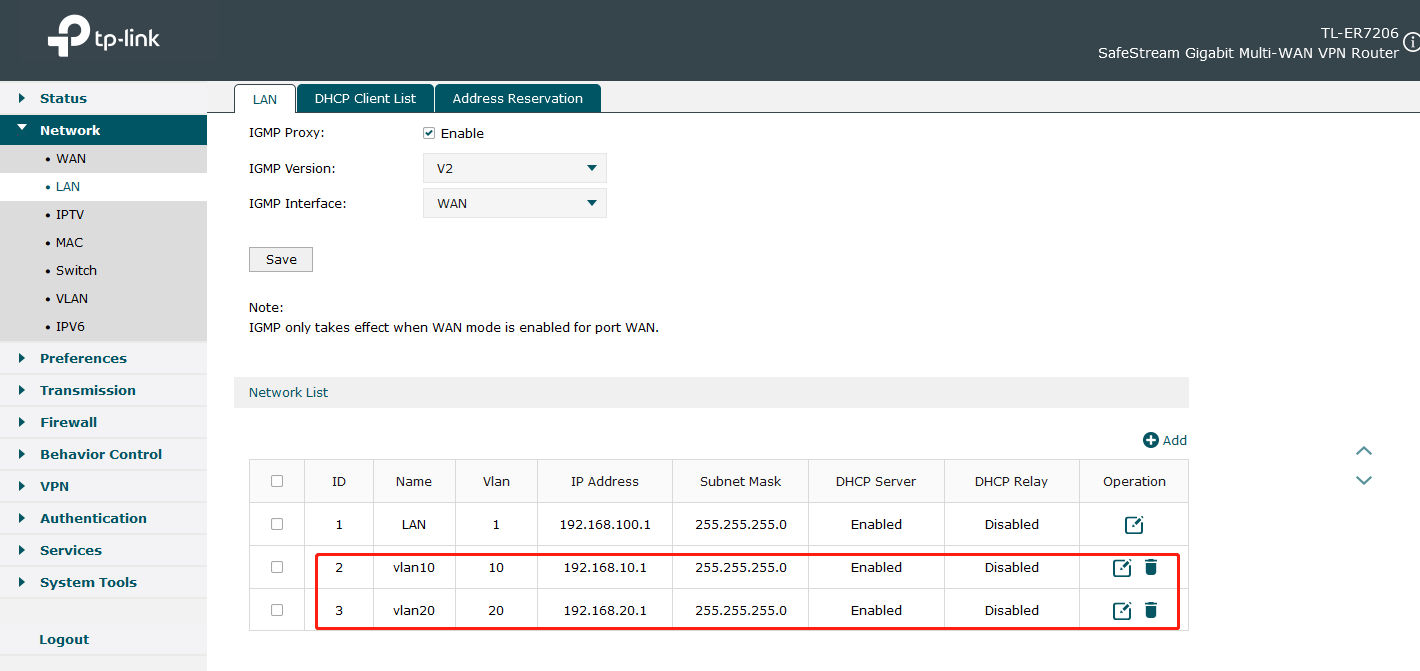
With regards to the port that connects to the switch, there is no special configuration needed. Additionally, you can connect the switch to any LAN port on the router.
Step 2. Adopt Devices to the Controller
Launch the Omada Controller and go to the Devices page. Find the Omada Switches and EAPs in question then click on the Adopt button to adopt them.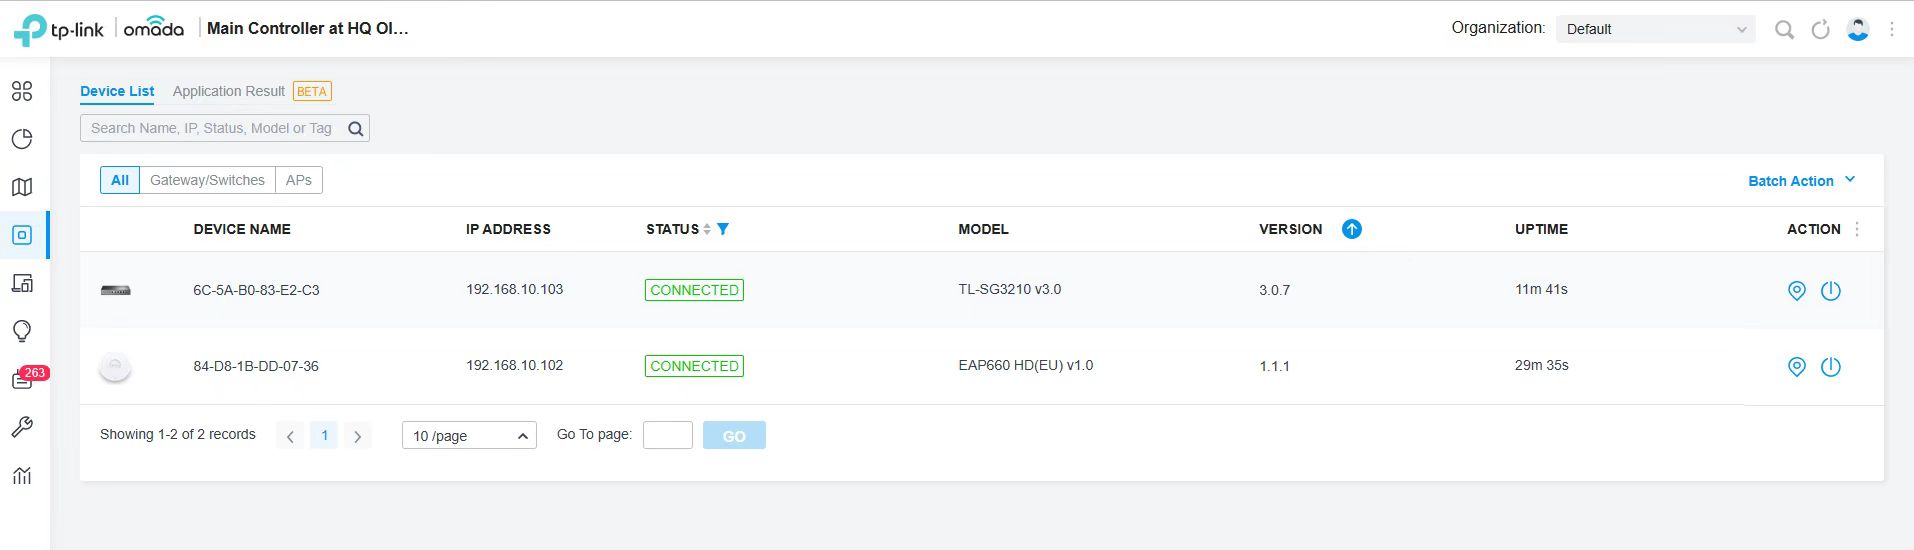
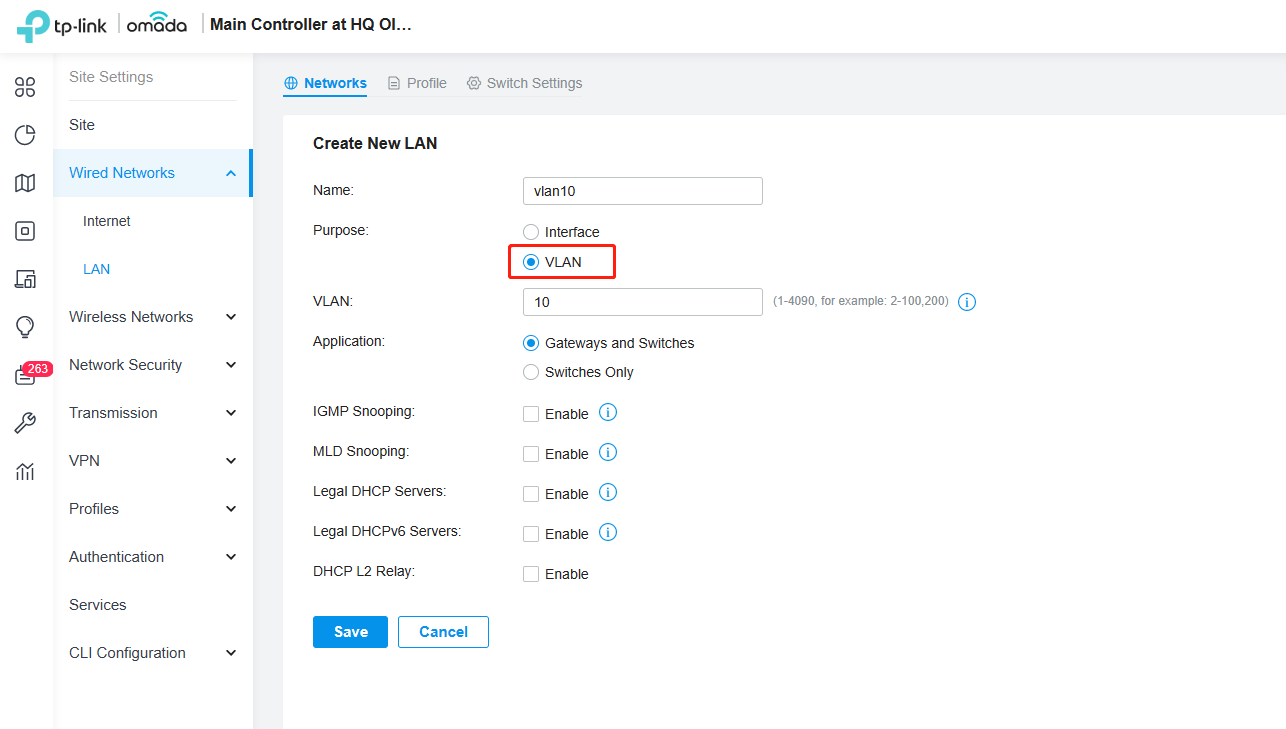
Step 3. Create VLANs for Omada Switch
Go to Wired Network > LAN > Create New LAN.
You should notice that the VLAN interface settings are for Omada Gateway rather than Omada Switch. Select the purpose as VLAN rather than then interface.

Create VLAN10:
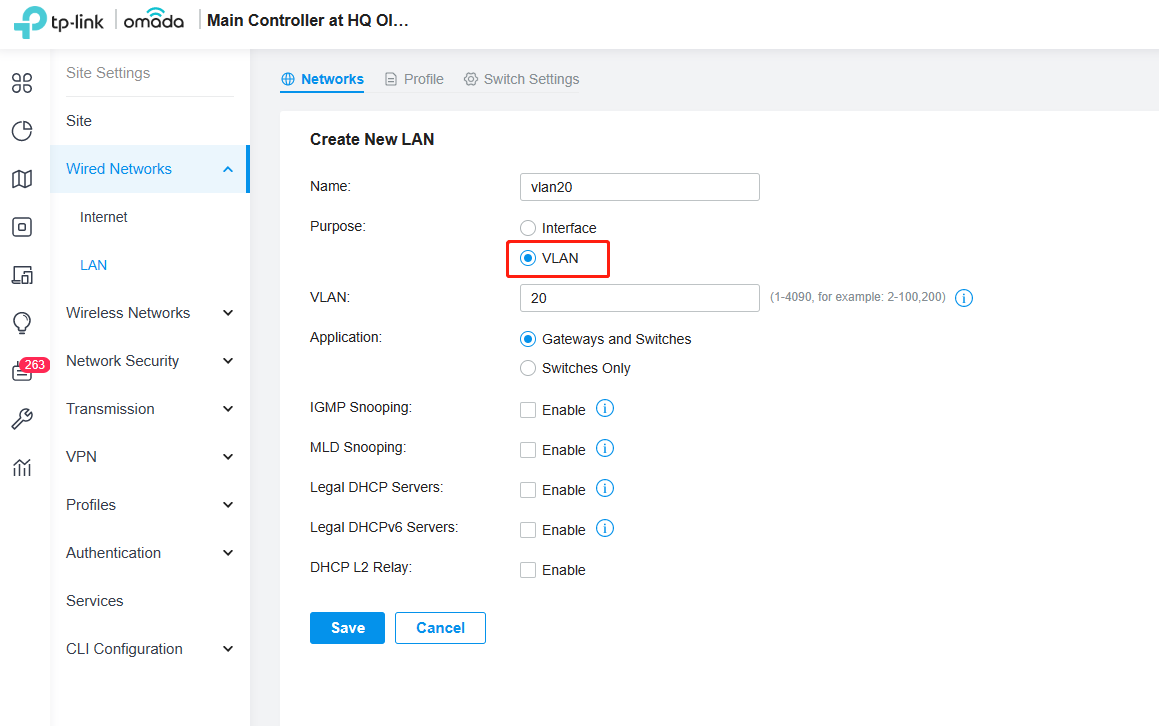
Create VLAN20:
Step 4. Create the SSIDs for Omada EAP
Go to Settings > Wireless Network > WLAN > Create New Wireless Network.
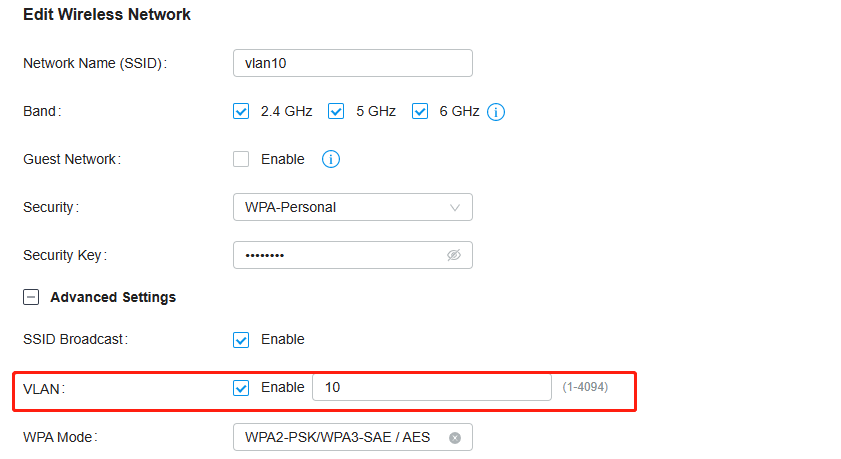
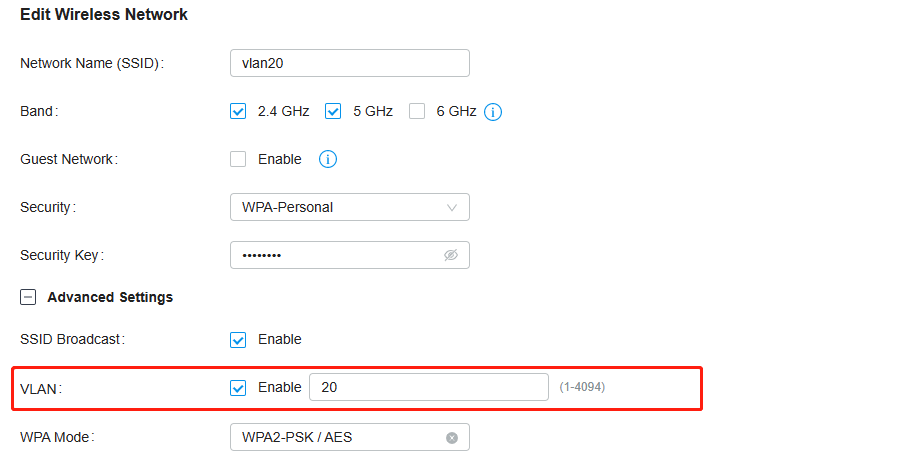
Here we need to create two wireless networks, VLAN10 and VLAN20. They each should have VLAN enable.
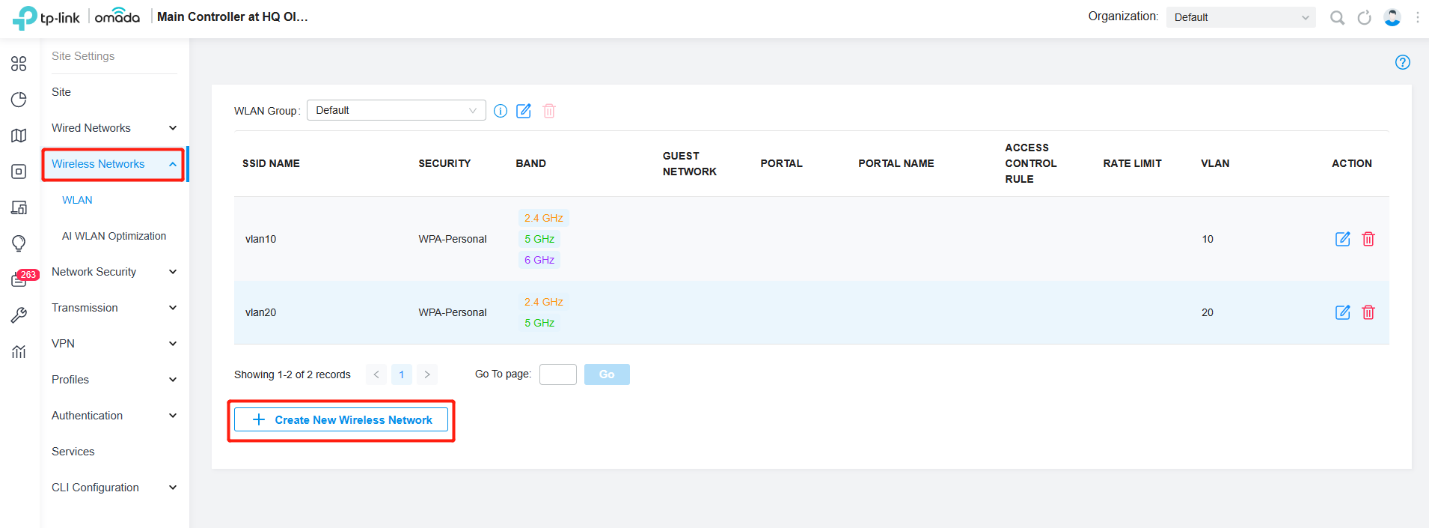
Wireless Network VLAN 10 with VLAN enabled.
Wireless Network VLAN 20 with VLAN enabled.
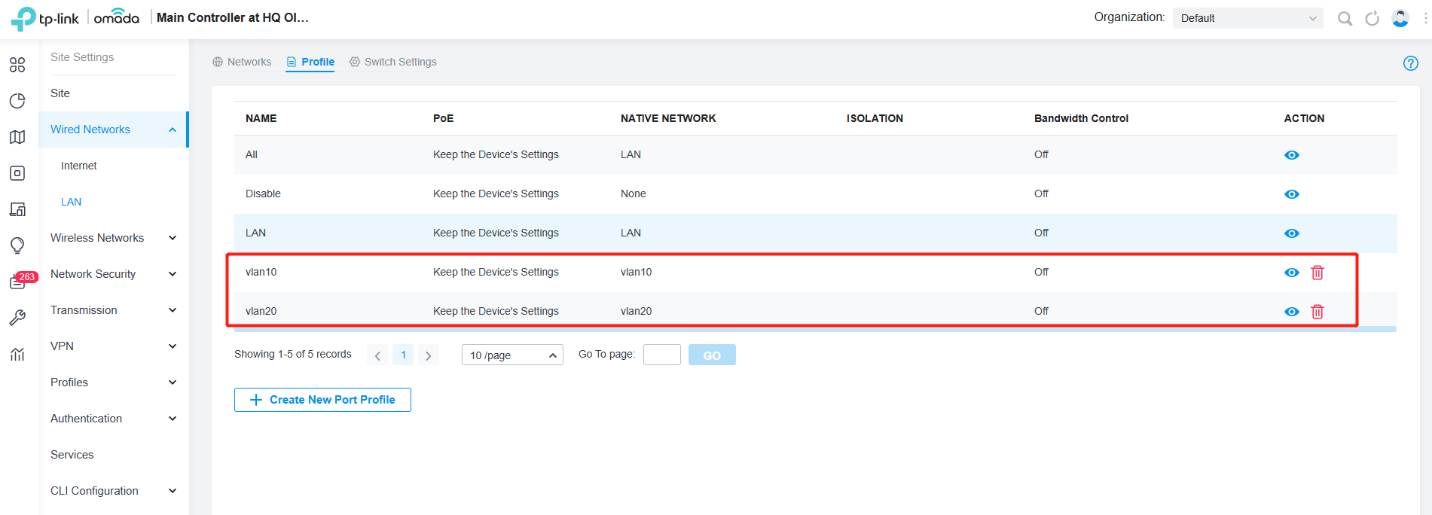
The above is all the configuration that we will need to do on the controller. After you create the VLANs, it will generate VLAN10 and VLAN20 profiles automatically. Do not apply those two profiles to the switch ports that connect the EAPs. If you do the clients connect to the EAPs will not have internet access.
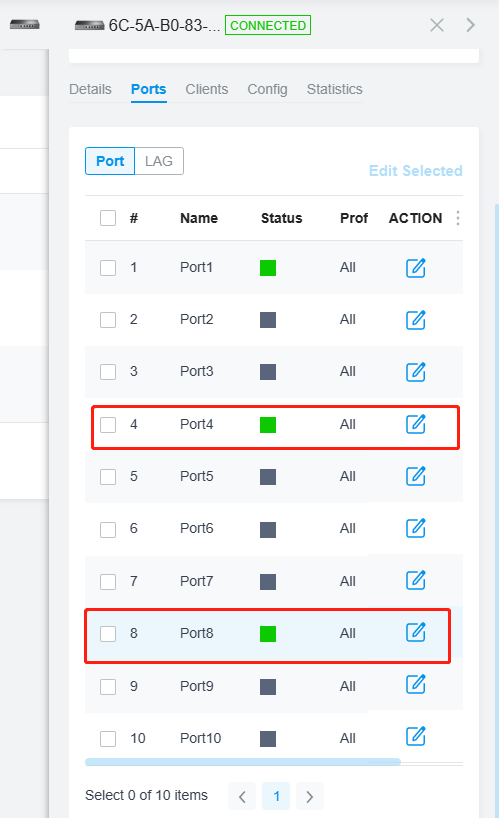
Please maintain the router and EAPs default switchport conditions.
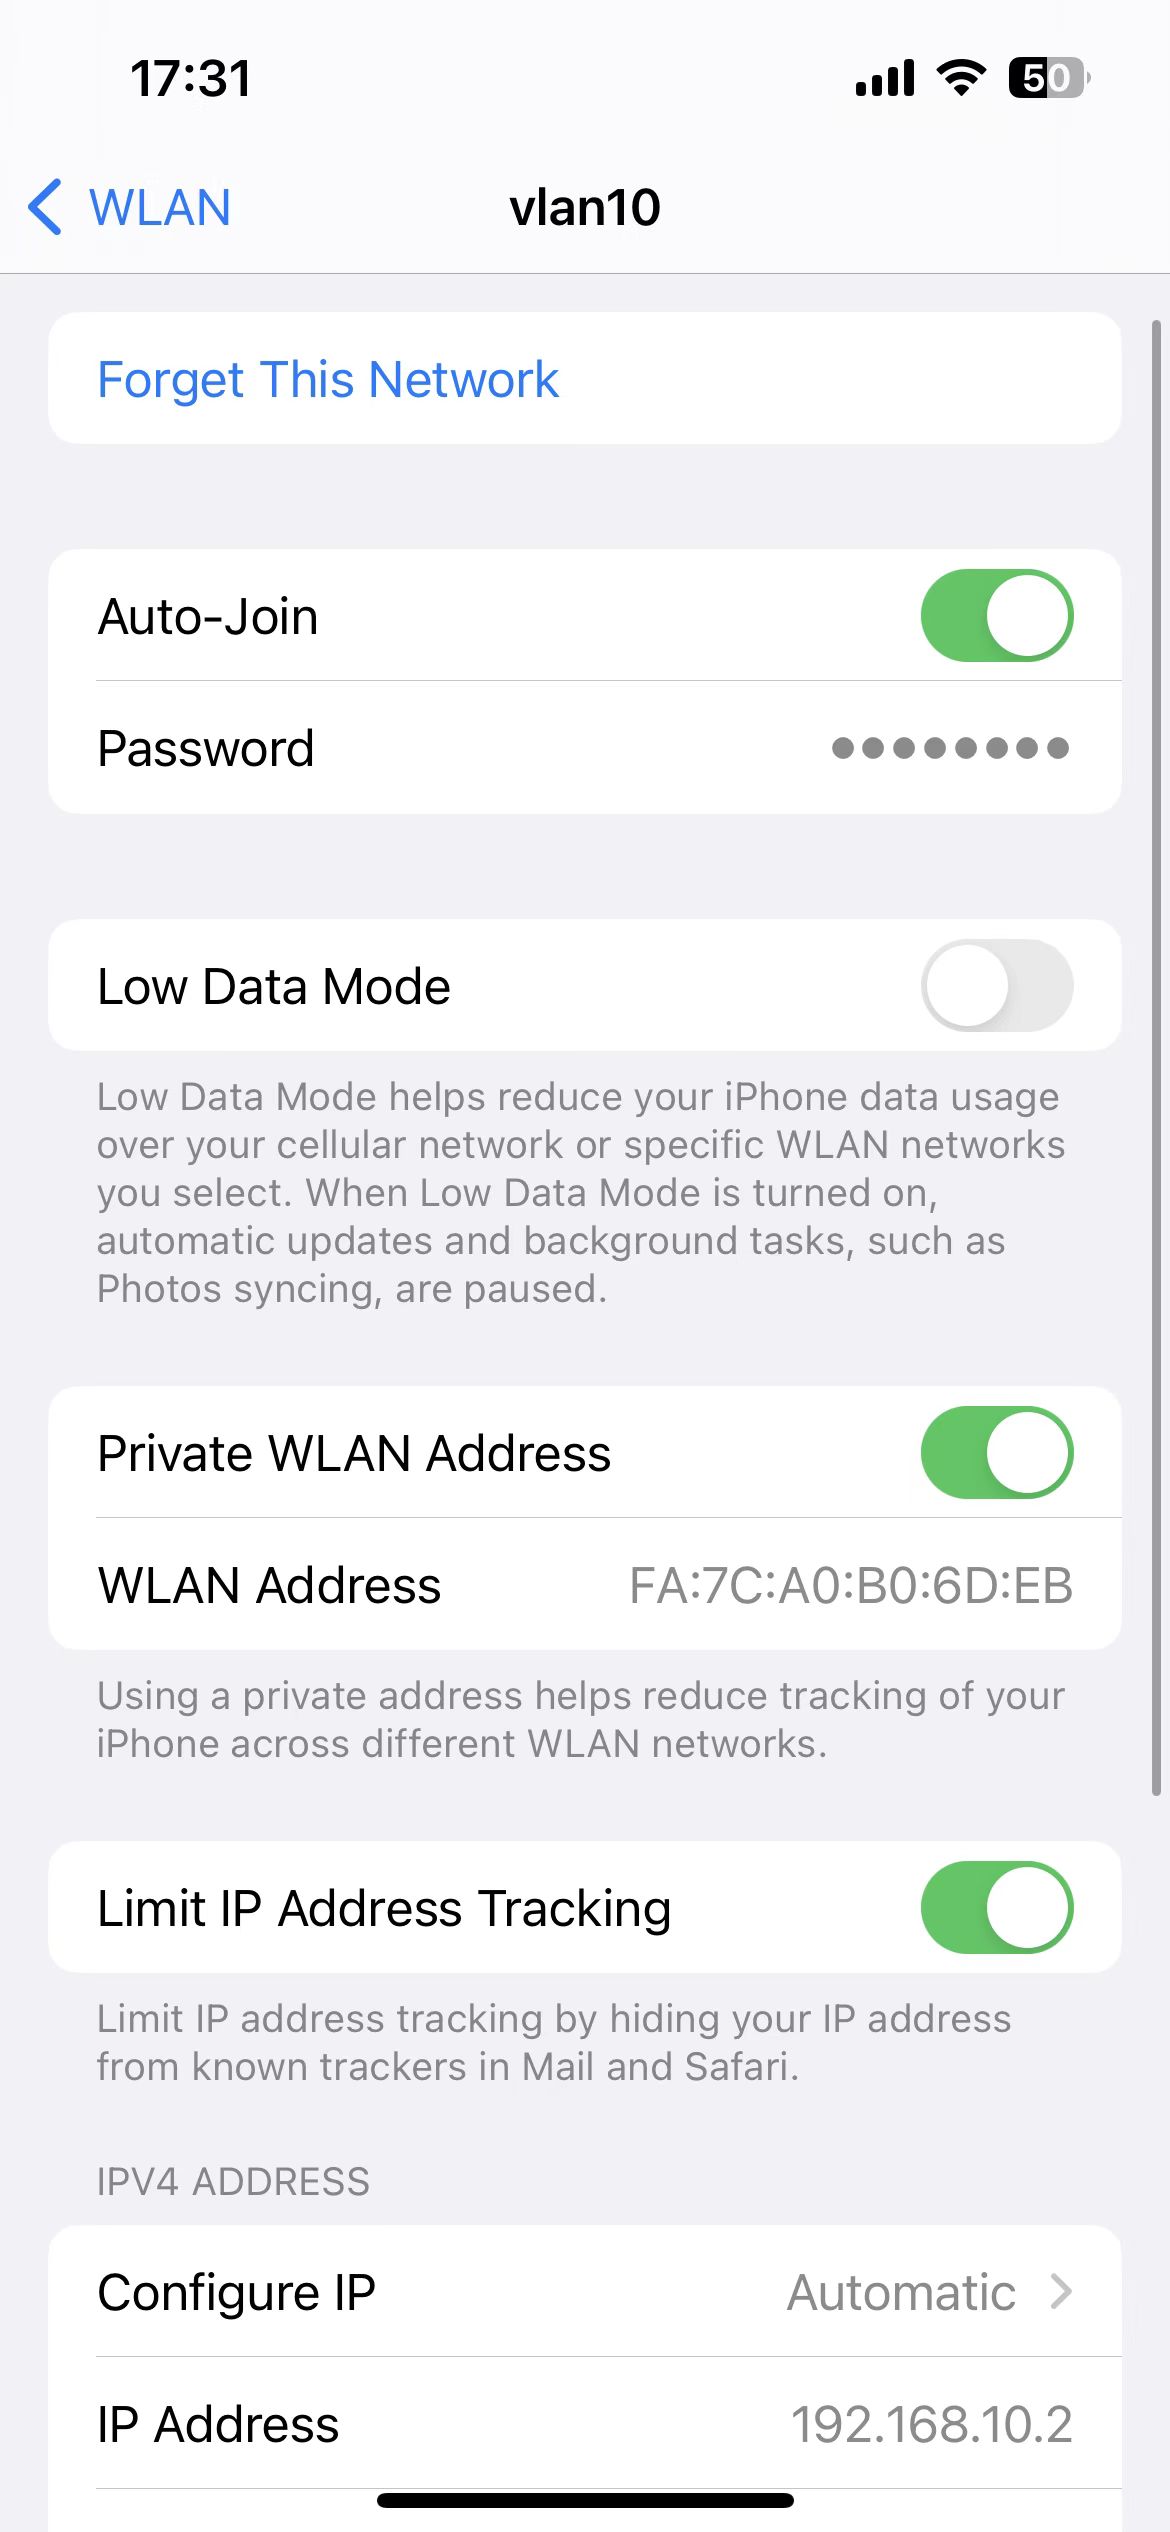
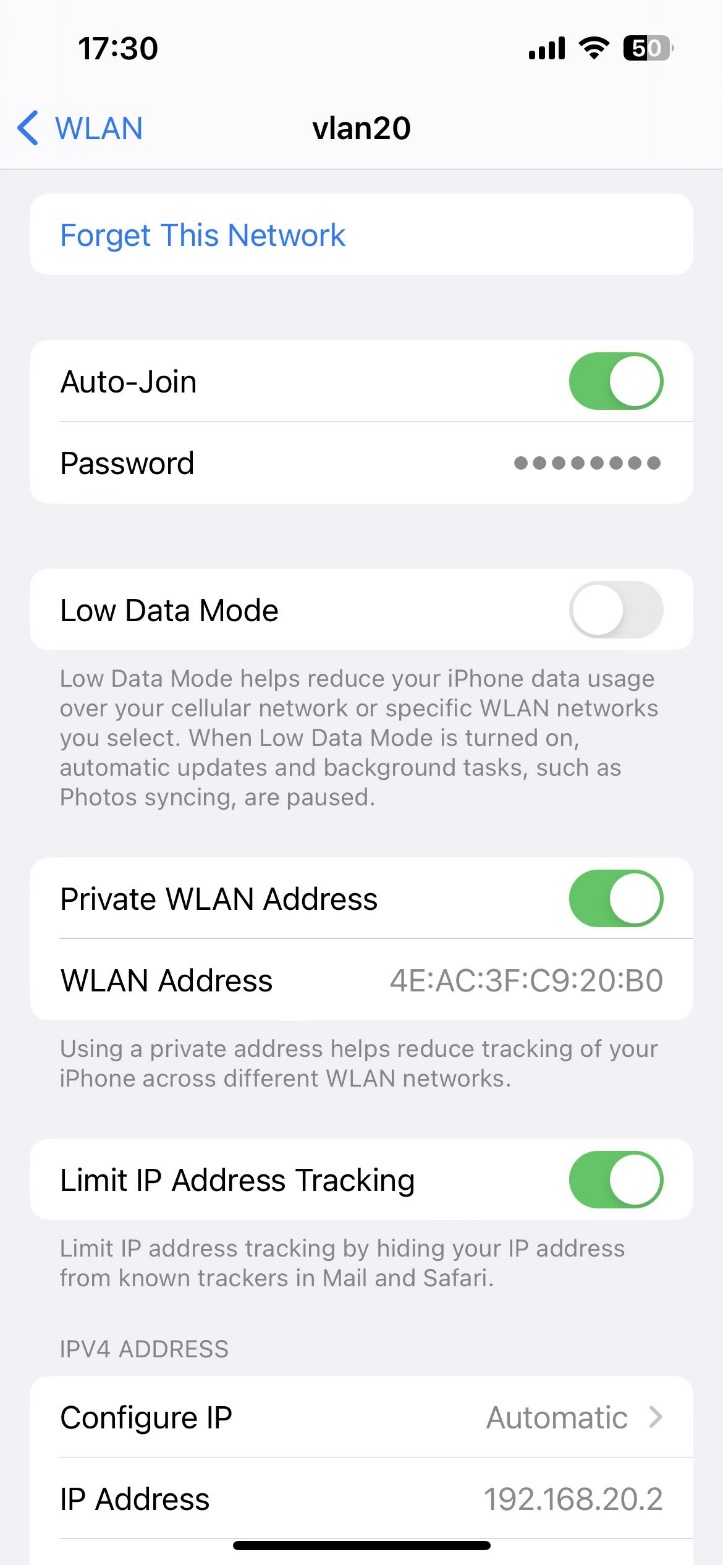
Step 5. Verification
When you connect to VLAN10, you will be able to access the internet and get an IP from VLAN10.
When you connect to VLAN20, you will be able to access the internet and get an IP from VLAN20.
Is this faq useful?
Your feedback helps improve this site.
4.0-F_normal_20240826083047w.png)


TP-Link Community
Still need help? Search for answers, ask questions, and get help from TP-Link experts and other users around the world.