


How to configure MAC filtering for EAP in Controller mode
MAC Filter allows or blocks connections from wireless clients of specific MAC addresses, even the clients know the password of the wireless network.
This article introduces how to configure MAC filtering for EAP in Controller mode.
Step 1: Adopt the EAP with the Controller. For more information about how to adopt the EAP with the controller, please refer to this article: How to adopt EAP in controller mode
Step 2: Create MAC Groups. Go to Settings-Profiles-Groups to create new MAC Groups.
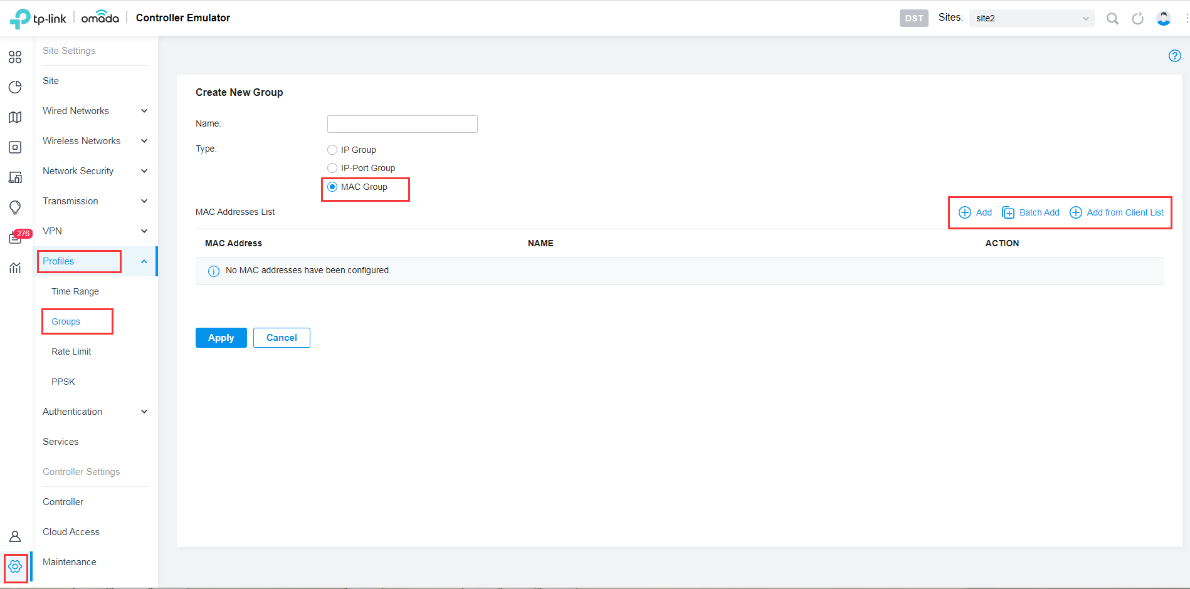
Here you can add the Devices’ MAC address via following three methods.
A. Add: Add MAC address singly.
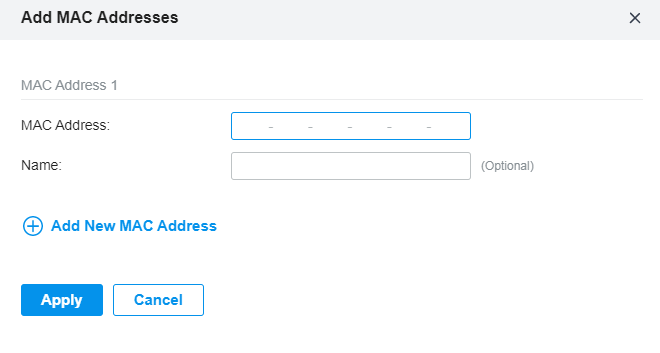
B. Batch Add: Add MAC addresses in batches. You can enter the MAC addresses and names in the input box or import them with files in the format of xlsx or txt.
If you want to use the newly added MAC address(es) and names when they conflict with the existing ones, click the small box to allow it to override the current MAC Access Control List.
Note:
- Each MAC address and name should be entered on a new line. The MAC address and name should be separated by a space.
- Octets in a MAC address should be separated by a hyphen. For example, AA-BB-CC-DD-EE-FF.
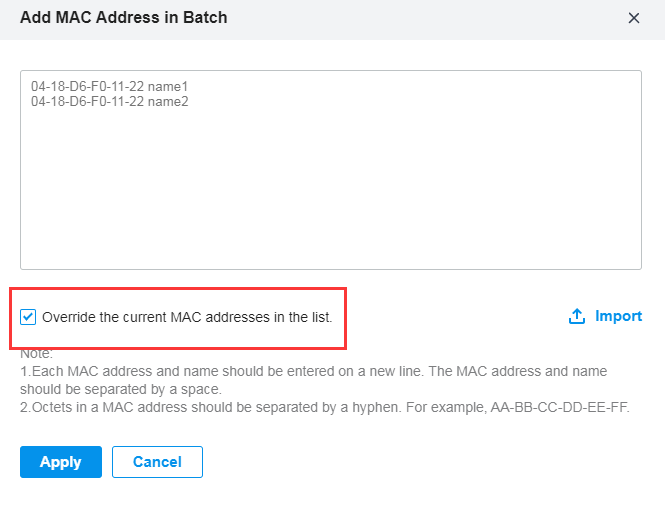
C. Add from Client list: Add MAC addresses from the clients that are connecting to the devices controlled by the Omada SDN Controller.
Step 3: Create a new wireless network. Please go to Settings - Wireless Networks. 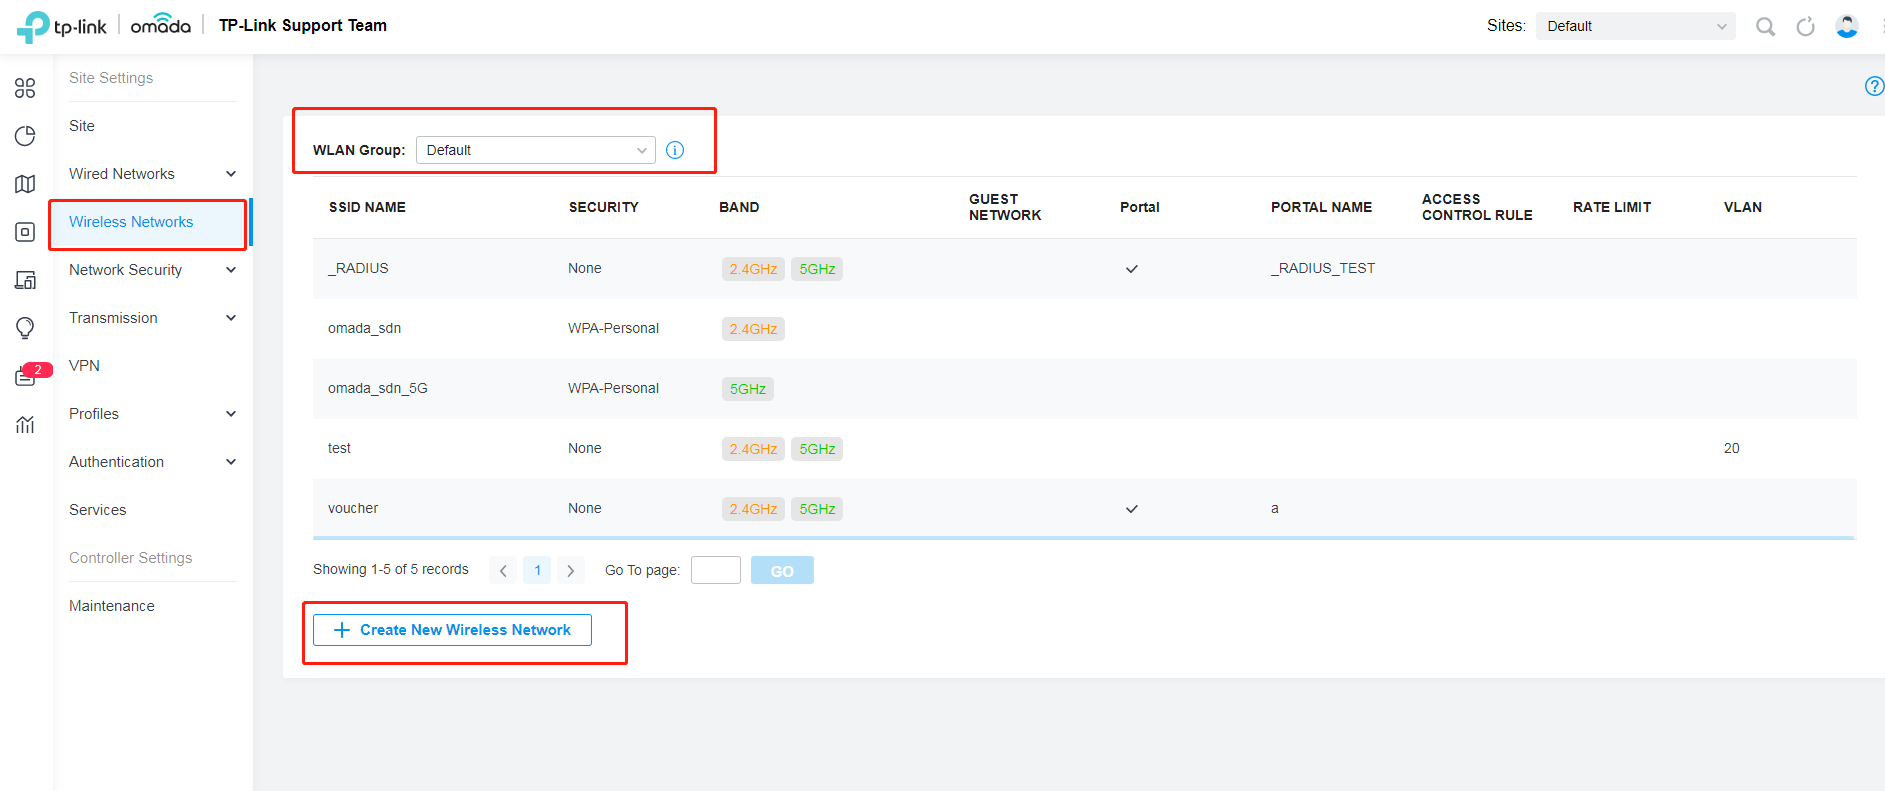 Note: You can skip this step if you want to apply the MAC Filter settings on an existing SSID.
Step 4: Enable MAC Filtering after creates the wireless network.
Note: There are two type of policy, one is Allow list while the other is Deny list.
- Allow List: Allow the connection of the clients whose MAC addresses are in the specified MAC Address List, while blocking others.
- Deny List: Block the connection of the clients whose MAC address are in the specified MAC Addresses List, while allowing others.
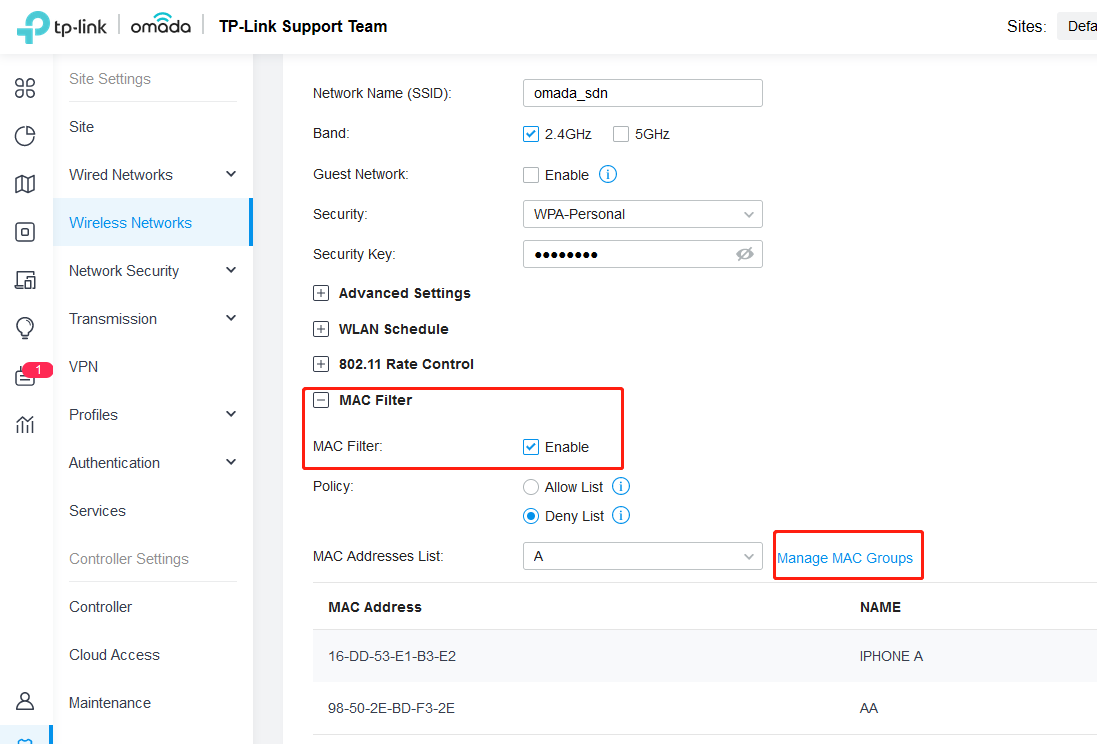
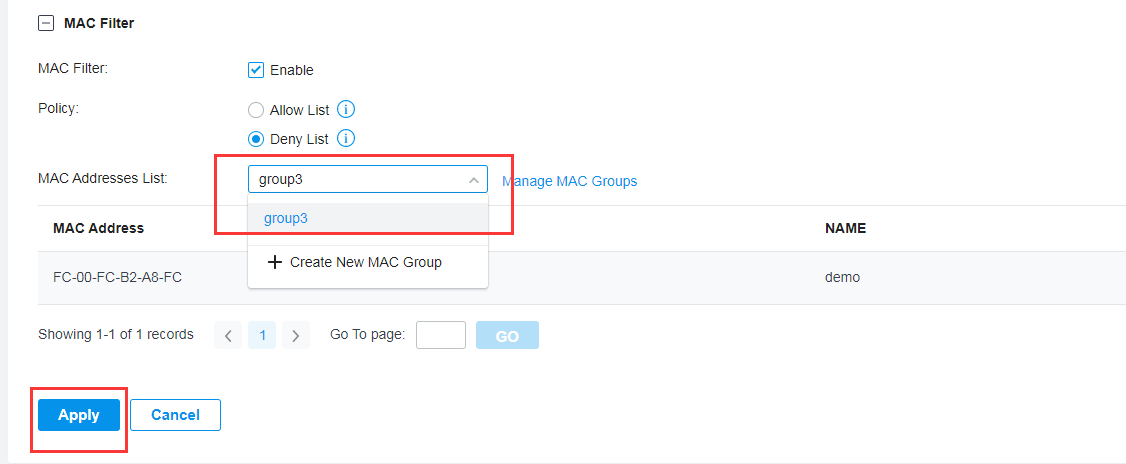
Step5: Check the MAC Group you created just now from the MAC address list.
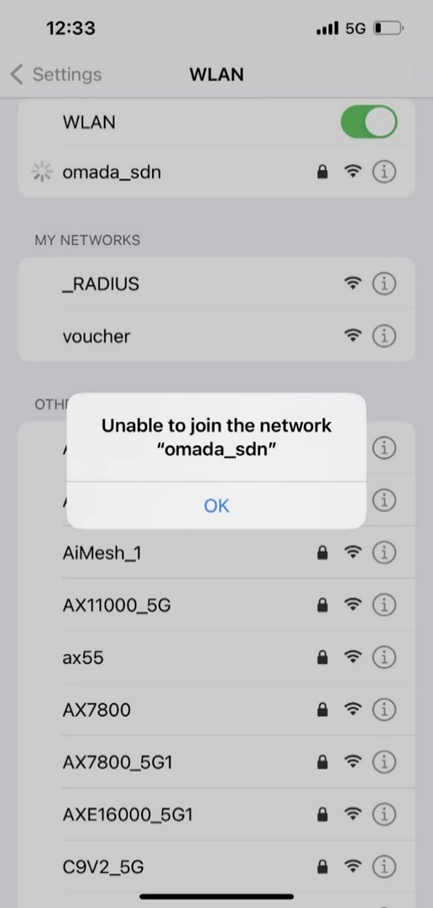
Step 6: Verification
Before setting the MAC address filtering, the device can connect to the network with ease, now, the device cannot join the network anymore.
Note: Some wireless clients will use random MAC addresses instead of their real MAC addresses when connecting to a wireless network, so called private MAC or virtual MAC. This feature may cause the MAC filter settings invalid, so please be careful with the configuration. Here is the article about the private MAC Address on iOS devices , please take it as a reference: https://support.apple.com/en-us/HT211227
Finden Sie diese FAQ hilfreich?
Mit Ihrer Rückmeldung tragen Sie dazu bei, dass wir unsere Webpräsenz verbessern.


Von United States?
Erhalten Sie Produkte, Events und Leistungen speziell für Ihre Region