


How to Configure the AP Client Router Mode on the Pharos device
This Article Applies to:
Definition:In AP Client Router mode, after accessing the wireless network provided by WISP, the device provides wireless network service for downstream wireless clients. Meanwhile, the device allows wired devices, such as desktop computer, to access it via LAN1 port or PoE adapter’s LAN port. In this way, all members of a home user can share the Internet using one account applied from WISP.
Take CPE as an example.
Access web management page of the CPE
Please follow this link to access the web interface of CPE.
Note:CPE210 is a 2.4GHz device which can only broadcast & connect to 2.4GHz wireless networks;CPE510 is a 5GHz device which can only broadcast &connect to 5GHz wireless networks.Here we take CPE510 as example in this article.
Run Quick Setup
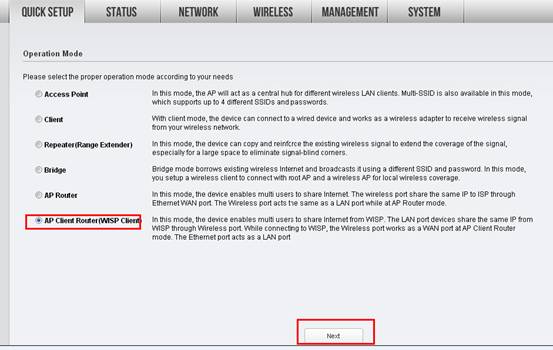
Step 1:
Go to Quick Setup-> Choose “AP Client Router (WISP Client)” -> Click Next
Step 2:
Choose the WAN Connection Type your ISP is using. If you’re not sure, please consult with your ISP customer service.
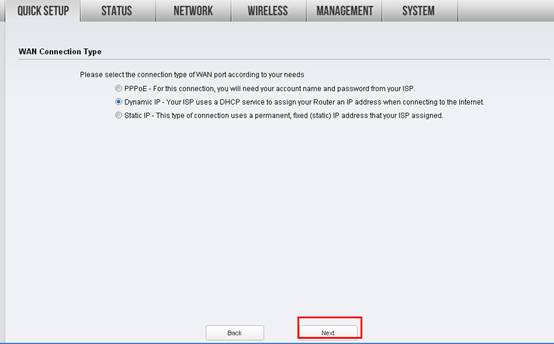
Procedures are different according to the Connection Type you choose.
1) Select Dynamic IP, and click Next;
2) Select PPPoE, input the Username and Password provided by ISP and then click Next;

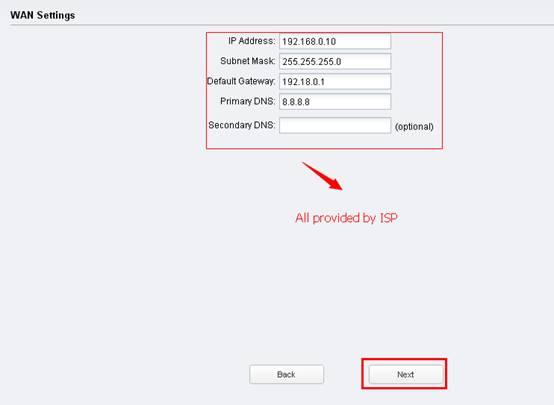
3) Select Static IP, input the IP parameters provided by ISP and then click Next;
Step 3:
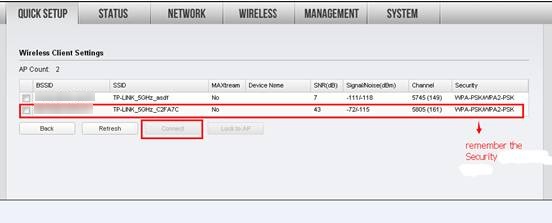
Click Survey
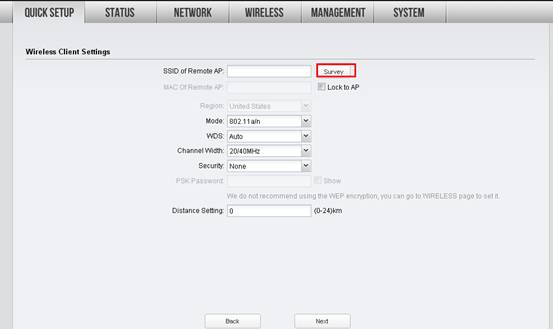 It will scan for all the available wireless networks, please find your existing wireless internet (normally the wireless satellite from ISP), check the security type and click Connect.Here we take TP-Link_5GHz-C2FA7C as an example.
 Step 4:
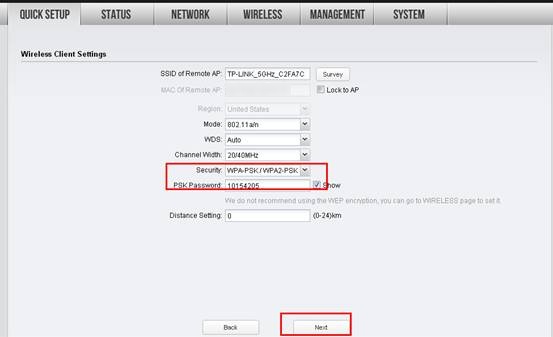
Choose the same Security type, and type in the same wireless password/Network Security Key of the existing 5GHz wireless internet. Please contact your ISP if you are sure about the wireless password/network security key ->Click Next.
 |
Step 5:
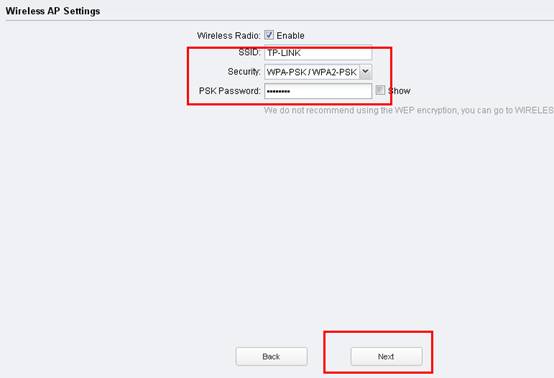
Customize your wireless name (SSID) and password
|
SSID: (Rename Your Wireless Name)
Security: (the security type you need to remember on step 3)
PSK Password: (Create a Private Password)
Click Next
 |
Step 6:
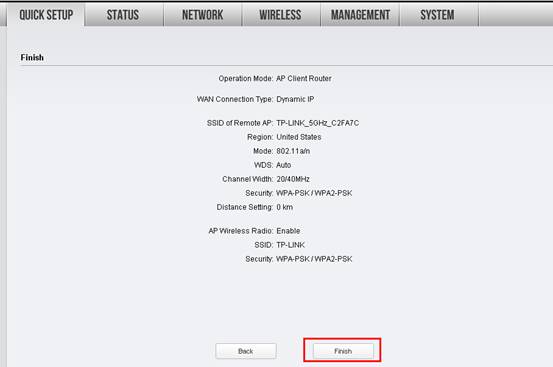
Click: Finish, and wait for the settings to take effect, it takes about 1 minute.
Final Computer Setup Reversion (For Windows OS)
We need change the IP settings back on the computer after the configuration.
Please find Local Area Connection/Ethernet on the computer, if you cannot remember the procedure, please refer to the FAQ again.
Go to Properties →Internet Protocol Version 4(TCP/IP)→ Select “Obtain an IP address automatically” and “Obtain DNS server address automatically”
Click OK to exit
Click OK again to apply the settings.

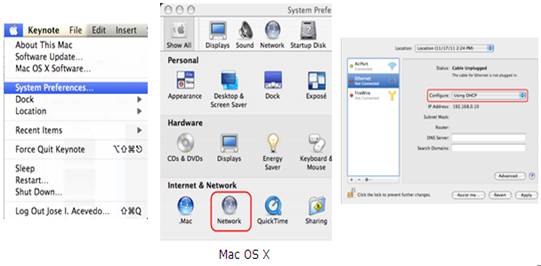
Final Computer Setup Reversion (For Mac OS X)
Go to the Apple->System Preferences->Network-> Highlight Ethernet ->Configure IPv4: Using DHCP.
Click Apply.
Get to know more details of each function and configuration please go to Download Center to download the manual of your product.
Is this faq useful?
Your feedback helps improve this site.
TP-Link Community
Still need help? Search for answers, ask questions, and get help from TP-Link experts and other users around the world.