How to set up and configure VIGI NVR via web GUI
Contents
Introduction
You can initialize the VIGI NVR through its web management interface (GUI) . Once the VIGI NVR and VIGI Cameras are connected according to the appropriate network topology, the device can be set up using various management platforms. This article details the initialization process using the VIGI NVR web GUI.
Requirements
- VIGI NVR
- PC
Configuration
Step 1. Power on the NVR and connect the PC to the VIGI NVR via Ethernet cable. Log into the NVR web GUI by entering its IP address in the browser.
- If there is a DHCP server on your network, the NVR will obtain an IP address automatically. You can check the DHCP client list and identify the NVR by its MAC address.
- If no DHCP server is available, the NVR will use the default fallback IP address: 192.168.0.240.
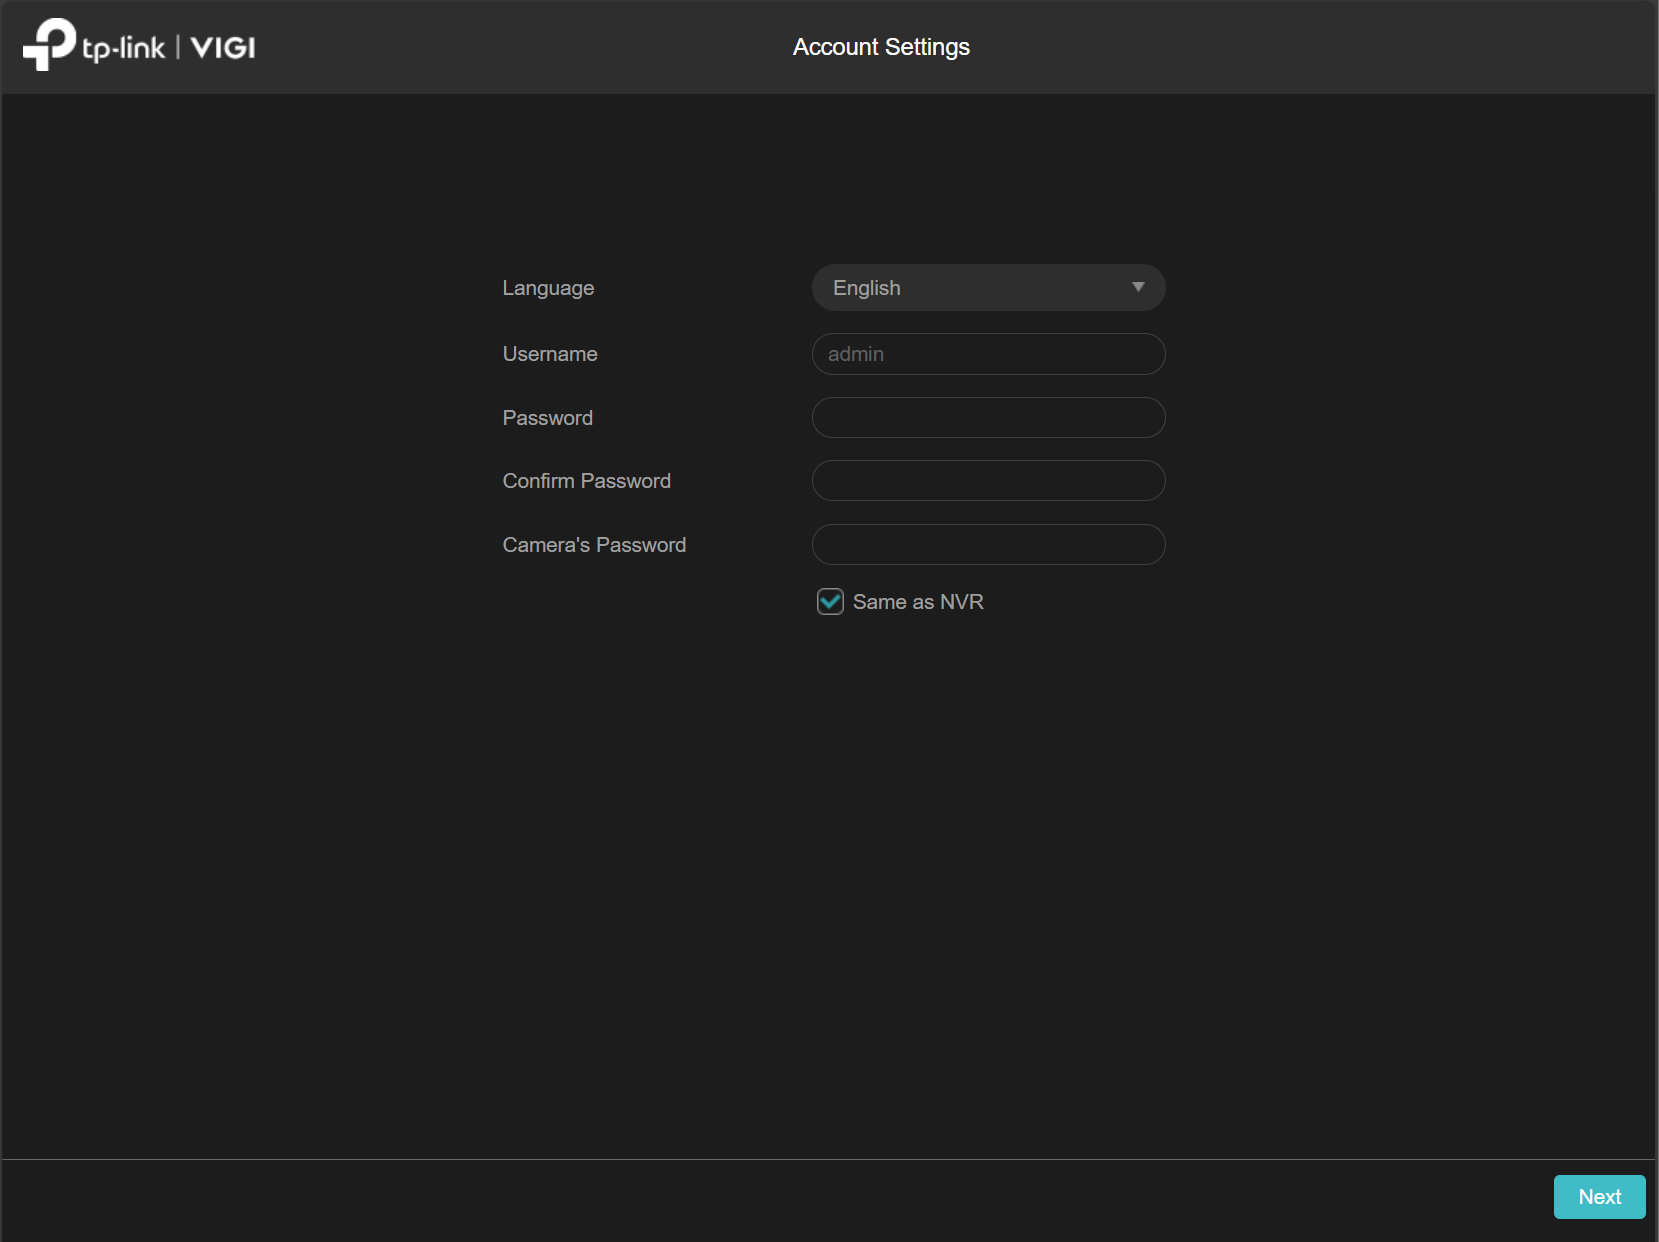
Step 2. Select the System Language and configure passwords for NVR login and Camera management. Click Next.
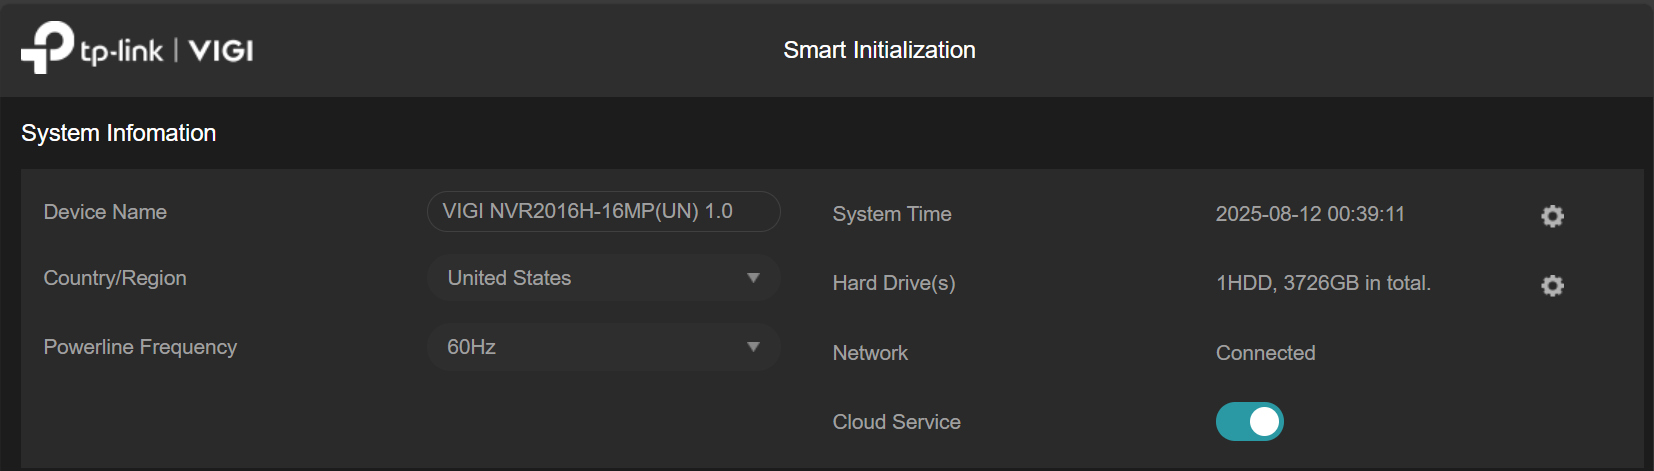
Step 3. Configure System Information:
- Change Device Name, Country/Region, Powerline Frequency, System Time, Hard Drive(s), and Cloud Service as needed.
- The Powerline Frequency will be set automatically based on Country/Region.
- Click the gear icon next to System Time to adjust time zone, date/time format, DST, and time settings (NTP or manual).
- Click the gear icon next to Hard Drive(s) to initialize hard drives
Step 4. Configure Password Recovery by entering email addresses that will receive reset instructions.
Note: The NVR must be connected to the Internet to send password reset emails.

Step 5. Configure Device Access:
- Add cameras in the local subnet to the VIGI NVR.
- If Plug and Play is enabled, new and unused VIGI IP cameras will be automatically added and activated.

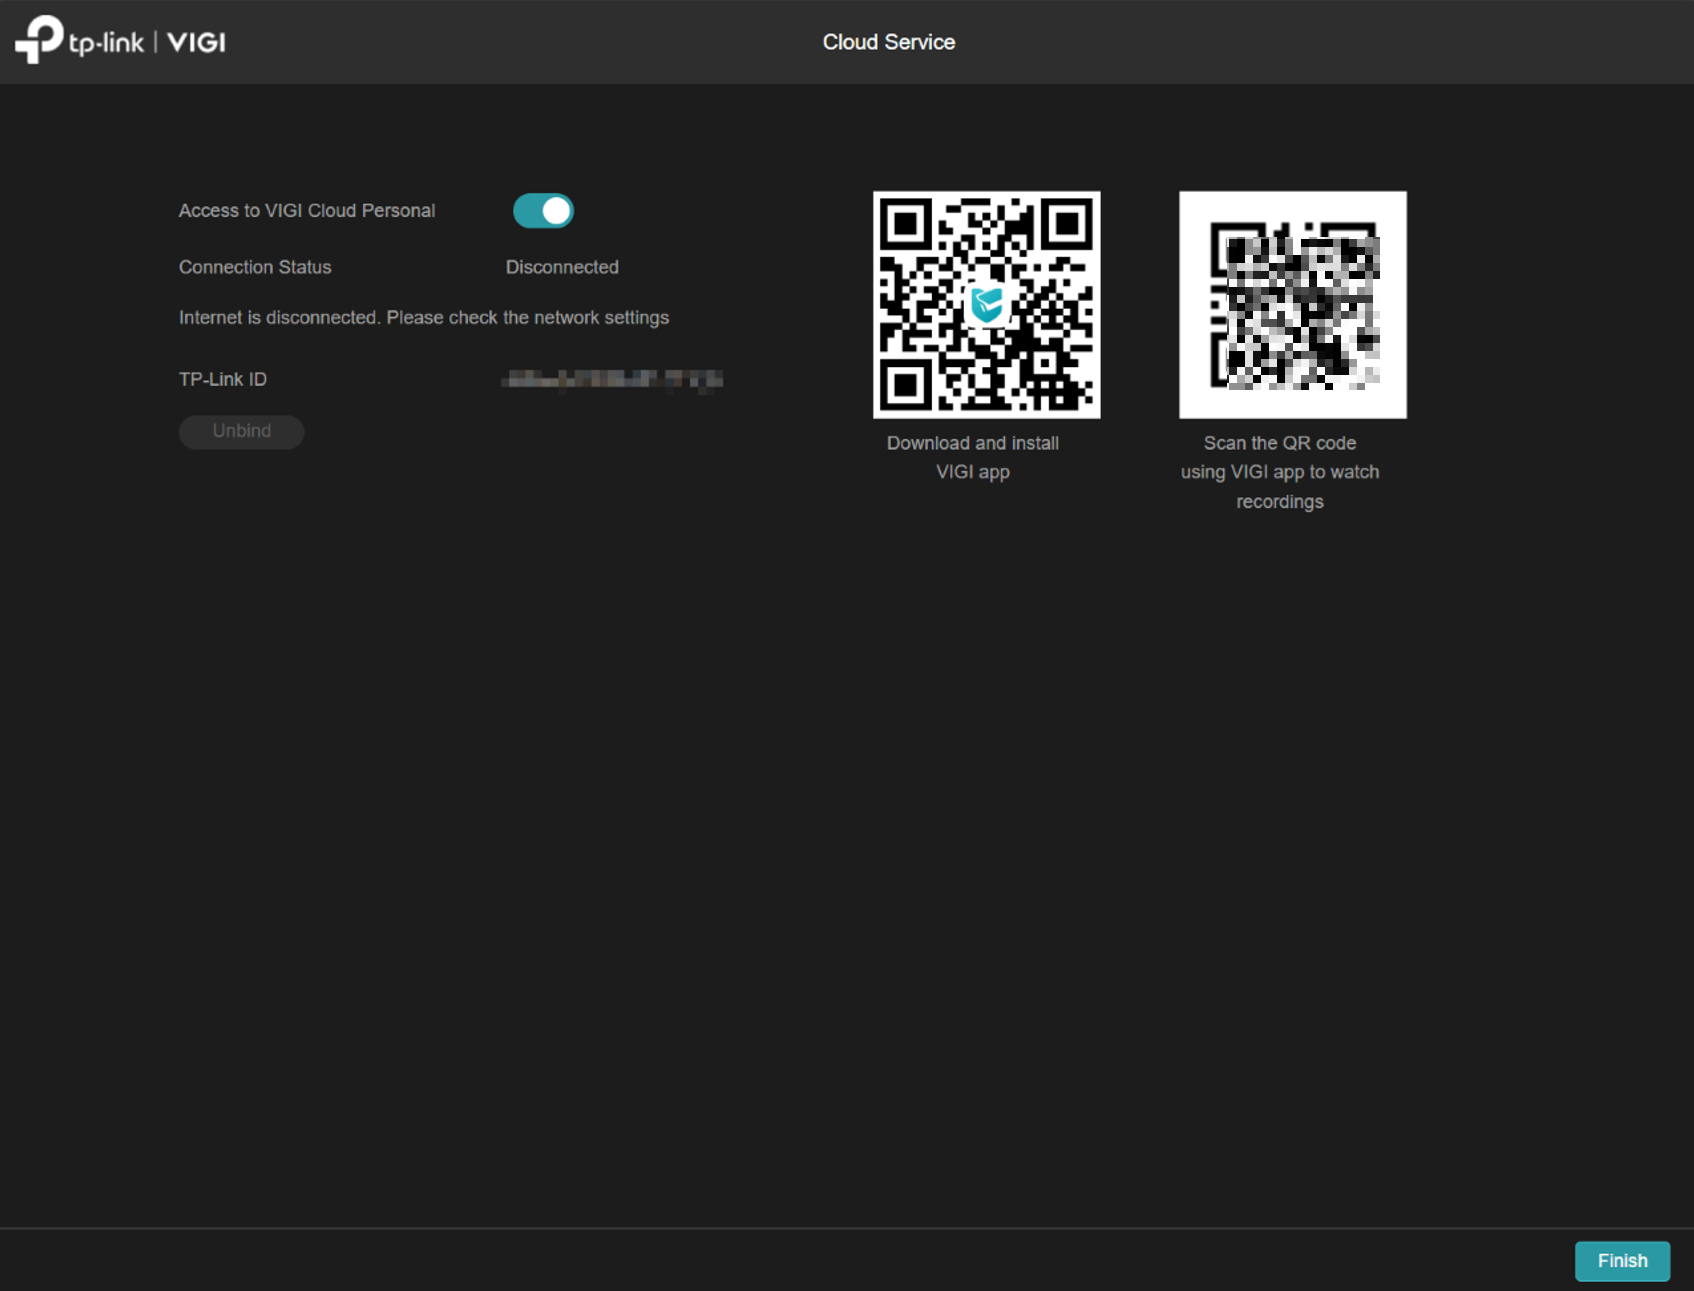
Step 6 (Optional). Enable Access to VIGI Cloud Personal to bind the NVR to your TP-Link ID, allowing you to view recordings via the VIGI App. Click Finish if you choose not to enable this feature.
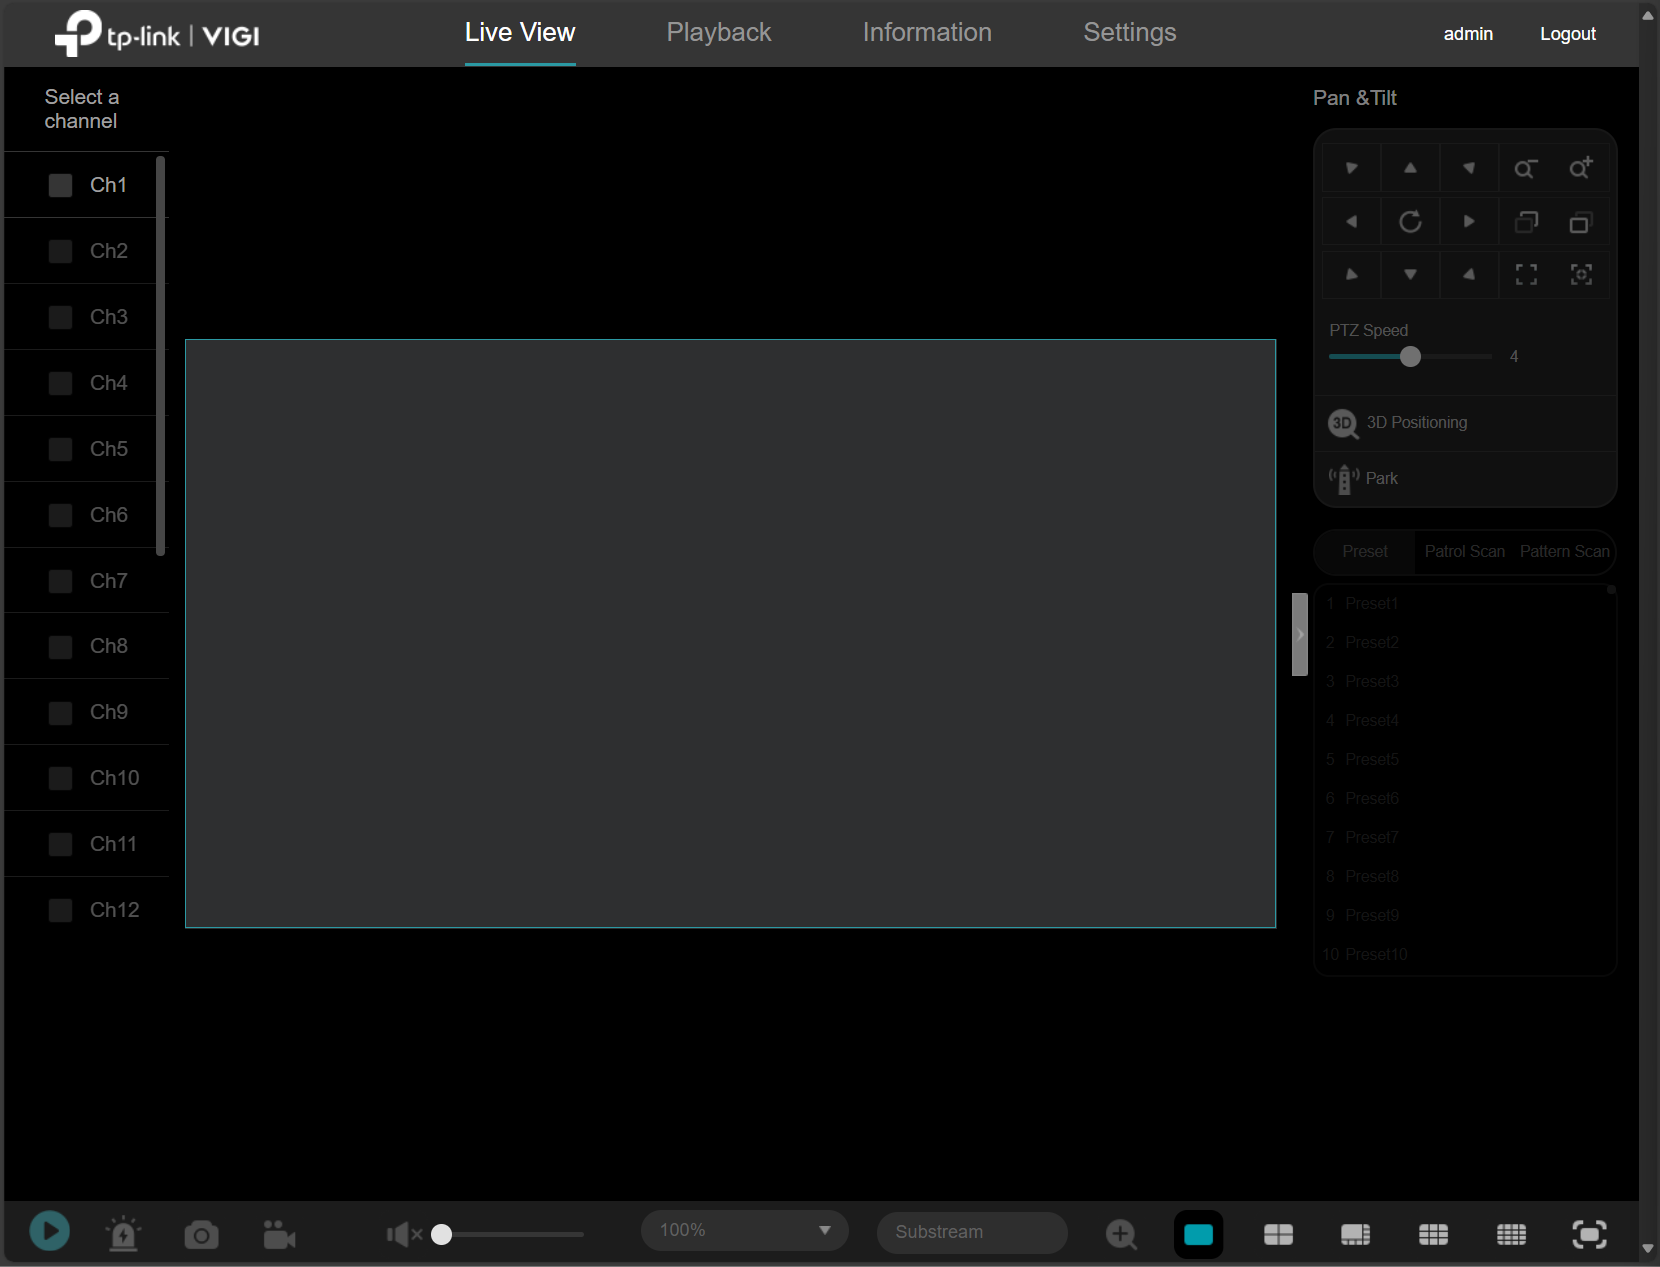
Step 7. The NVR home screen will be displayed, and the device is ready for use..
Conclusion
You have successfully configured the VIGI NVR using the web management interface.
Get to know more details of each function and configuration please go to Download Center to download the manual of your product.
Полезен ли беше този ЧЗВ?
Вашите отзиви помагат за подобряване на този сайт.


