How to Change the IP Address of a VIGI Camera
Contents
VIGI NVR GUI before adding the IPC, using the Modify IP Address option
VIGI NVR GUI after adding the IPC
VIGI NVR GUI via one-click networking option
VIGI NVR WebUI before adding the IPC
VIGI NVR WebUI after adding the IPC
VIGI NVR WebUI using Assign Subnet option
Introduction
VIGI cameras support multiple methods for configuring their IP addresses, allowing you to choose the method that best fits your deployment. This article introduces how to change the IP address of a VIGI camera through its web management interface, VIGI software, or a VIGI NVR, as well as how to specify the camera IP address when first adding the camera to a VIGI NVR.
Requirements
The requirements vary depending on the configuration method used. Ensure that the VIGI camera is powered on and connected to the network before proceeding.
- VIGI IP Camera
- A PC when using the camera WebUI, VIGI Security Manager, VIGI PC Client, or VIGI NVR WebUI
- A VIGI NVR when using the VIGI NVR GUI or WebUI methods
- The login credentials for the VIGI camera or VIGI NVR, as applicable
Configuration
The IP address of a VIGI camera can be changed through several VIGI management interfaces. Select the method below based on how the camera is currently being managed.
VIGI IPC through WebUI
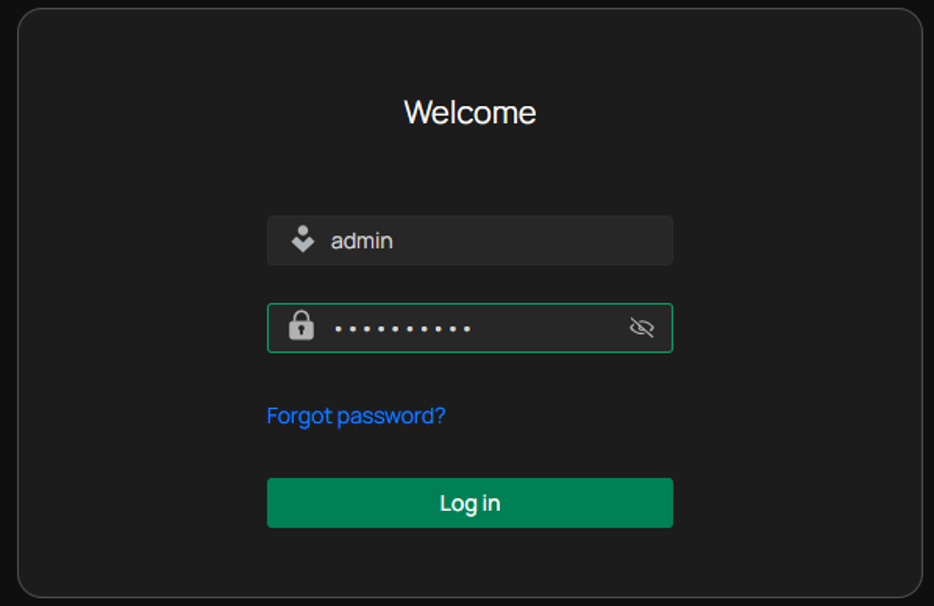
Step 1. Enter the IP Address of the IPC in a web browser and log into the WebUI.
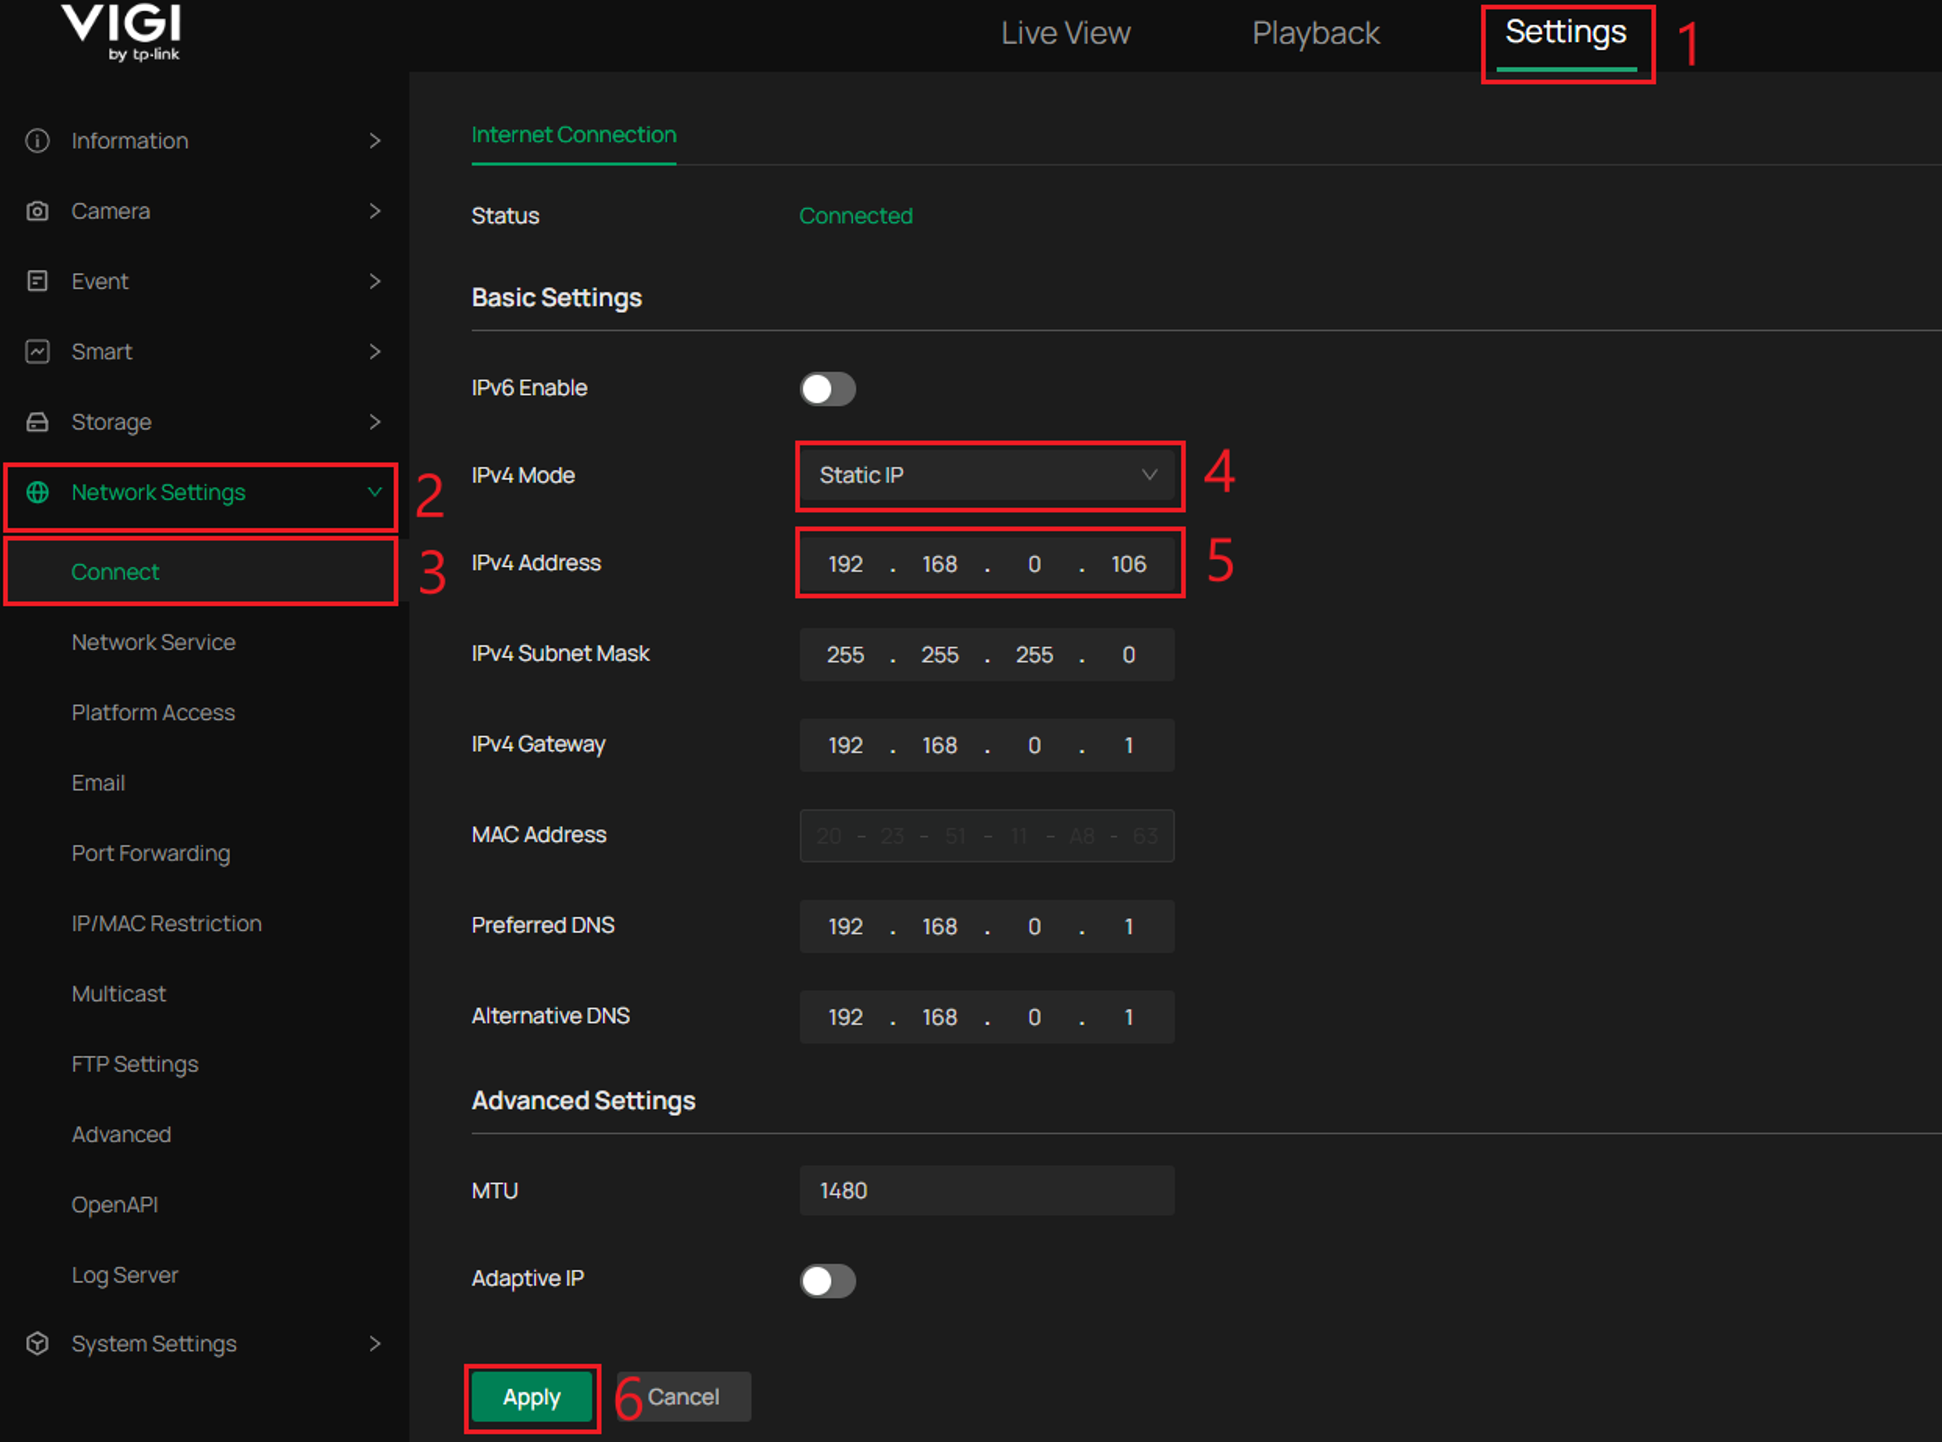
Step 2. Go to the Settings tab, select Network Settings > Connect. Change the IPv4 Mode to Static IP and change the IP Address of the IPC. Select Apply when complete.
VIGI PC Client
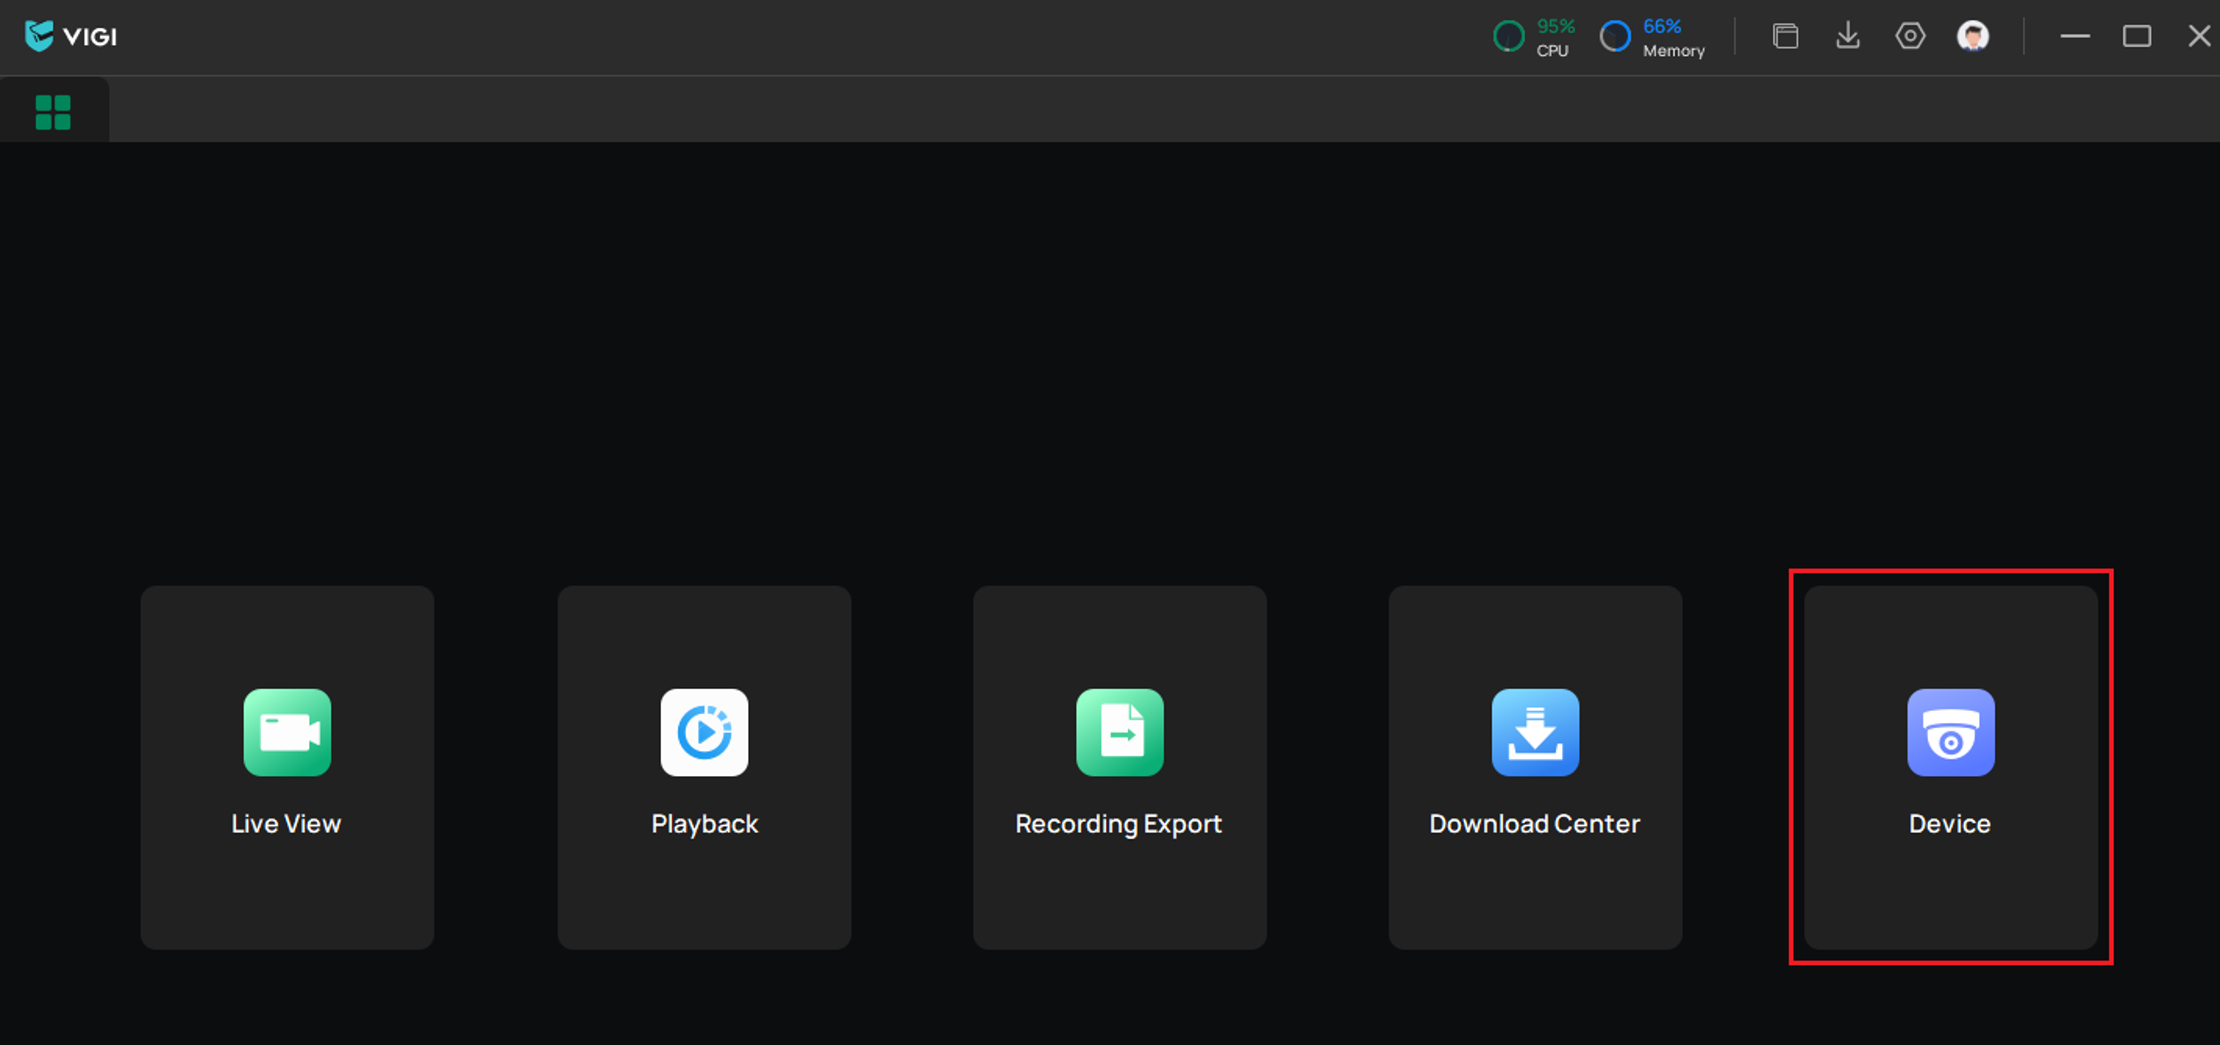
Step 1. After logging into VIGI PC Client, go to Device.
Step 2. Find the IPC on the Device List and select Edit. 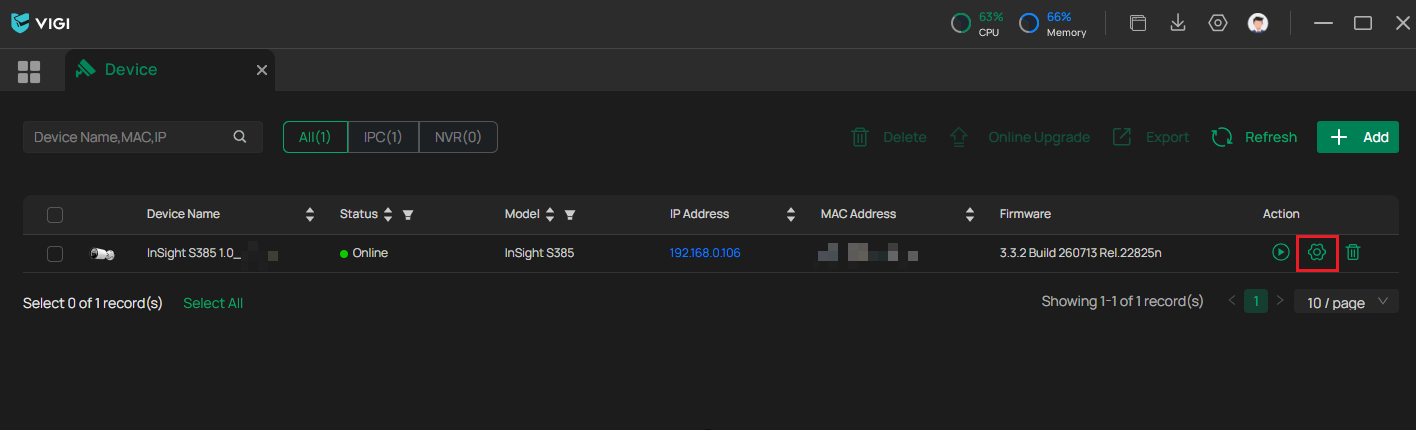
Step 3. Go to Network Settings > Internet Connection. Change the IPv4 Mode to Static IP and change the IP Address of the IPC. Select Apply when complete.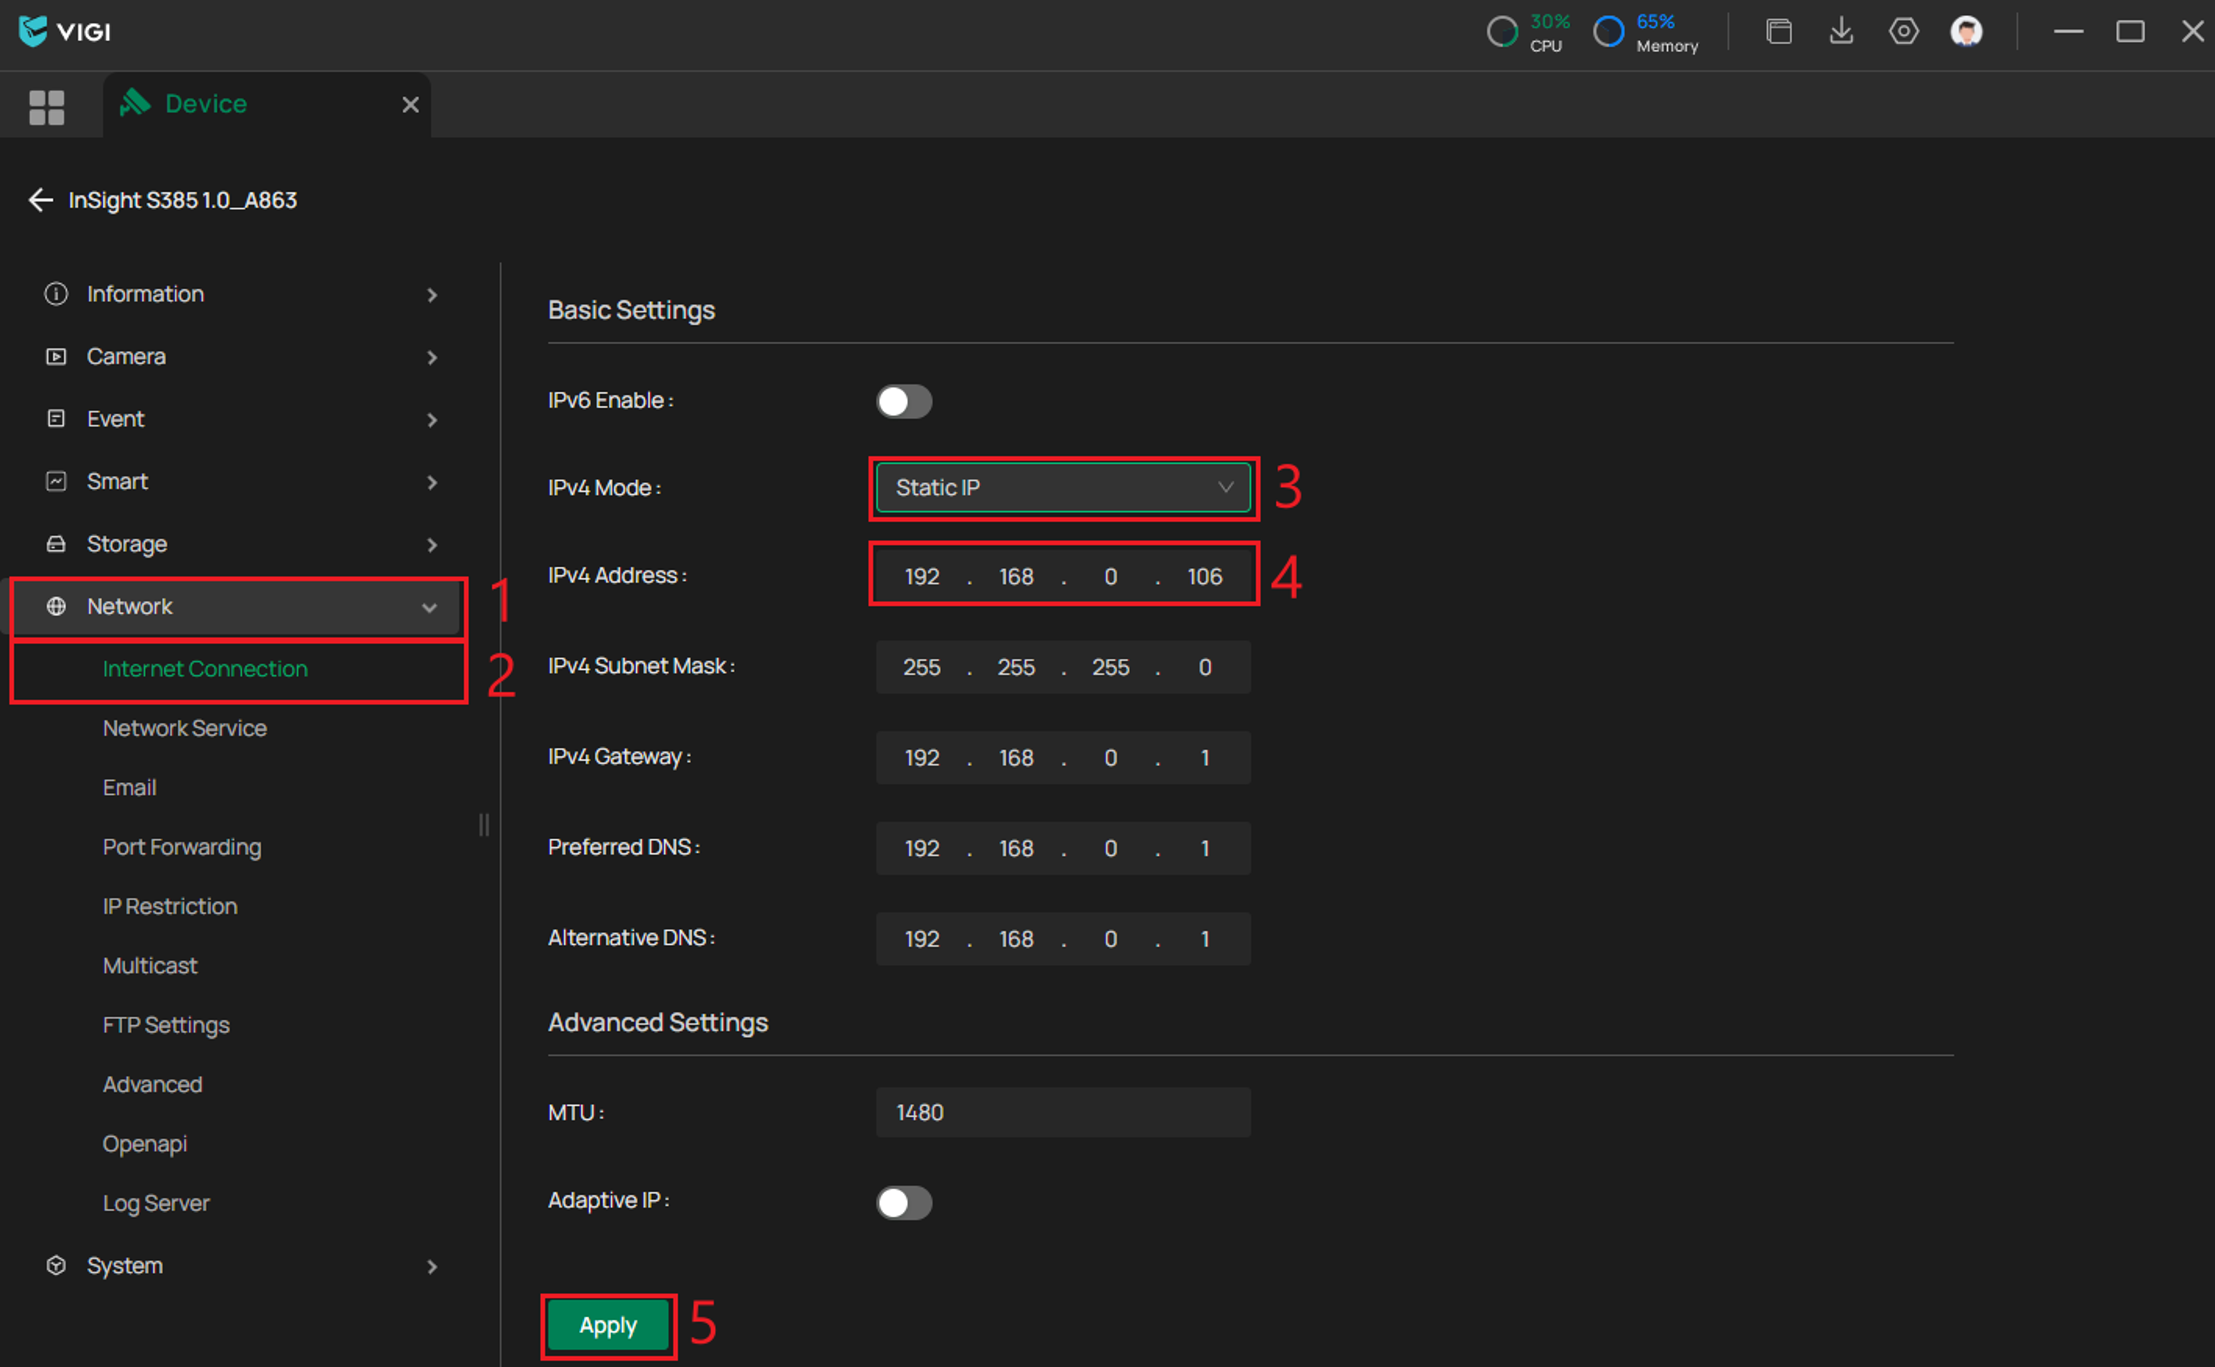
VIGI Security Manager
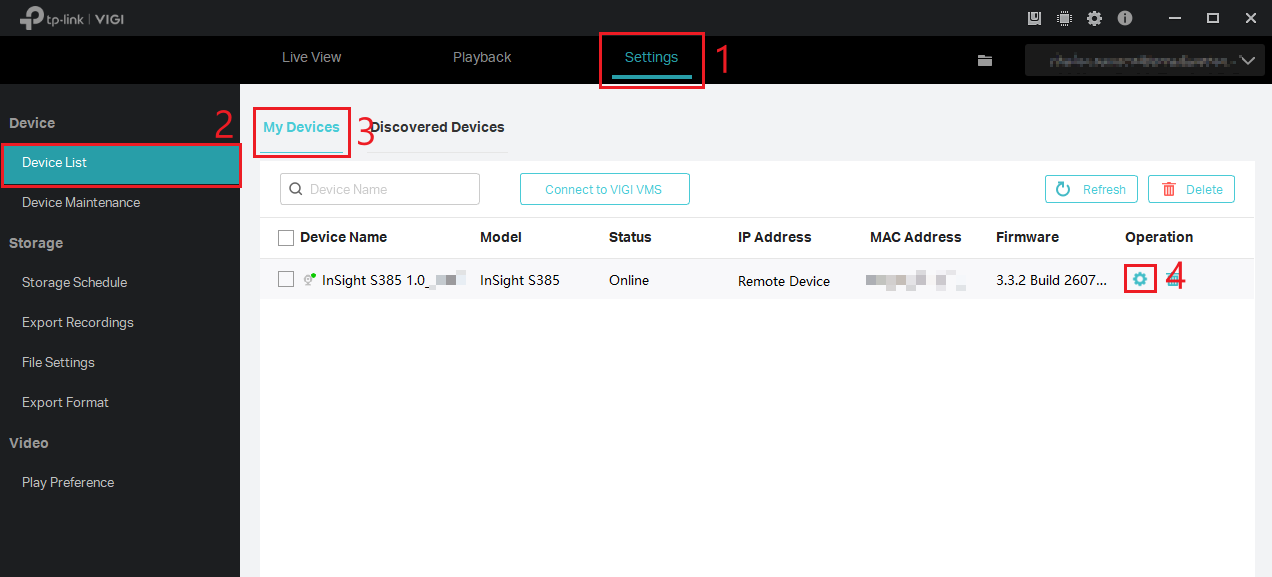
Step 1. After logging into VIGI Security Manager, go to Settings > Device List > My Devices, then select the Edit button for the IPC.
Note: When using TP-Link ID to manage the camera, you can only view the camera’s network settings, but you cannot modify the network parameters. Log in with a local account.
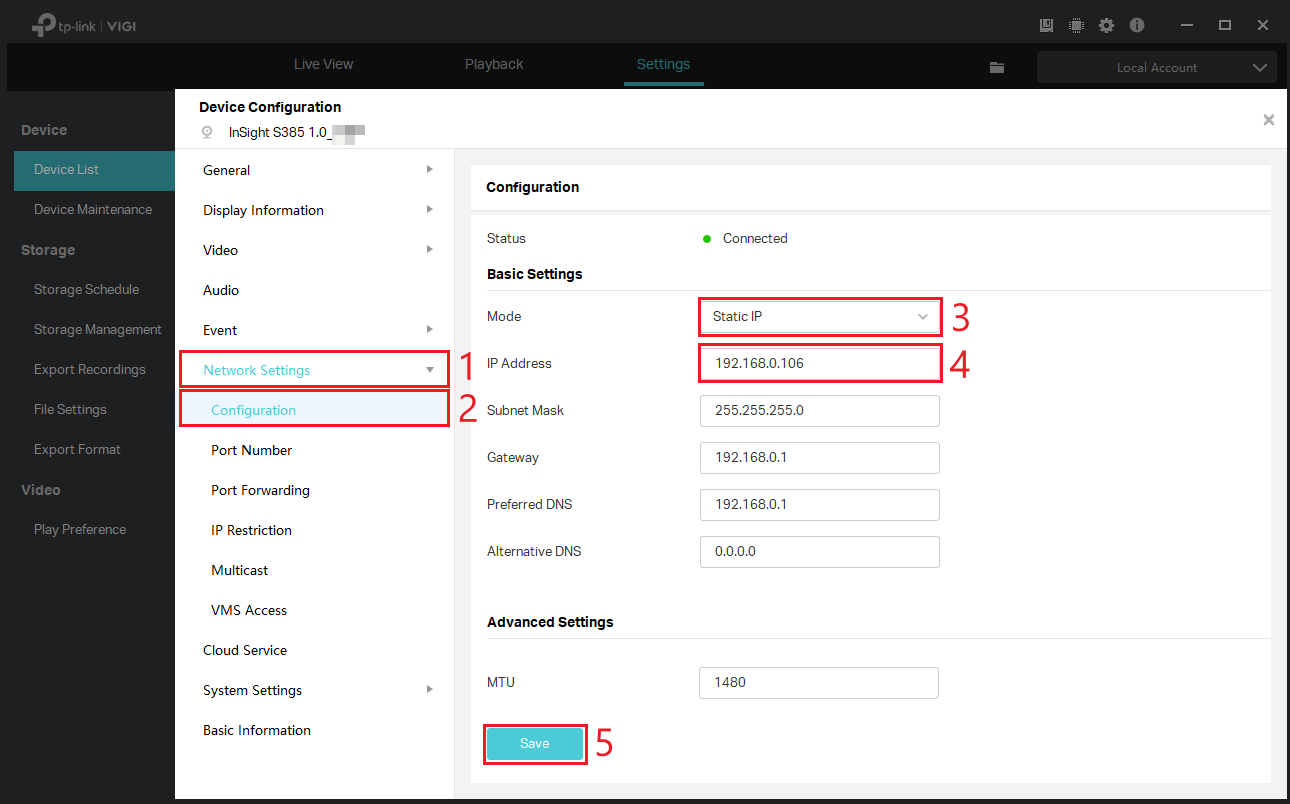
Step 2. Go to Network Settings > Configuration. Change the Mode to Static IP and change the IP Address of the IPC. Select Save when complete.
VIGI NVR GUI before adding the IPC, using the Modify IP Address option
There are two options for configuring or specifying an IPC IP address before adding the camera to the NVR.
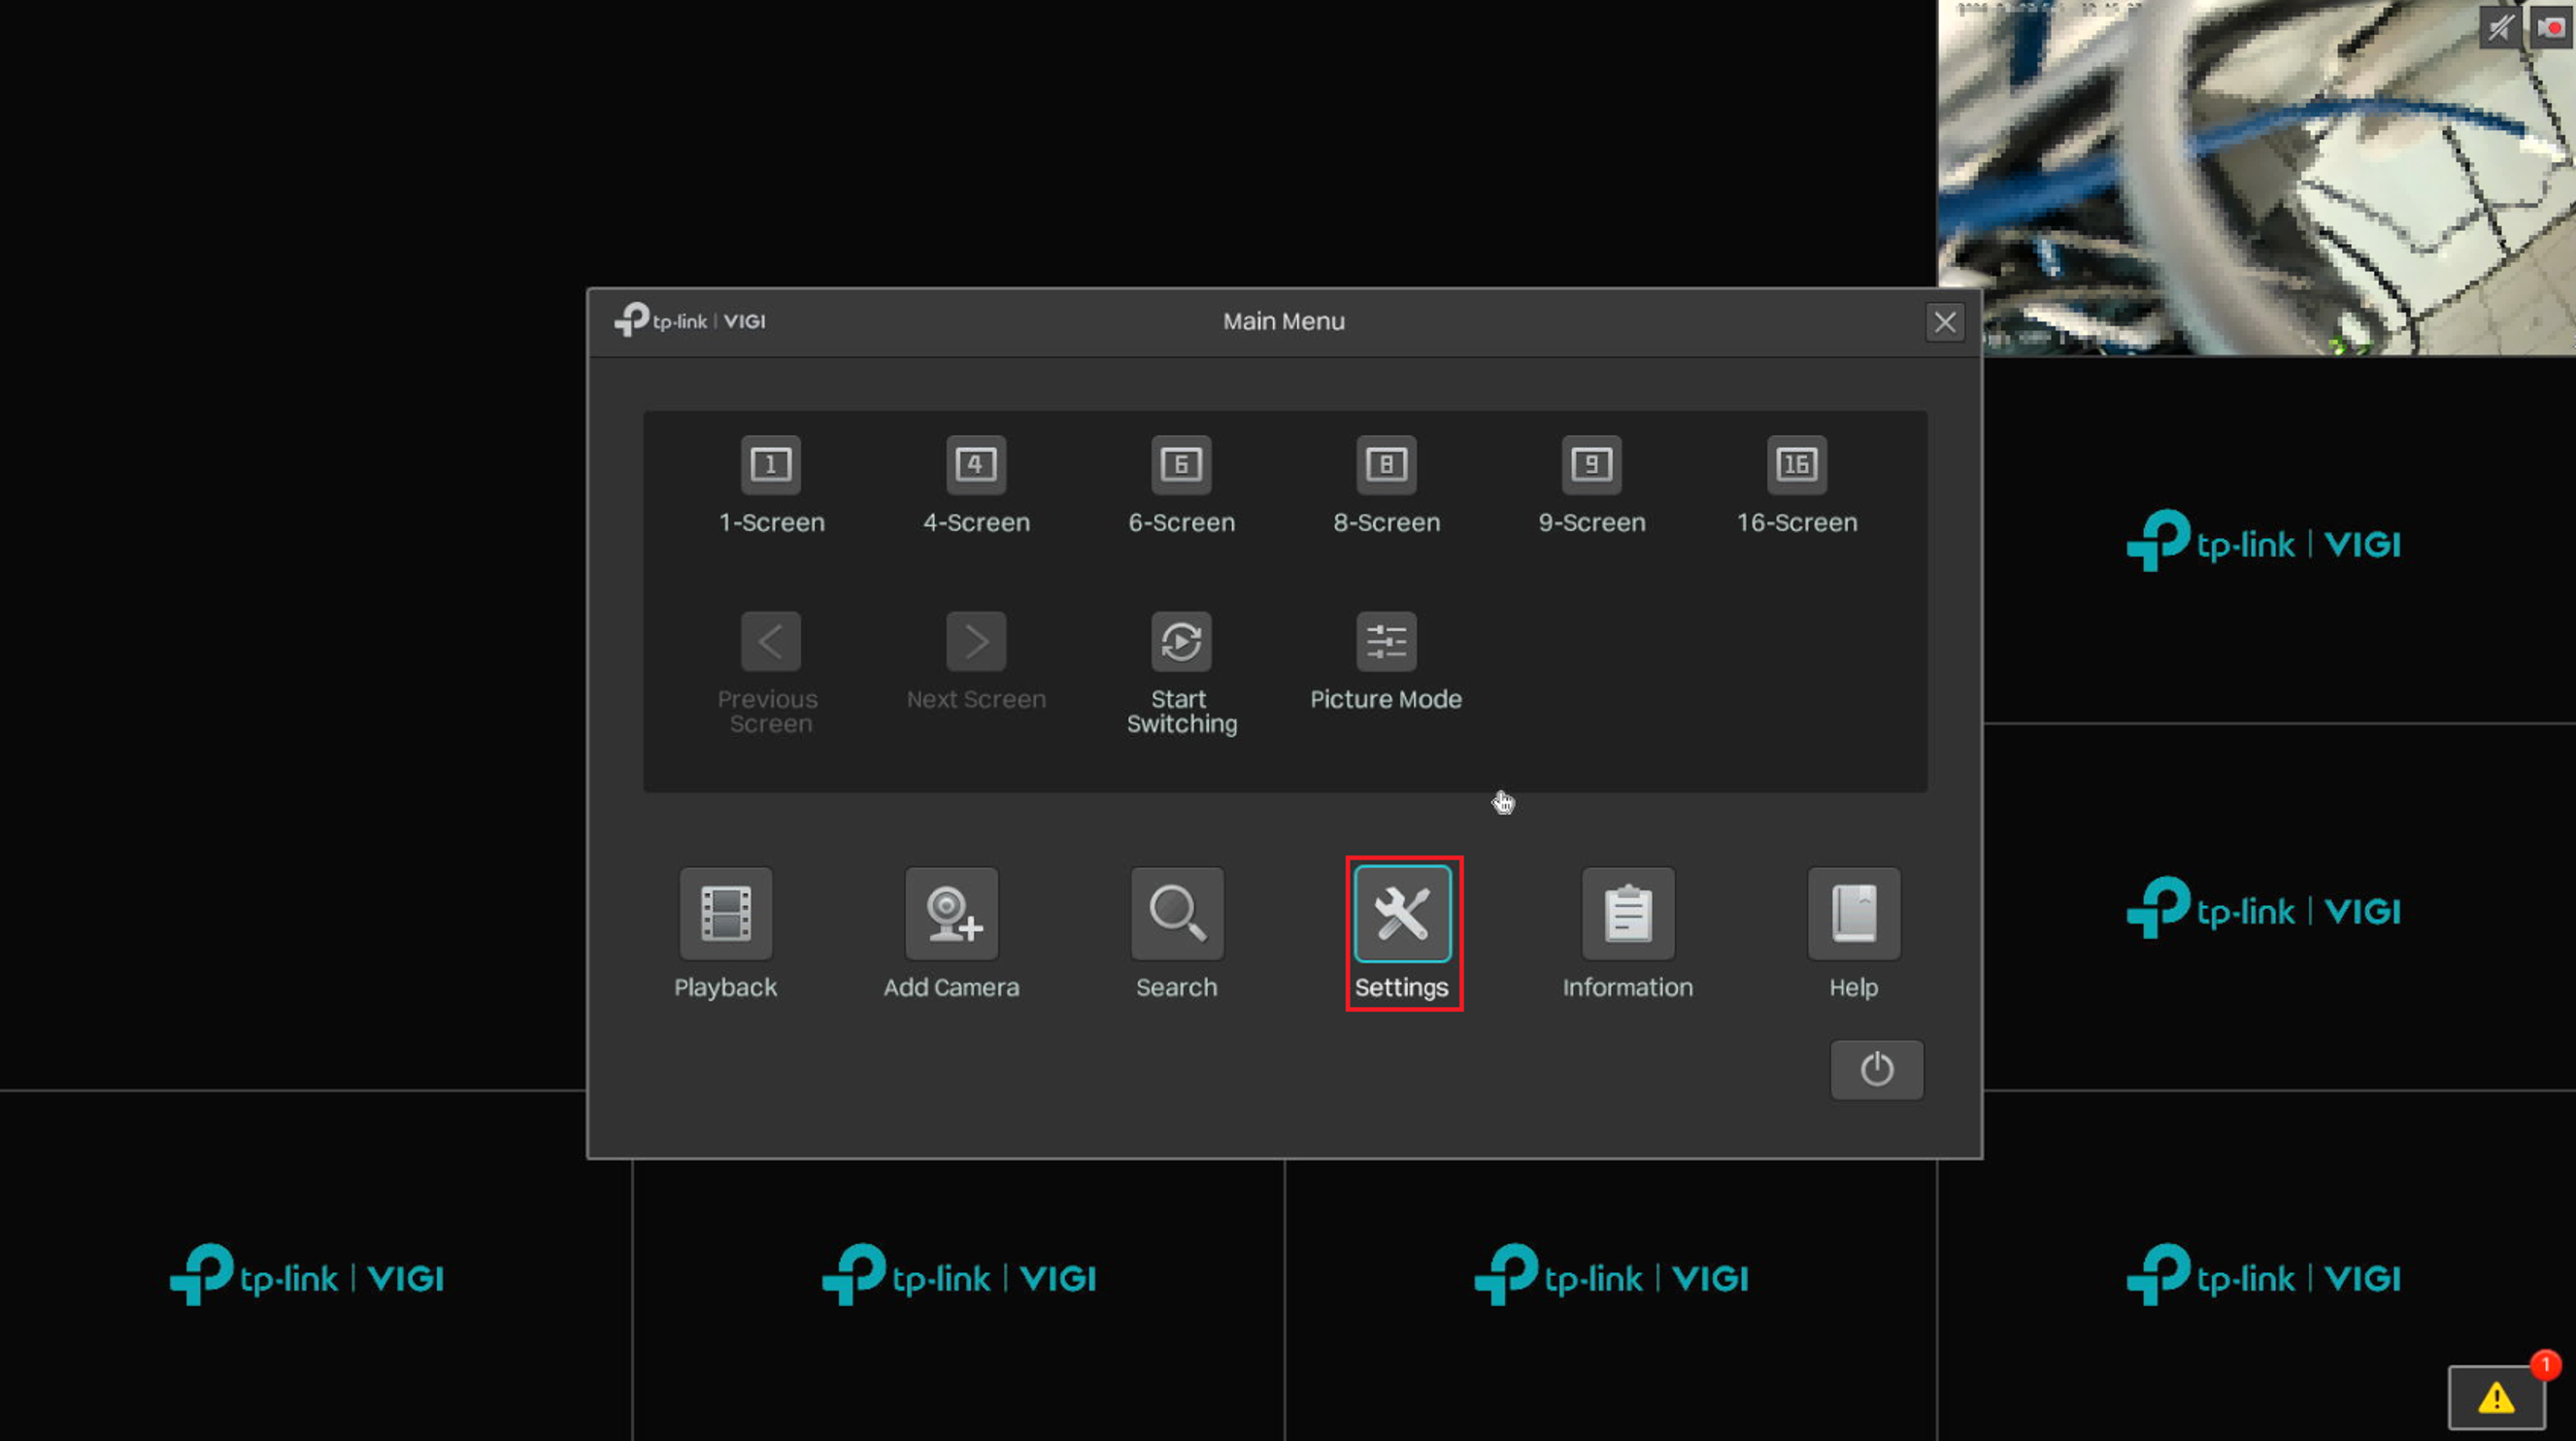
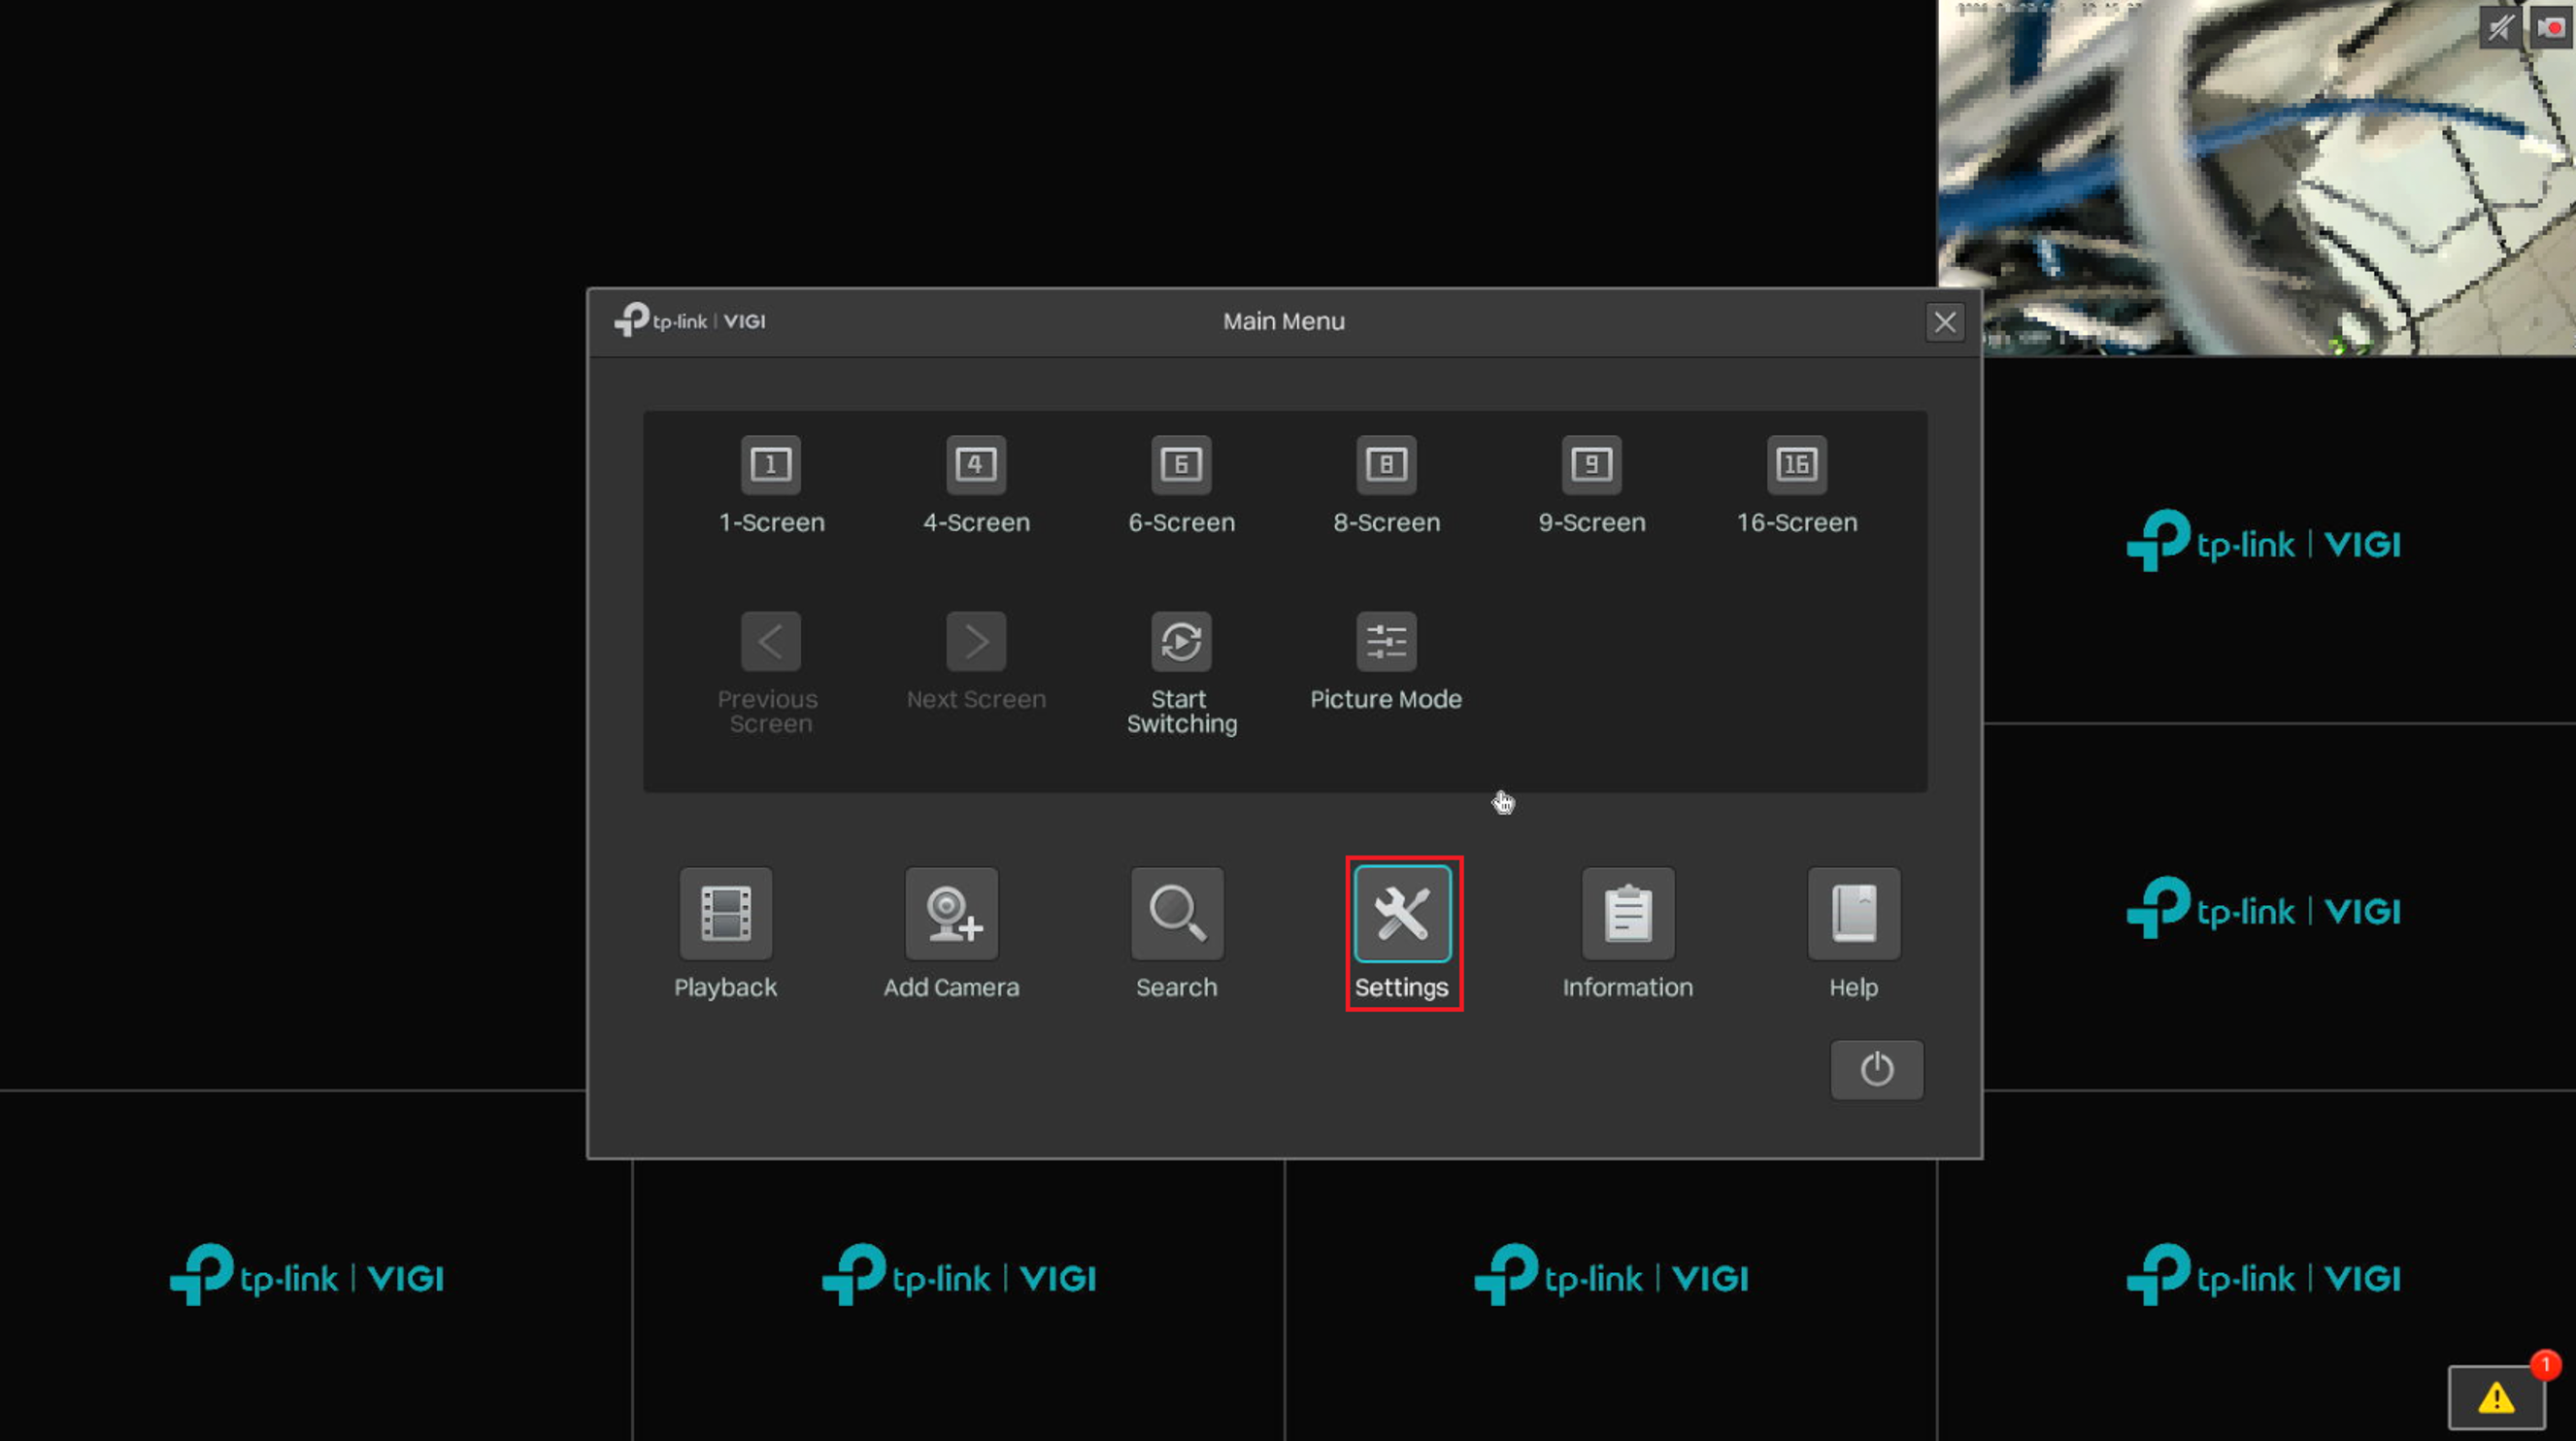
Step 1. First right-click with the mouse attached to the NVR to show the Main Menu. Select the Settings option.
Step 2. To use the Modify IP Address option, go to Camera > Device Access > Add Device. Within the Devices found list, select the device, then select Modify IP Address.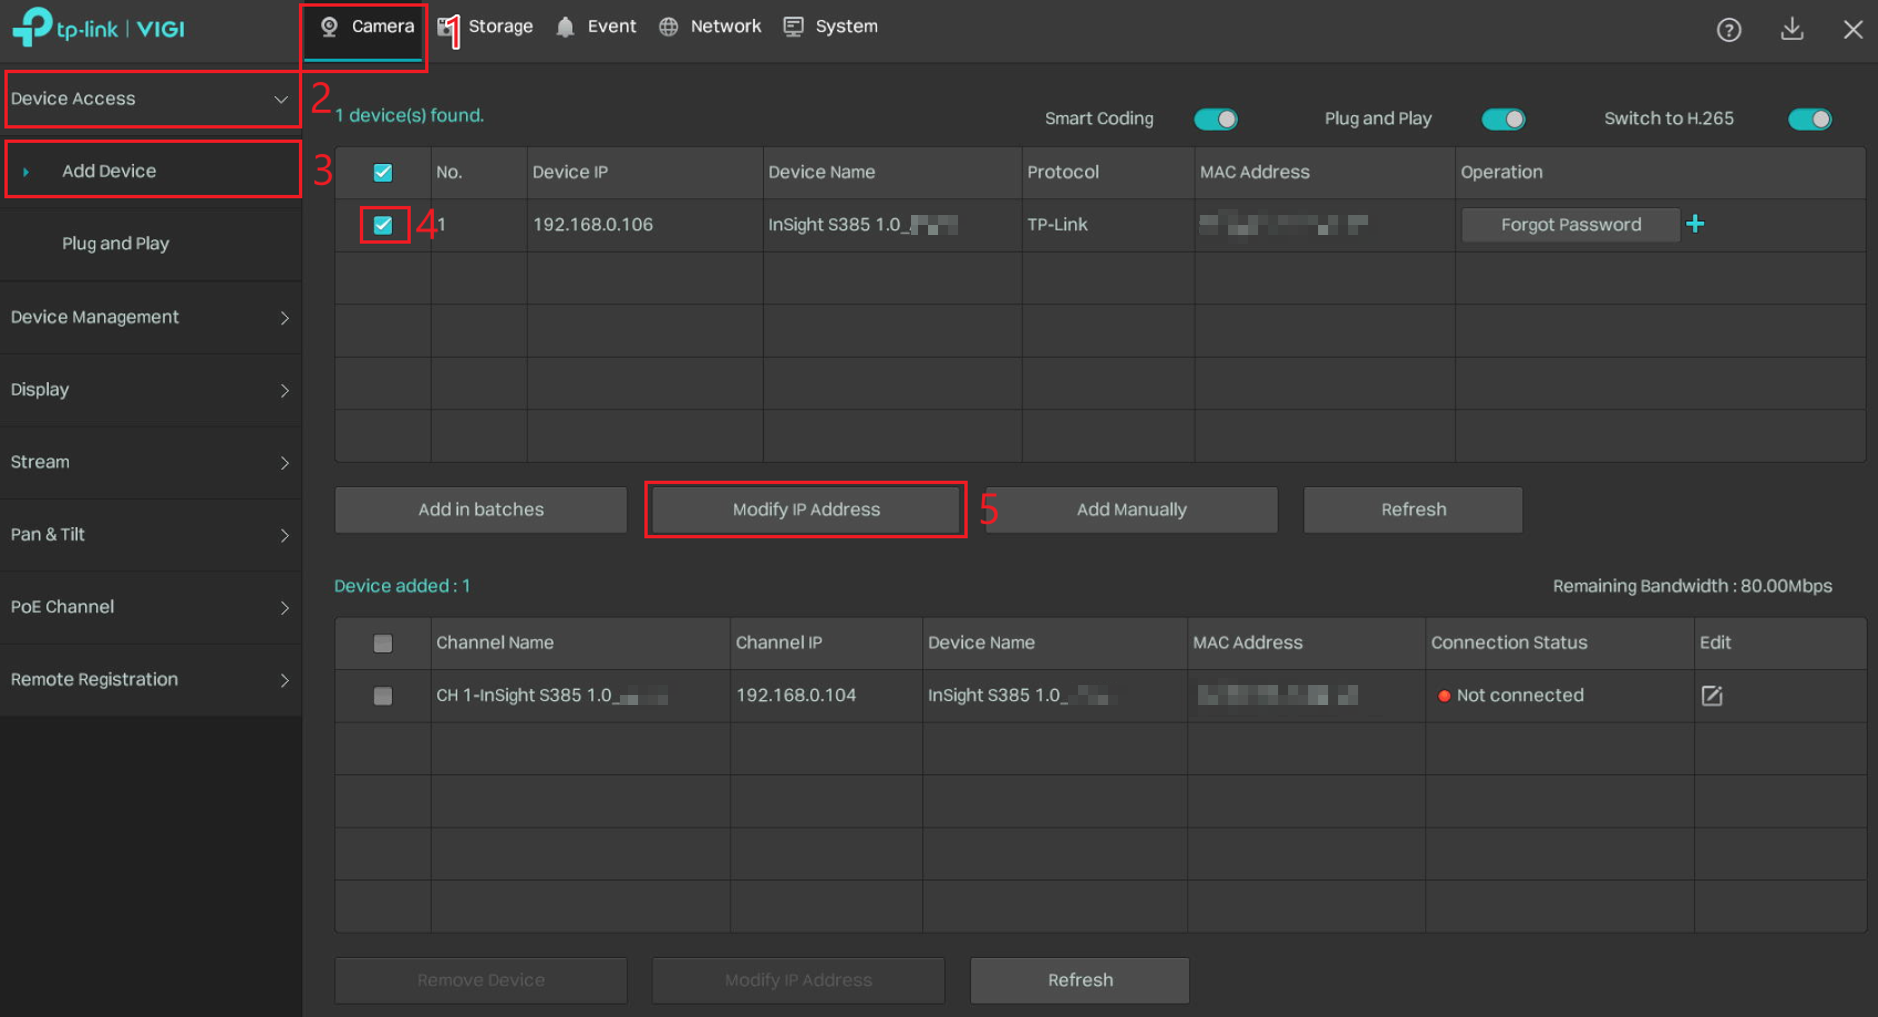
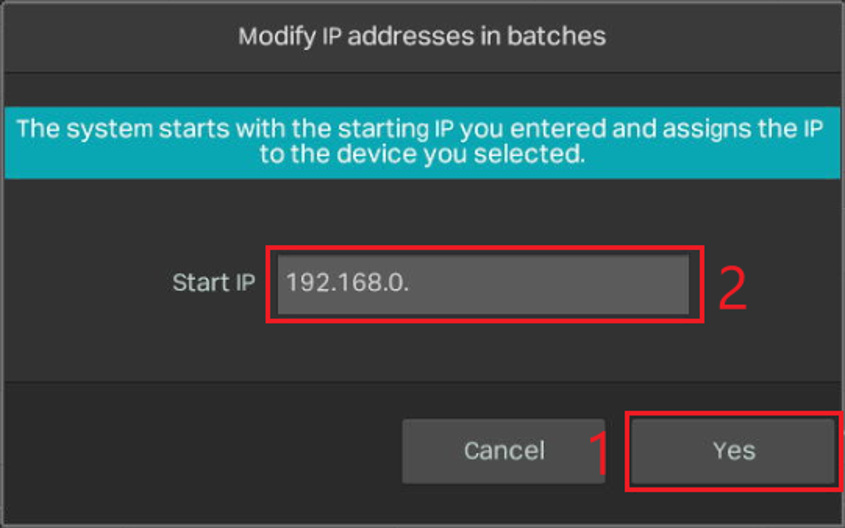
Step 3. Enter the Start IP address, then select Yes.
VIGI NVR GUI after adding the IPC
Step 1. First right-click with the mouse attached to the NVR to show the Main Menu. Select the Settings option.
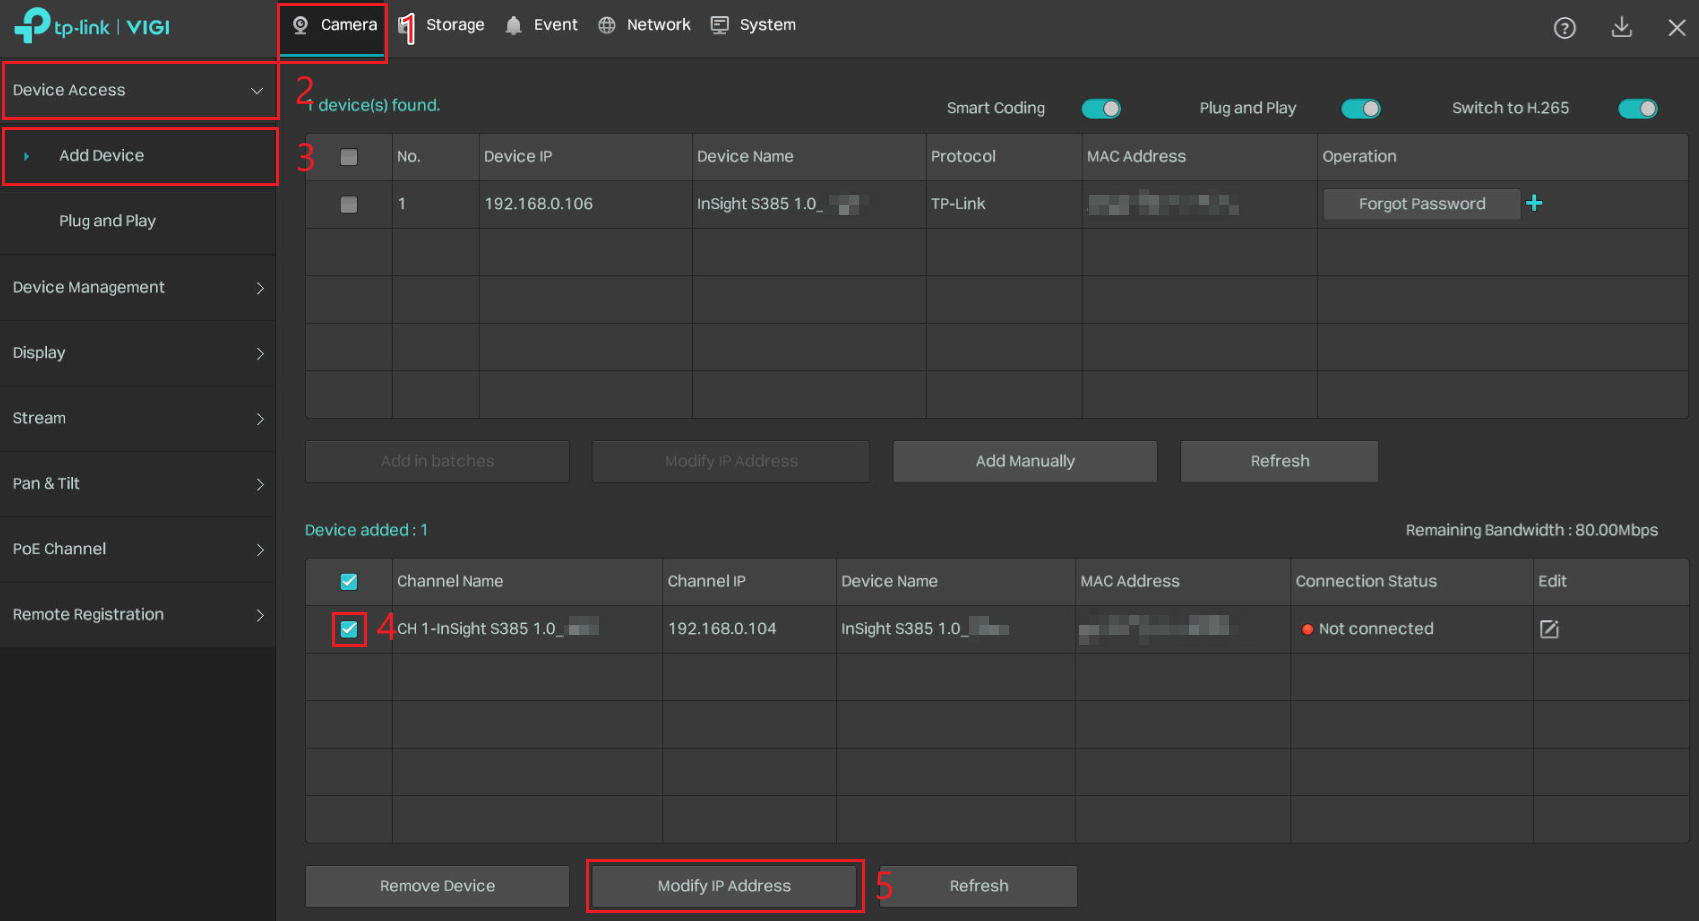
Step 2. Go to Camera > Device Access > Add Device. Within the Devices added list, select the camera, then select Modify IP Address.
Step 3. Enter the Start IP address, then select Yes.
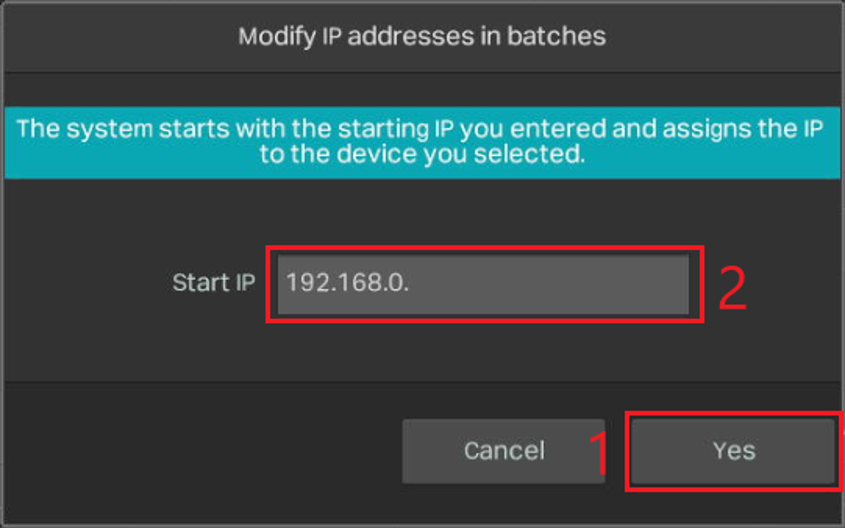
VIGI NVR GUI via one-click networking option
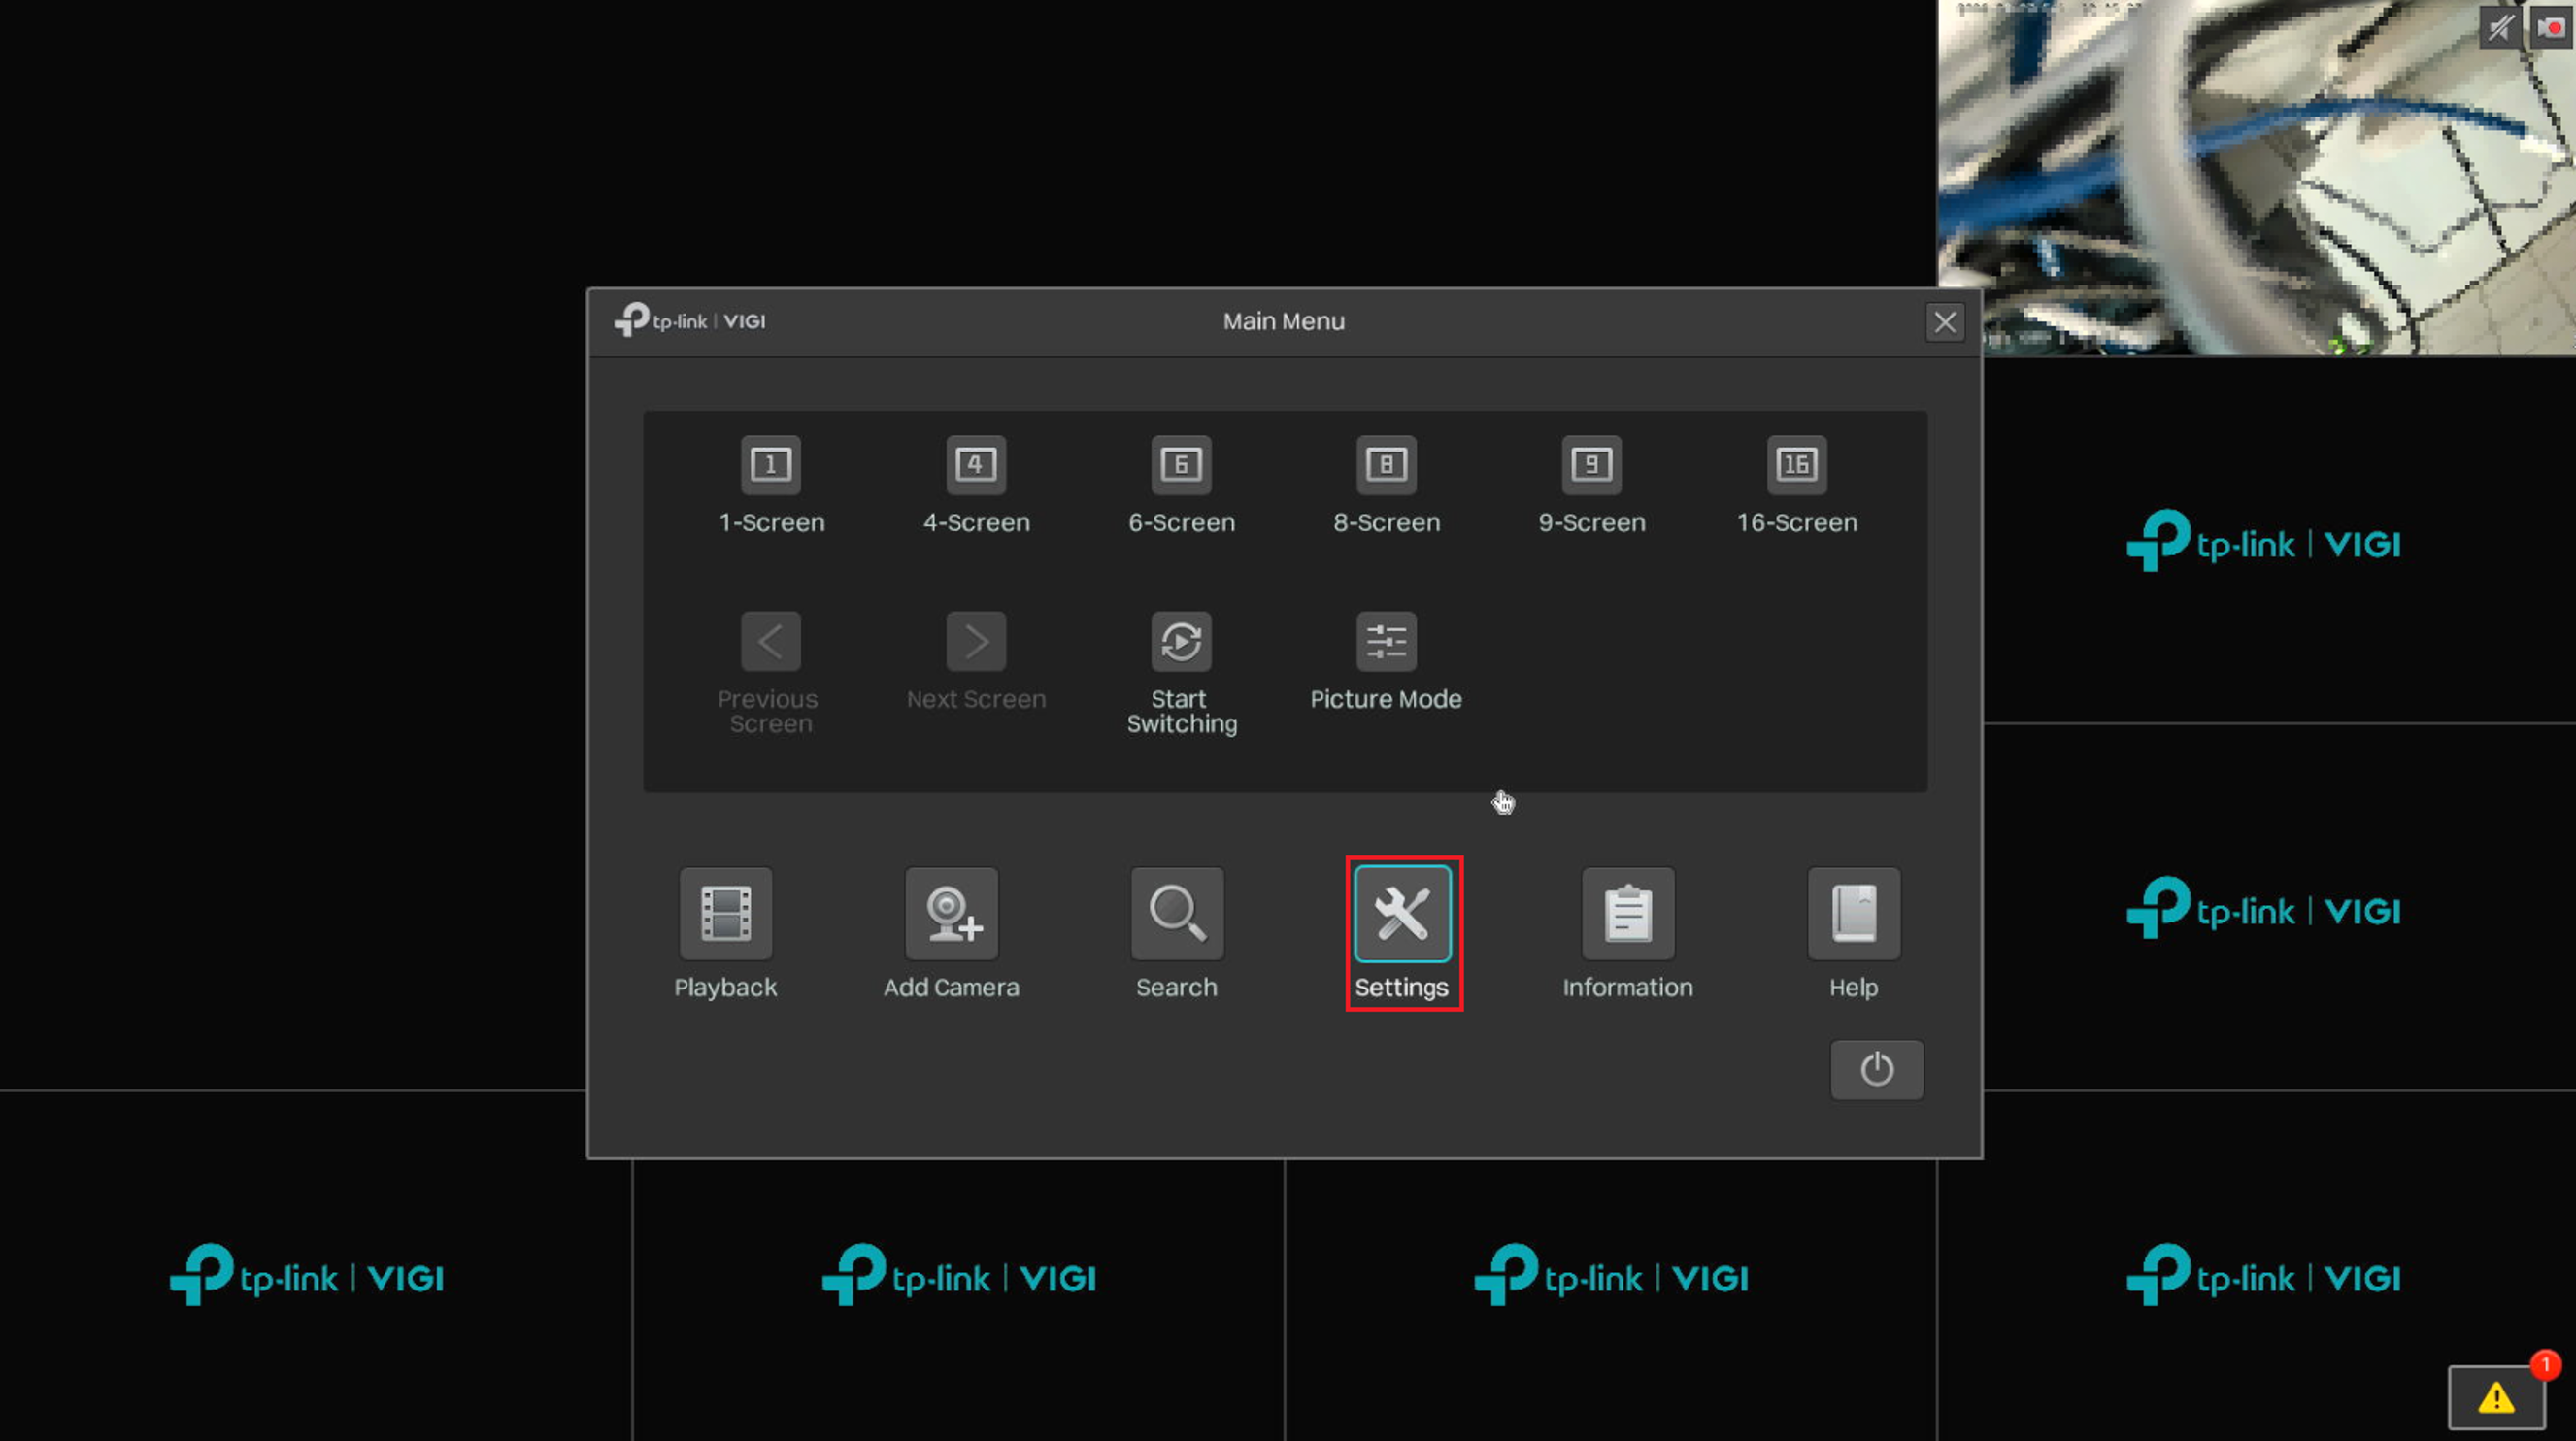
Step 1. First right-click with the mouse attached to the NVR to show the Main Menu. Select the Settings option.
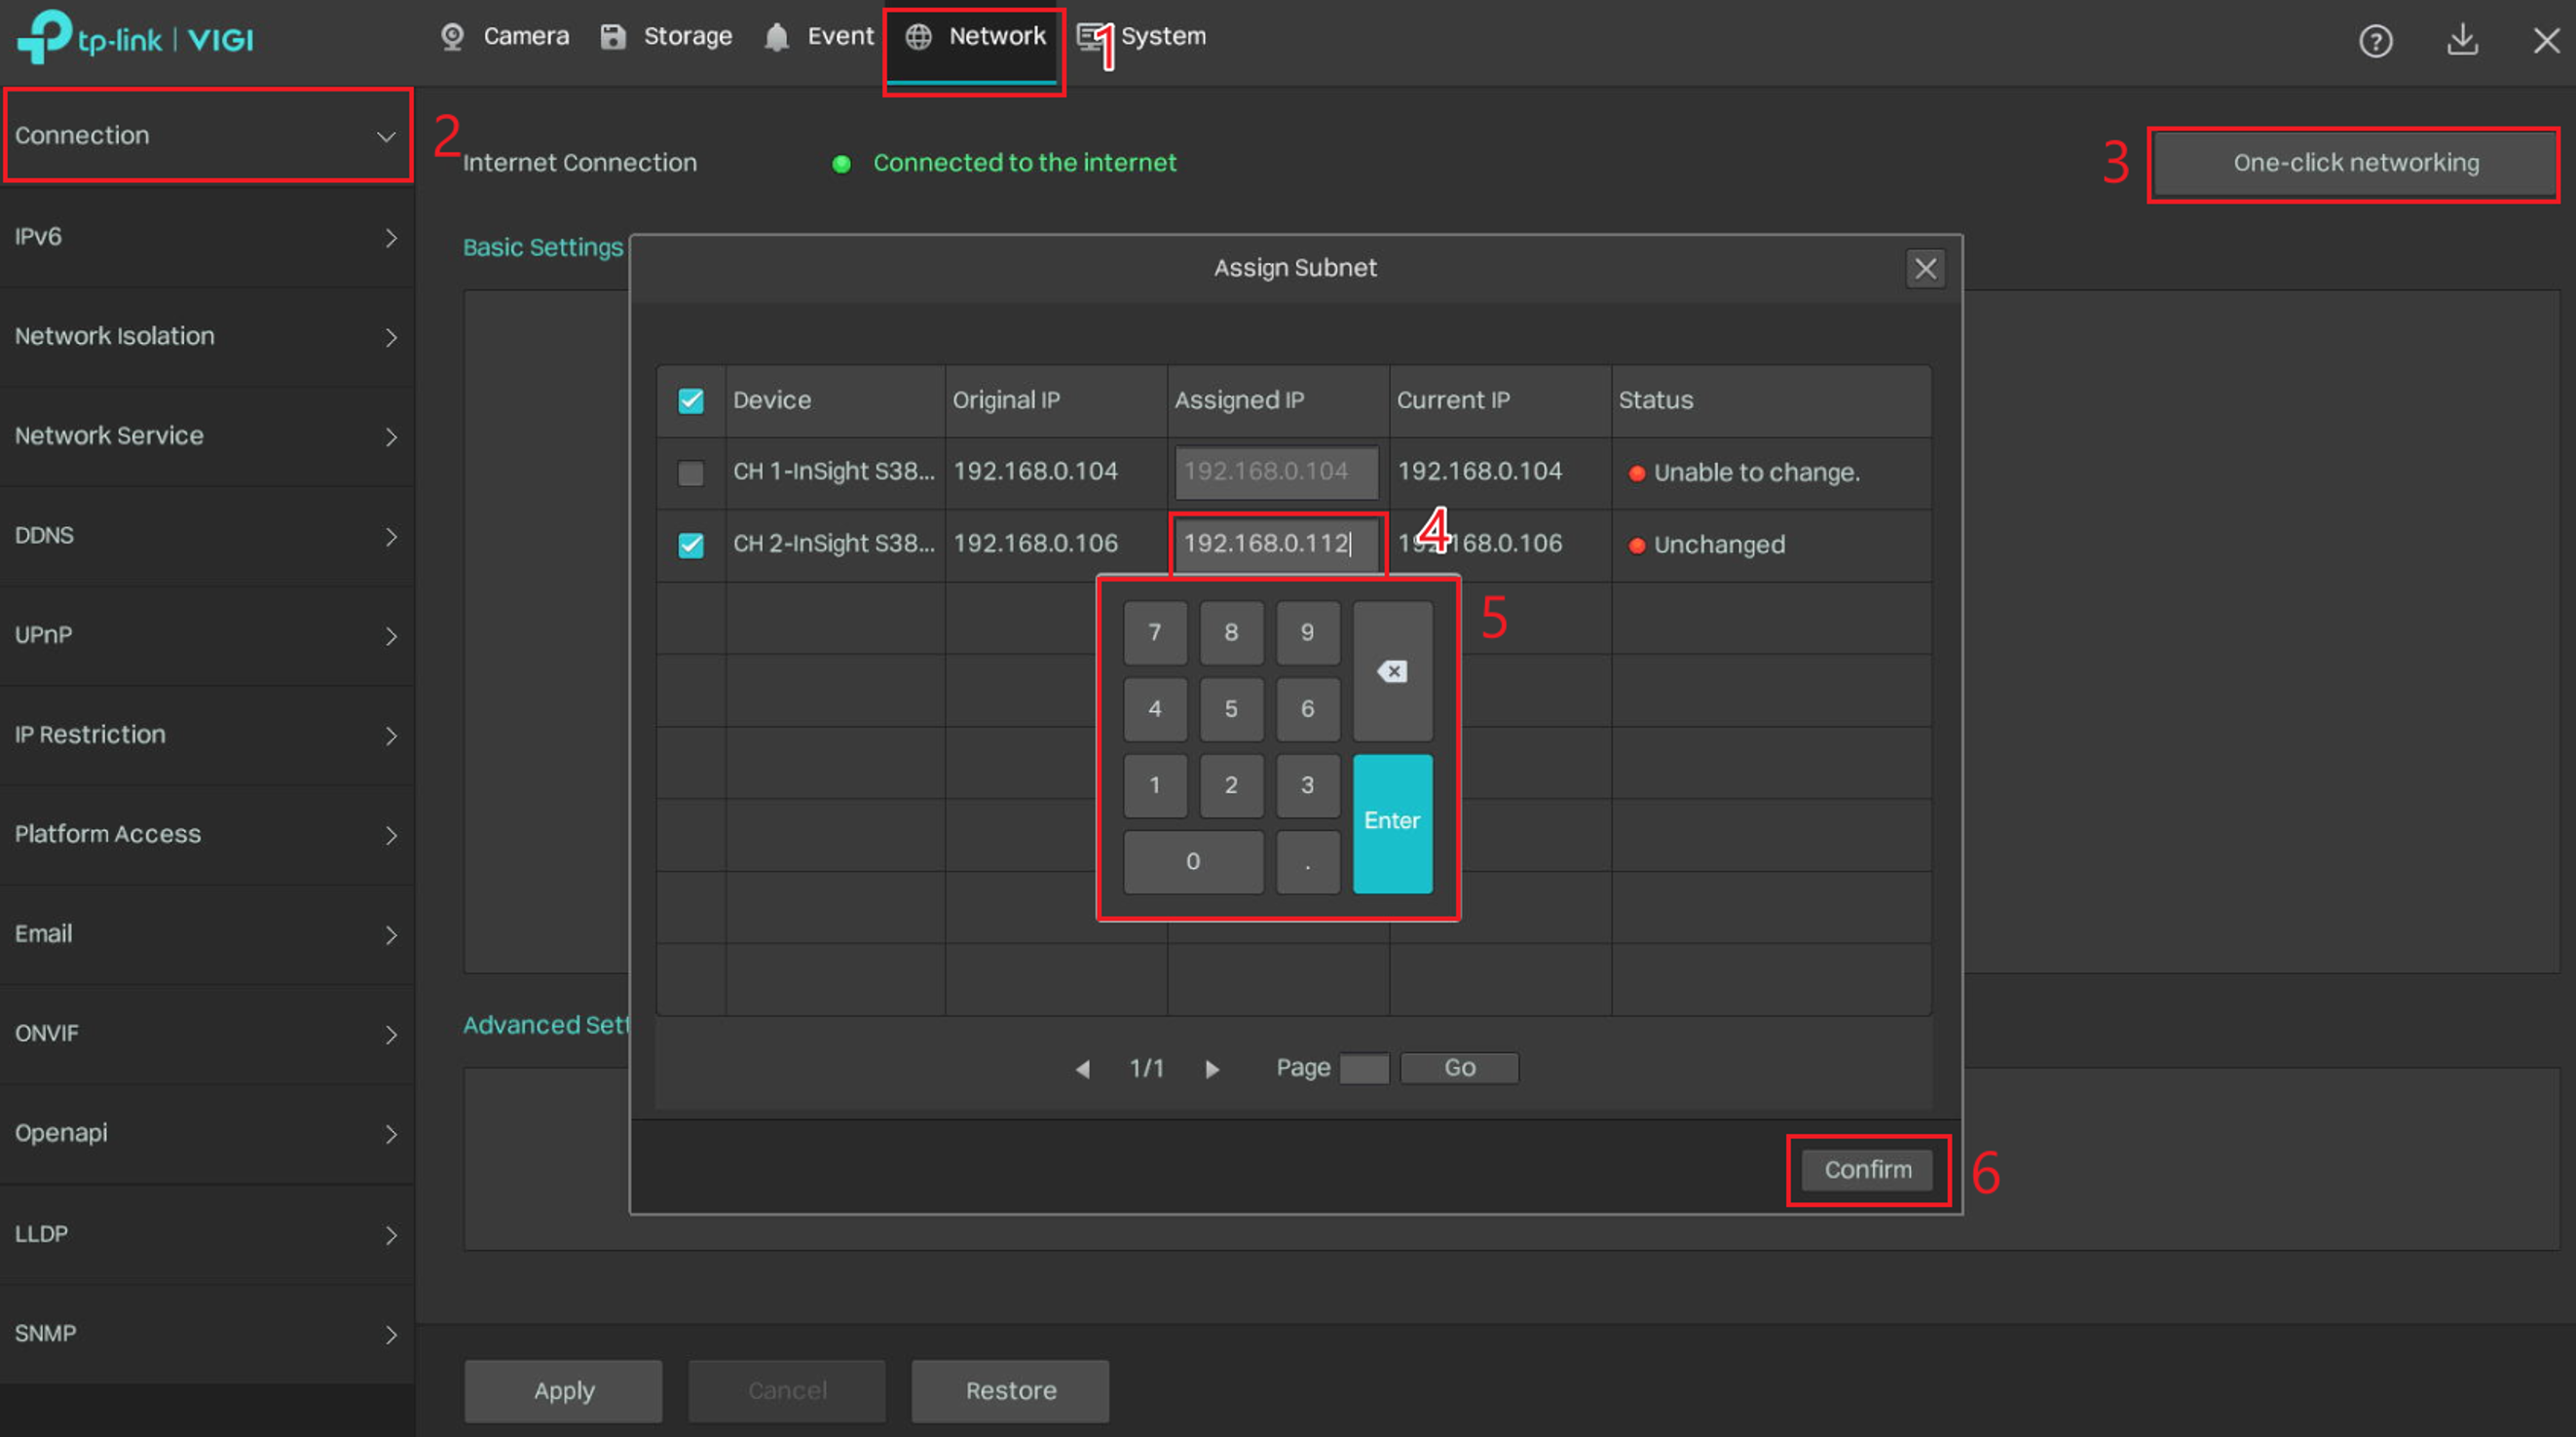
Step 2. Select the Network tab, go to Connection, then select One-click networking. An Assign Subnet window will appear. Select the IP Address of the IPC to be changed, then enter the new IP Address. Select Confirm to finalize the new IP Address.
VIGI NVR WebUI before adding the IPC
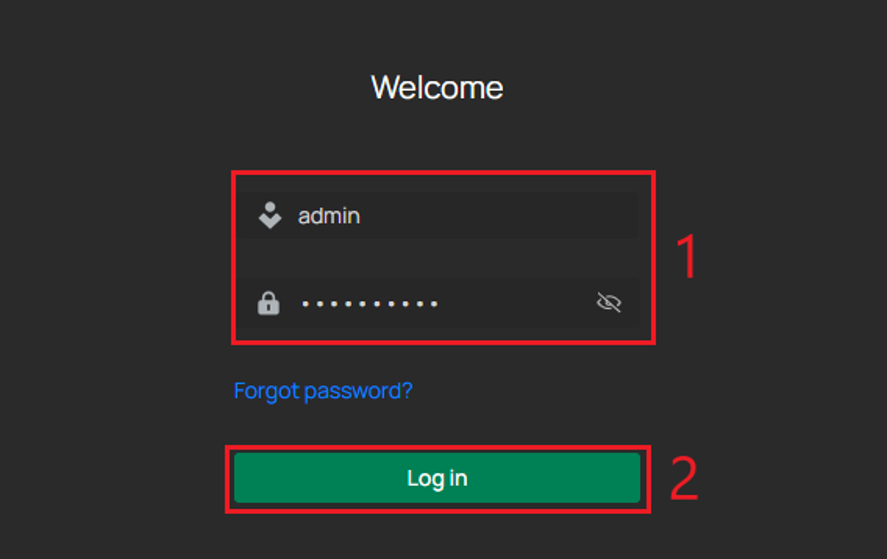
Step 1. Log in to the WebUI by entering the IP address of the NVR into a web browser.
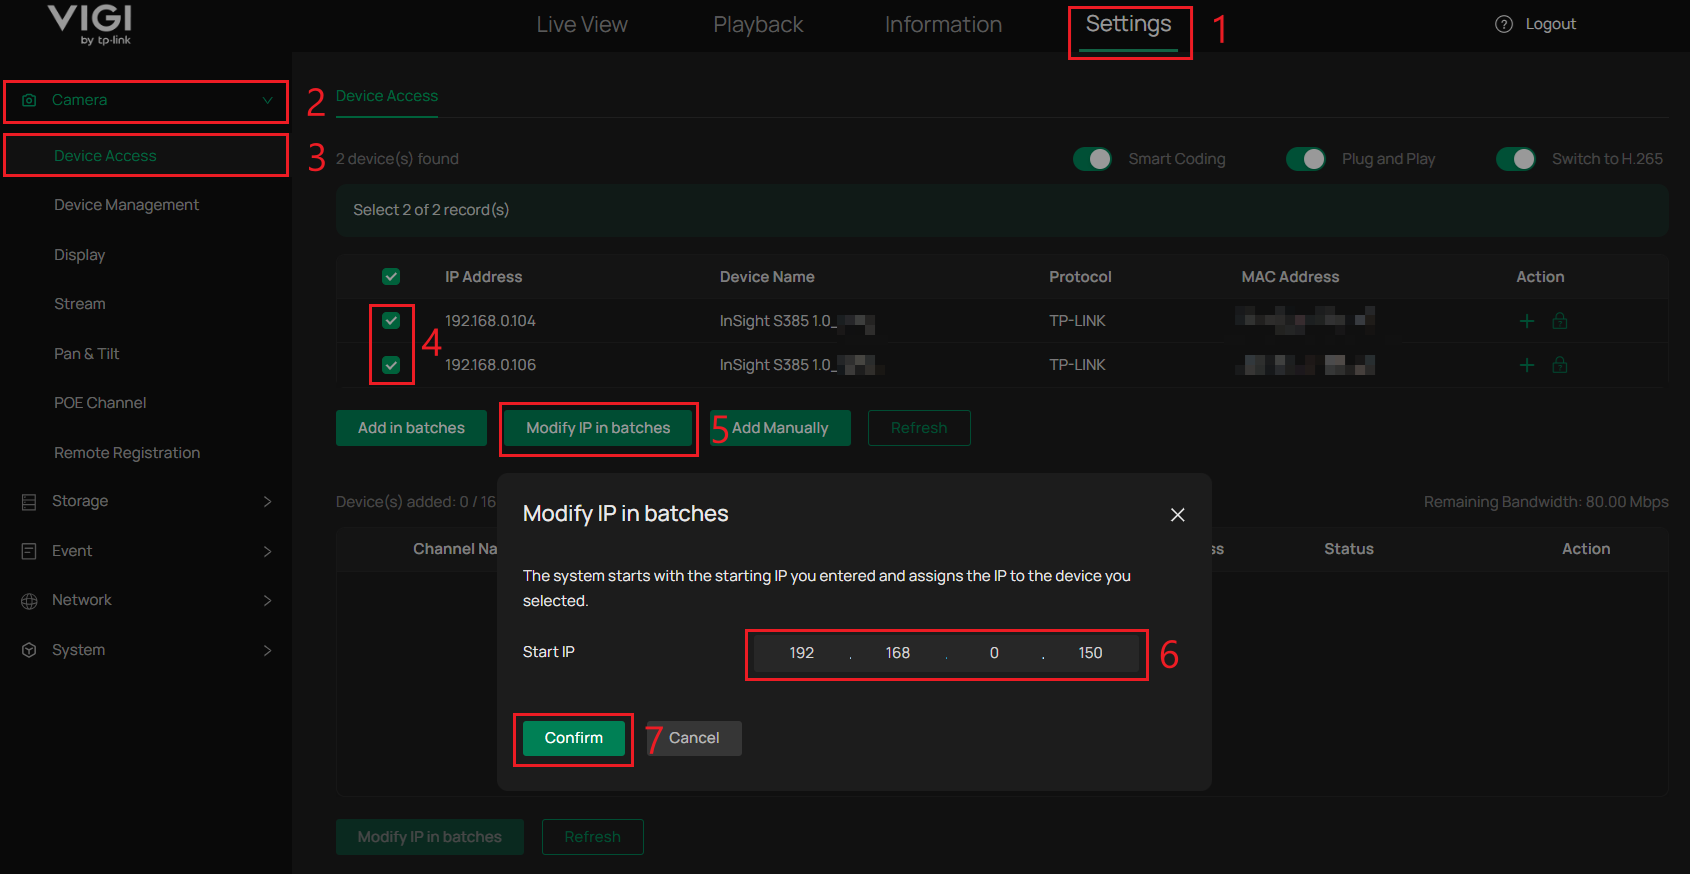
Step 2. If the IPC has not yet been added, go to Settings > Camera > Device Access. In the Devices found list, select the devices, then select Modify IP in batches. In the Modify IP in batches menu, enter the Start IP and select Confirm.
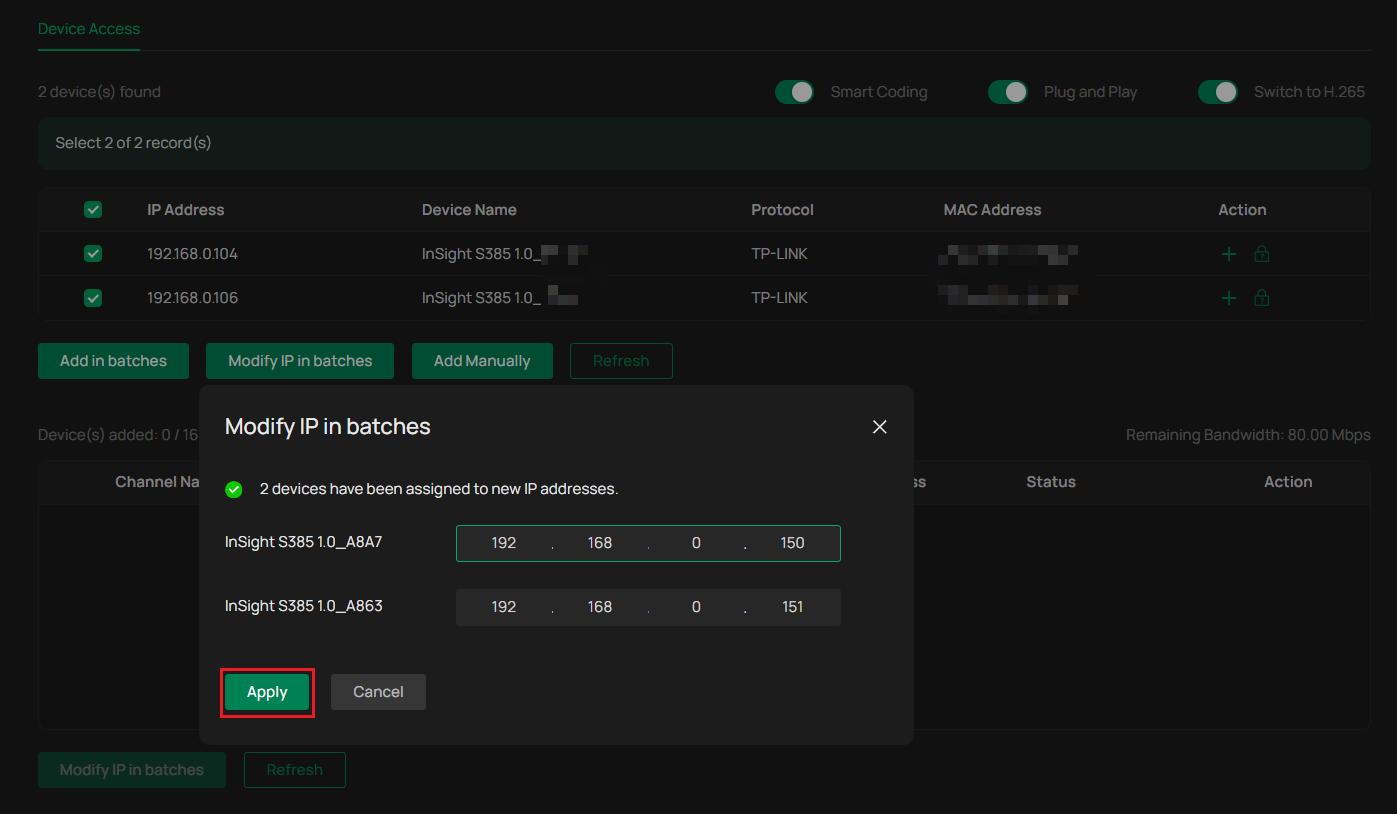
Step 3. The NVR WebUI will display the newly assigned IP addresses of the IPCs. Select Apply.
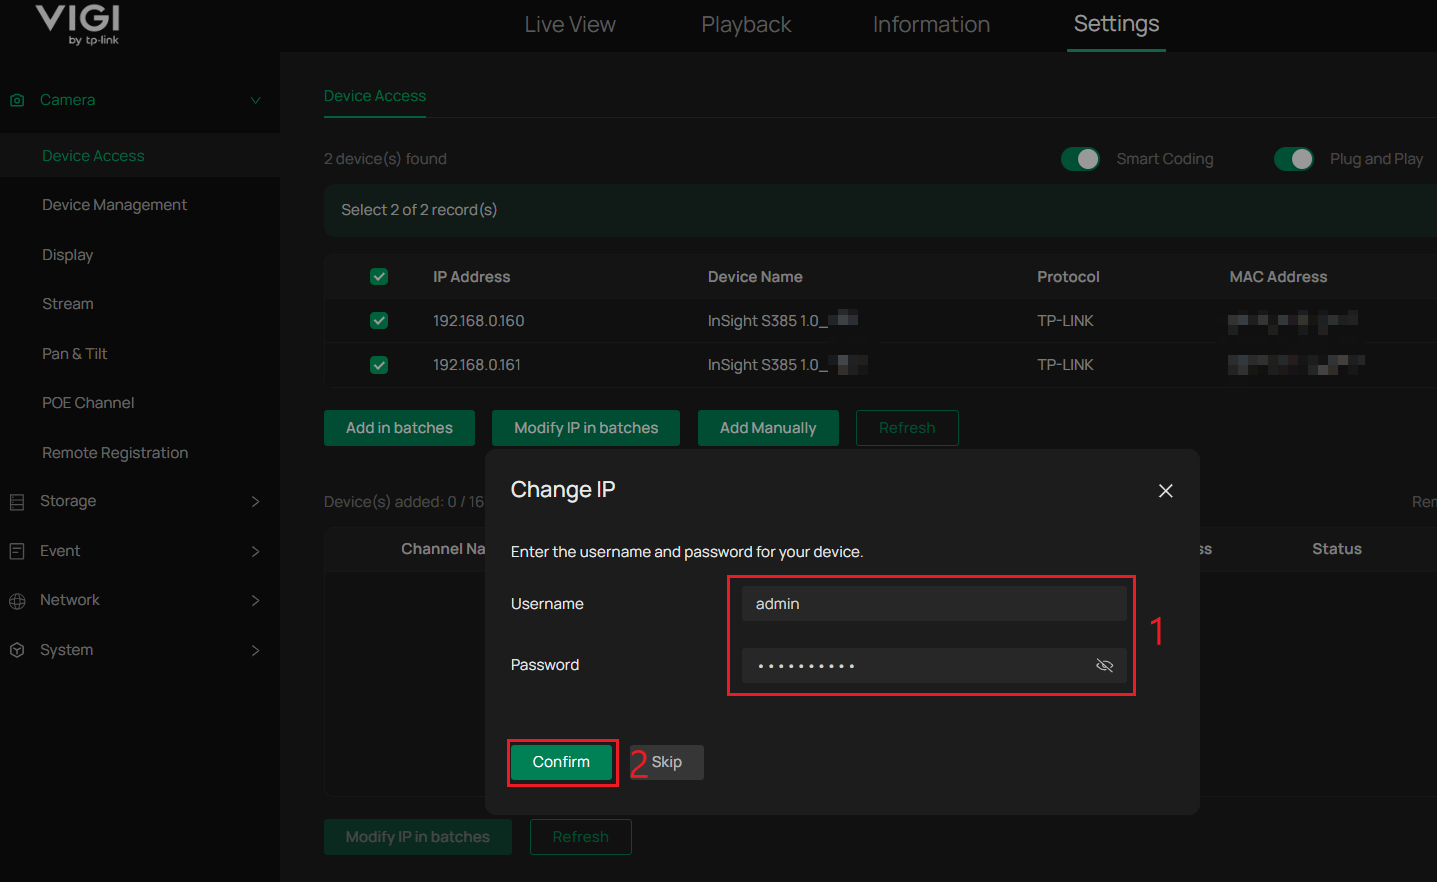
Step 4. A prompt for the Username and Password of the devices will appear. Enter the credentials and select Confirm.
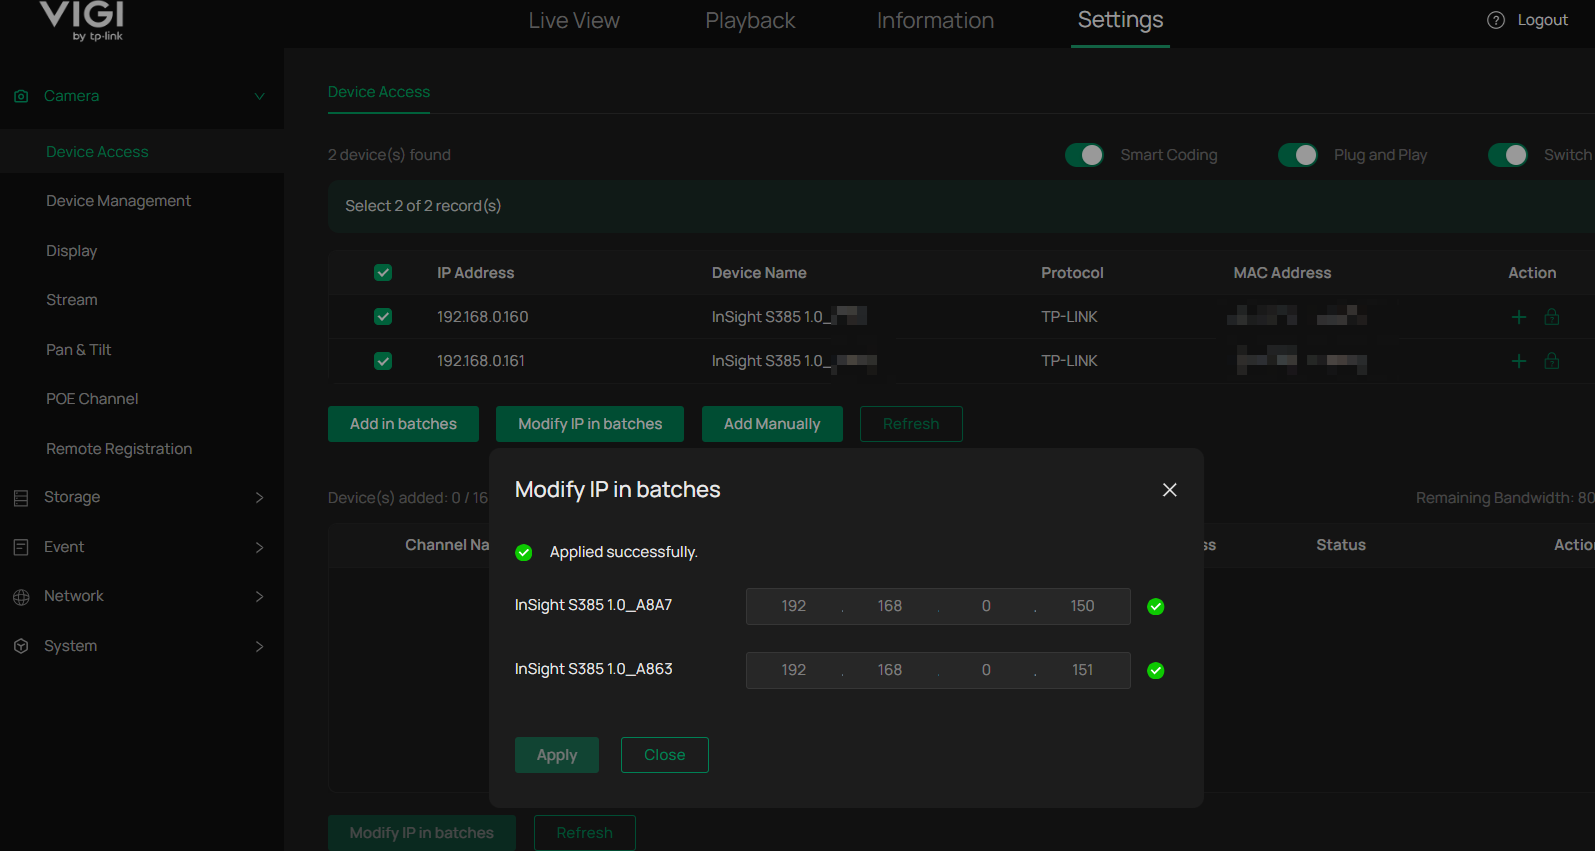
Step 5. A new window will appear confirming that the changes were applied successfully. Select Close, then refresh the page after a few minutes. The IP addresses of the IPCs will have changed to the configured range.
VIGI NVR WebUI after adding the IPC
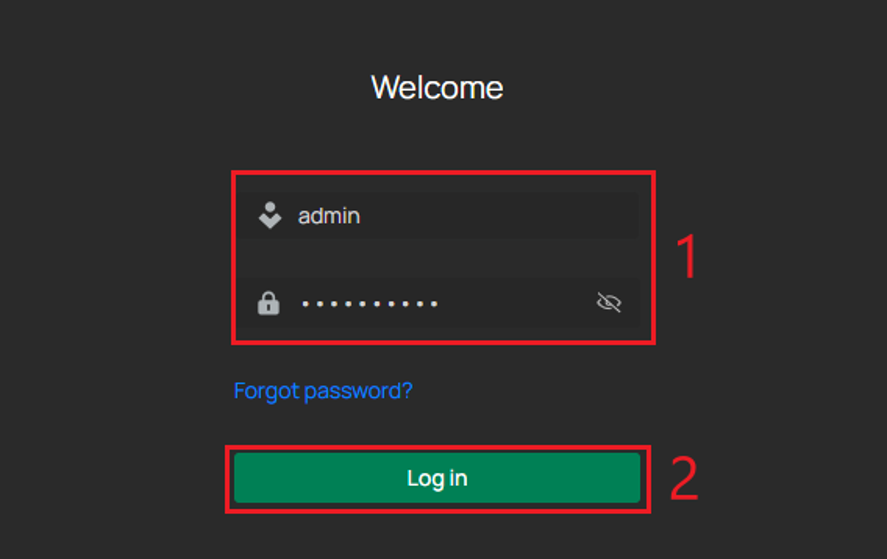
Step 1. Log into the WebUI by inputting the IP Address of the NVR into a web browser.
Step 2. Go to Settings > Camera > Device Access. Within the Devices added list, select the device, then select Modify IP in batches.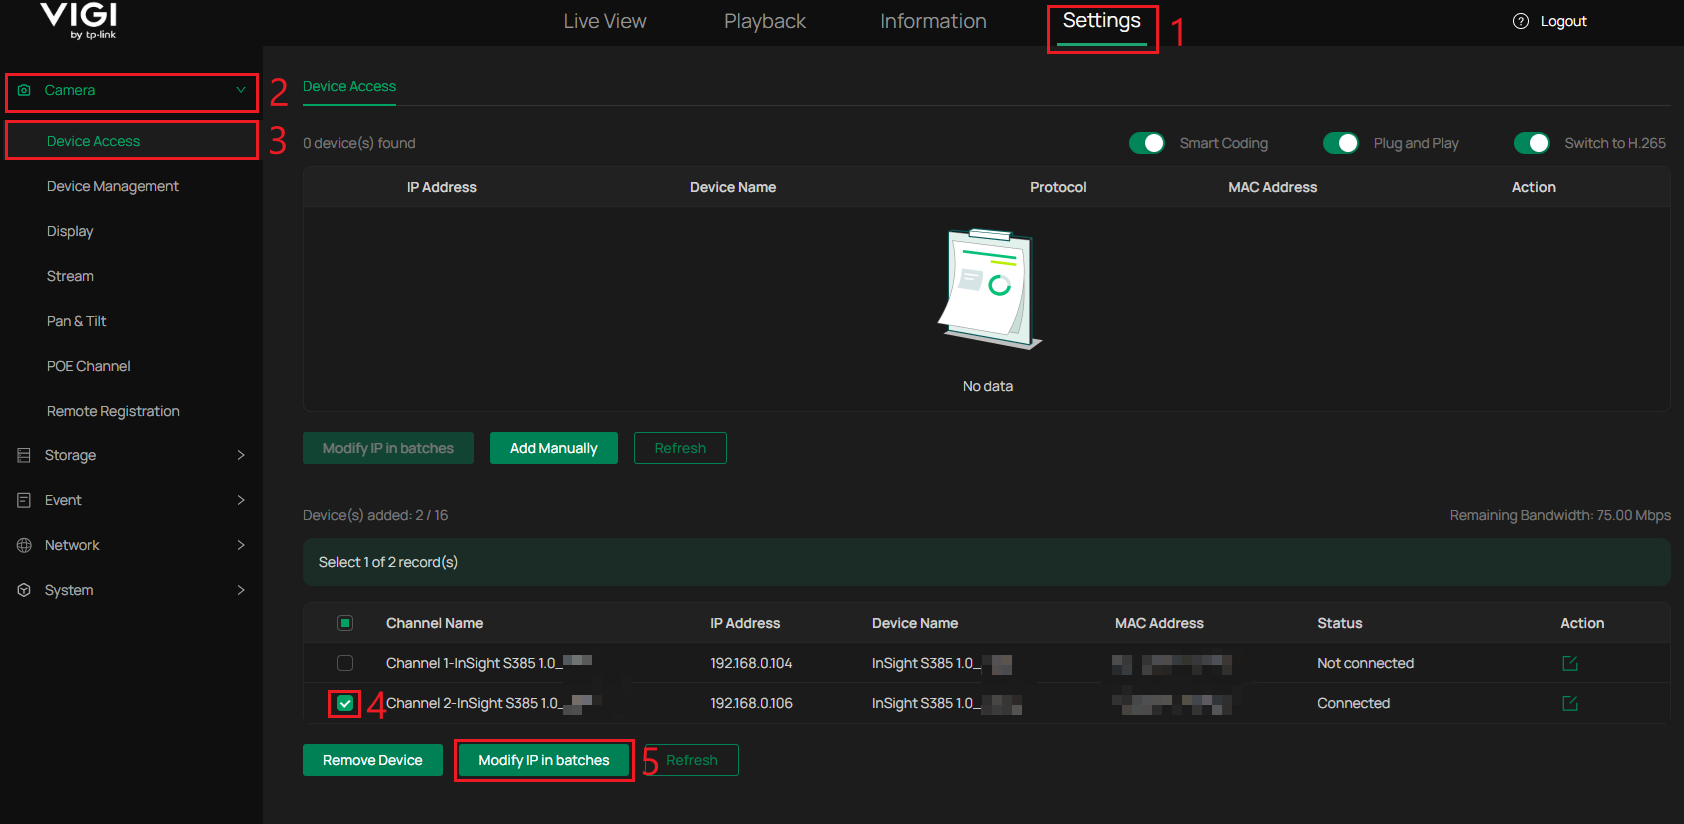
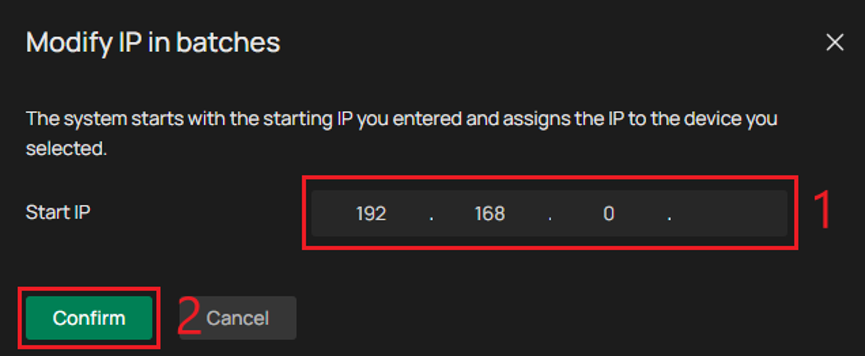
Step 3. Enter the starting IP address, then select Confirm.
VIGI NVR WebUI using Assign Subnet option
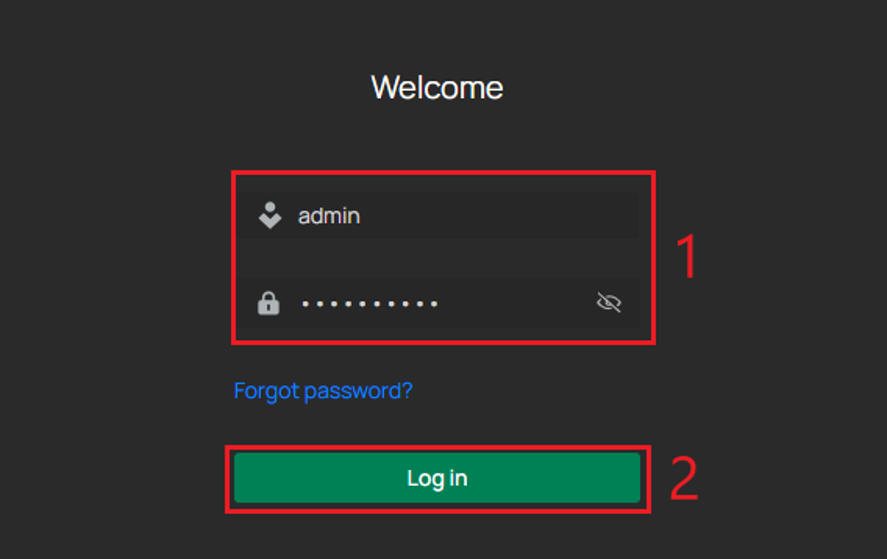
Step 1. Log into the WebUI by entering the IP address of the NVR in a web browser.
Step 2. Go to Settings > Network > Connect, then select Assign Subnet.
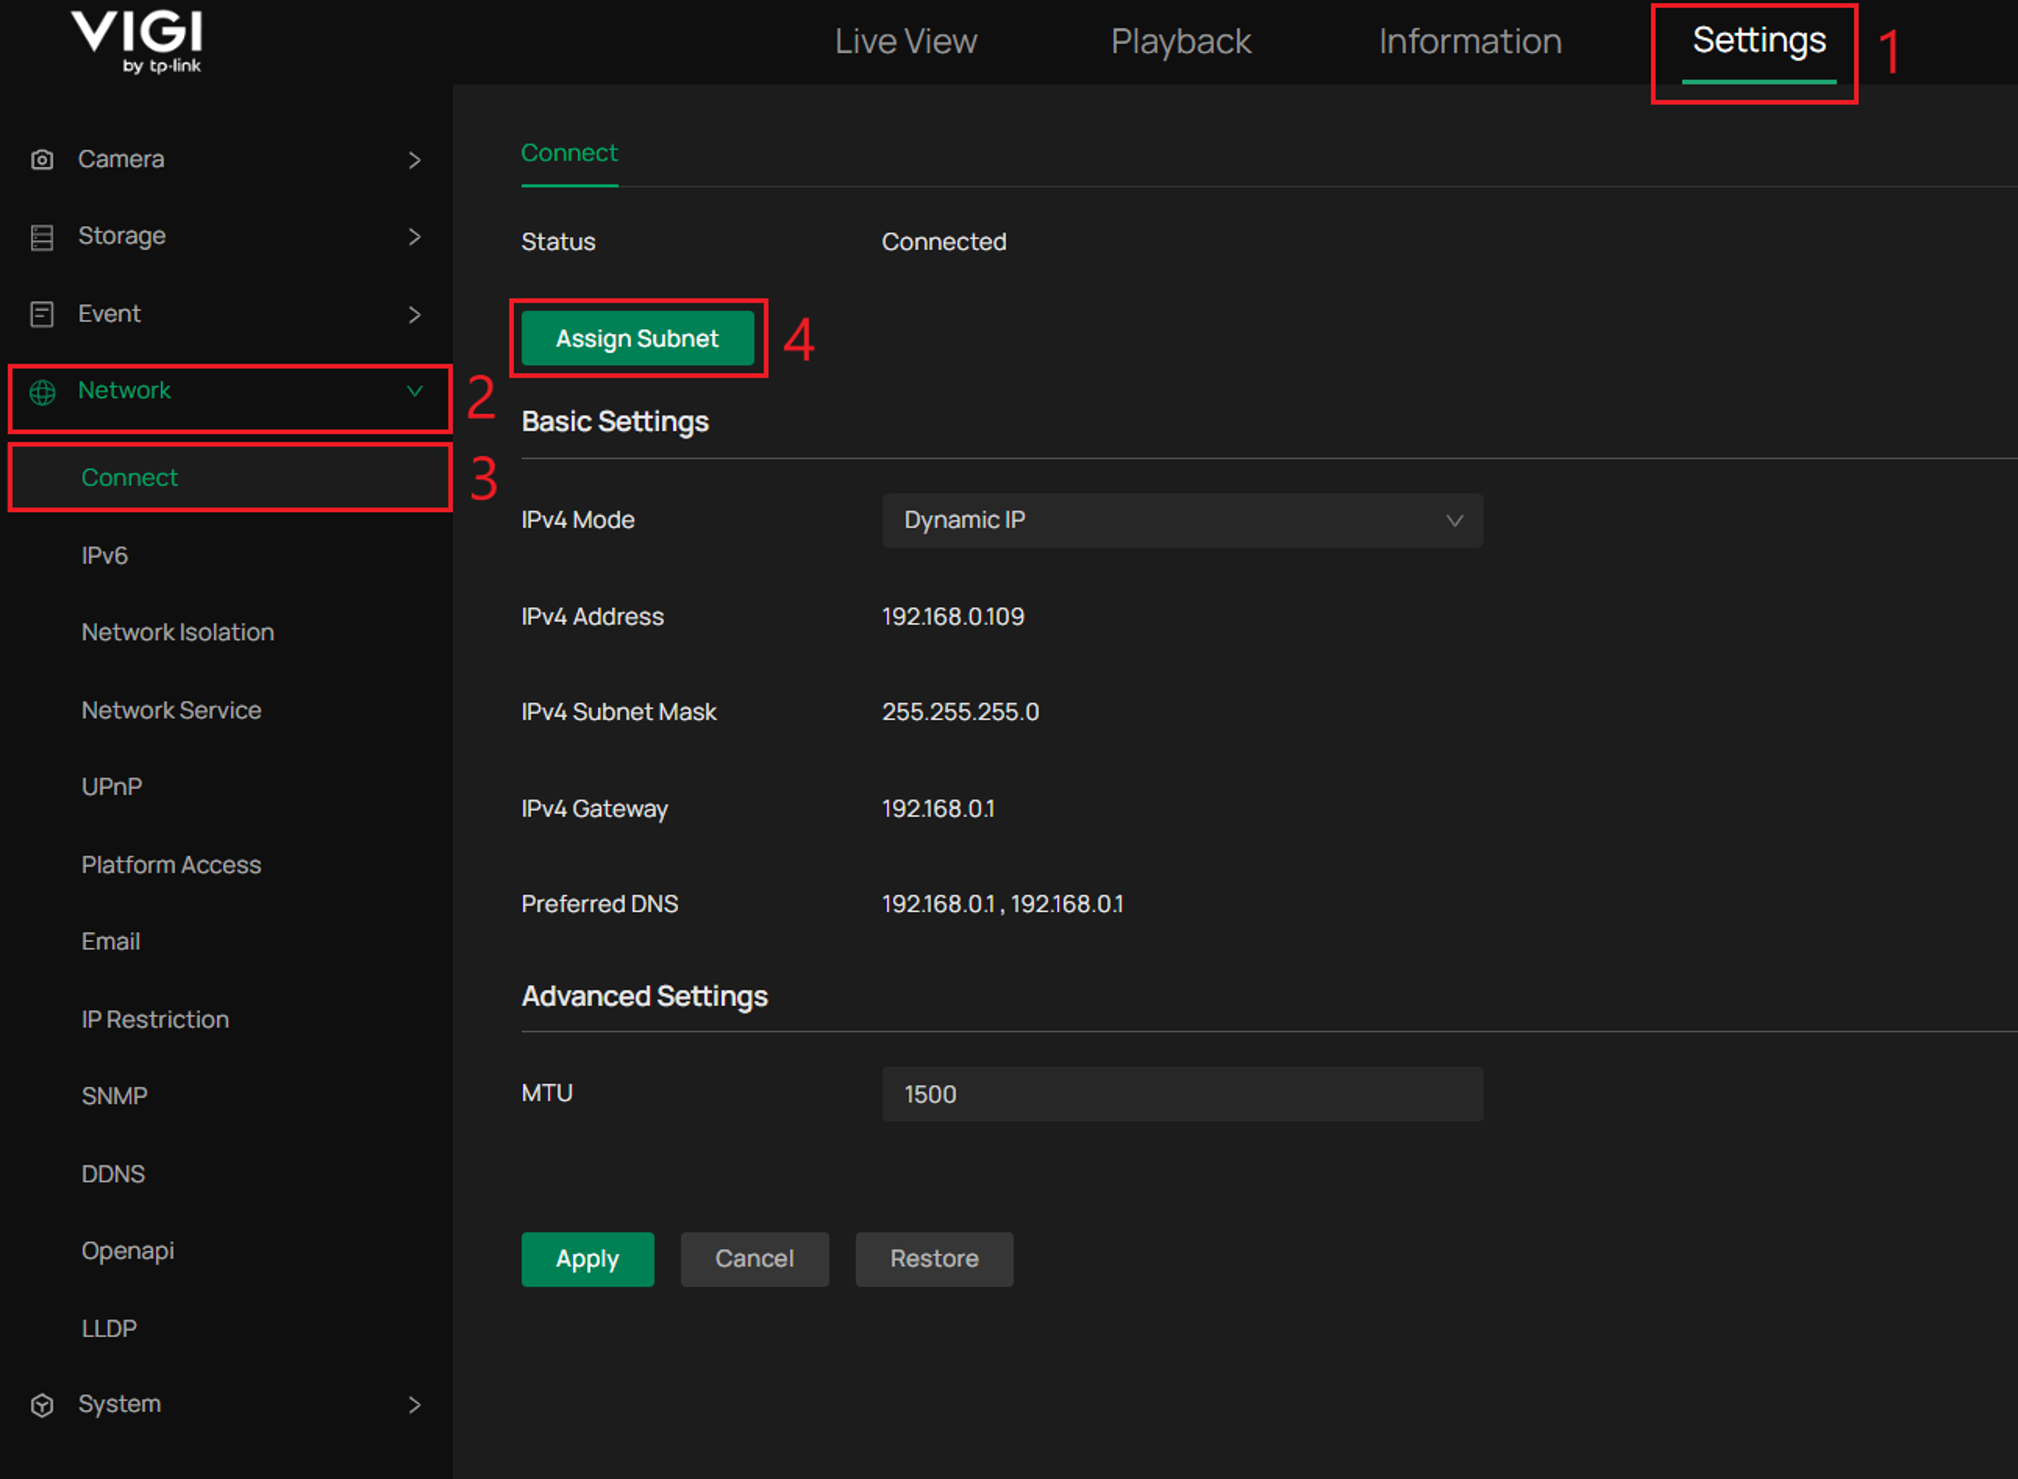
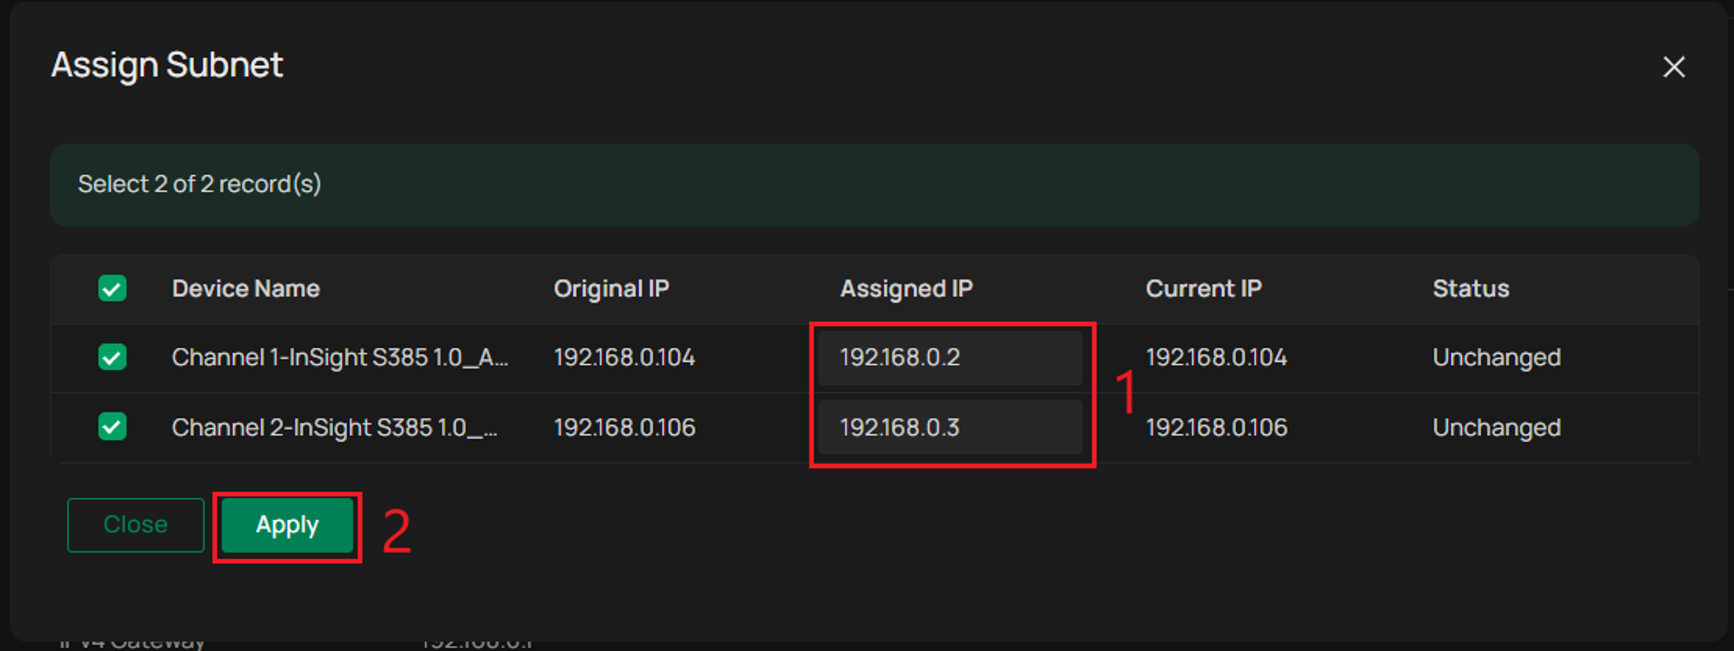
Step 3. Enter the desired IP address for each selected IPC, then select Apply.
Conclusion
You have now changed or specified the IP address of your VIGI camera using the camera WebUI, VIGI software, or a VIGI NVR.
To learn more about each function and configuration, please visit Support Home to download or check the manual for your product.
QA
Q1: Why can I no longer access the VIGI camera after changing its IP address?
A1: Ensure that your PC and the camera are on the same subnet and access the camera using its new IP address.
Q2: Why does the VIGI camera show as disconnected after I change its IP address?
A2: Ensure that the new IP address, subnet mask, and gateway match the network where the camera is connected. If the camera is managed by an NVR, verify that the NVR is using the camera's new IP address.
Q3: What should I do if I do not know the current IP address of the VIGI camera?
A3: You can locate the camera using a VIGI management tool or check the DHCP client list on the network's DHCP server.
Q4: Can I configure the VIGI camera with an IP address on a different subnet?
A4: Yes, but the camera must remain reachable from the device managing it. Ensure that the appropriate gateway and routing configuration are available between the networks.
Q5: Why can I view but not modify the network settings in VIGI PC Client?
A5: When the camera is managed using a TP-Link ID, its network settings can only be viewed. Log in using a local account to modify the network parameters.
Q6: Can I assign the same static IP address to multiple VIGI cameras?
A6: No. Each camera should use a unique IP address to prevent an IP address conflict.
Q7: What happens if I assign an IP address that is already being used by another device?
A7: An IP address conflict may occur and prevent one or both devices from communicating correctly. Select an unused IP address instead.
Q8: Can I change the IP addresses of multiple VIGI cameras at the same time?
A8: Yes. Supported VIGI management interfaces provide batch IP modification options for configuring multiple cameras.
Q9: Do I need to remove a camera from the VIGI NVR before changing its IP address?
A9: Not for every method. The NVR provides options for modifying the IP address of cameras before or after they have been added.
Q10: Should I use DHCP or a static IP address for a VIGI camera?
A10: A static IP address can make the camera easier to locate and manage because its address does not change. Ensure that the selected address does not conflict with another device.
Looking For More
Is this faq useful?
Your feedback helps improve this site.



TP-Link Community
Still need help? Search for answers, ask questions, and get help from TP-Link experts and other users around the world.