How to configure my RE200/RE210 via Web GUI to extend an existing wireless network’s coverage
- Plug your RE200 into a power outlet near your wireless router or AP.
- Use an Ethernet cable to connect your RE200 to your PC. If Ethernet connection is not available, please connect the Tplink extender wireless network (default network name is TP-LINK_Extender xxxxxx, no password required) via your PC/pad/phone.
Now let’s begin configuring RE200:
1. Log into the Web GUI of RE200 using its default IP: 192.168.0.254 or its domain name: tplinkextender.net or tplinkrepeater.net.
Follow the Quick Setup, and click “Next” to continue.

2. Select your Region here, and then click “Next”.

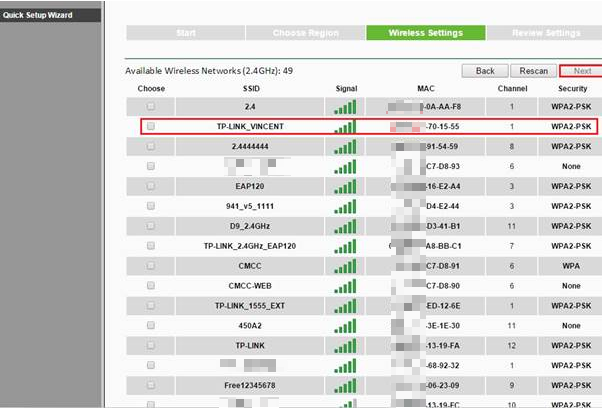
3. Now your RE200 will scan all the wireless networks around. Since RE200 is a dual band Ranger Extender, it’ll scan and configure Wi-Fi 2.4G first, then scan and configure Wi-Fi 5G.

Then please choose the wireless network you want to extend, click “Next”.
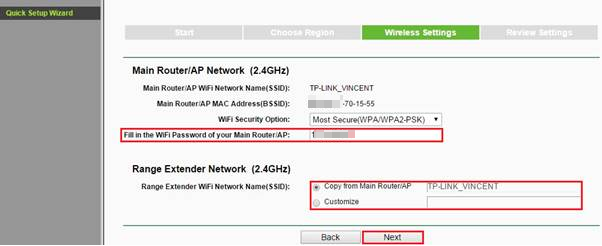
4. Now input the password of the wireless network you want to extend, and click “Next”.
Note:
- If you choose “Copy from Main Router/AP”, your RE200 will have the same Wi-Fi name as your main Router/AP. In this way you can set up a roaming network: your wireless clients can switch to the wireless network with the better signal strength either from your main Router/AP or your RE200. However, the roaming experience will be decided by your wireless clients. For more detail information about “roaming”, please refer to: www.tp-link.com/en/FAQ-592.html.
- If you choose “Customize”, your RE200 will have a different Wi-Fi name. It will be xxx_EXT(xxx is the Wi-Fi name of your main Router/AP) by default, but you can name it whatever you like. In this way you can’t experience “roaming network” but you can manually choose to connect to either Wi-Fi from your main Router/AP or RE200 according to the signal strength your wireless clients get.
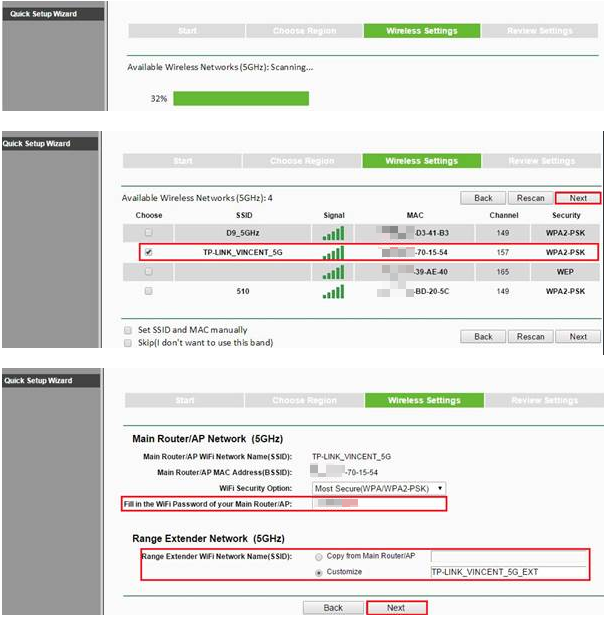
5. Now we can configure Wi-Fi 5G, it’s the same step as 2.4G.
Note:
If your main Router/AP is a single band (2.4G) Router/AP, you can still use RE200 to extend your wireless network. For more details about RE200’s application scenarios, please refer to: Different Application Scenarios to use the RE200
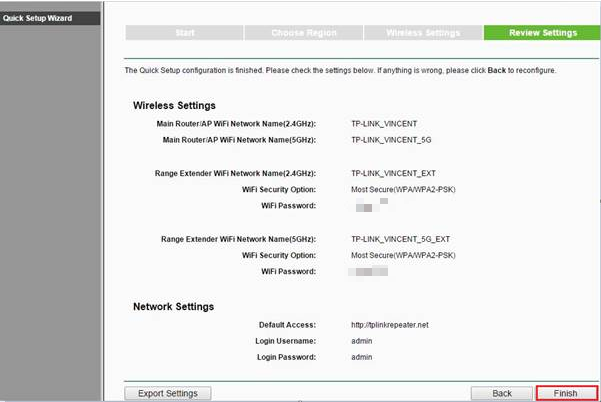
6. Here we can review all the settings we made just now, click “Finish” if it’s ok.
7. Now RE200 will reboot itself to make all settings take effect.

After the reboot, we need to check whether the settings take effect, which is to check whether your RE200 has successfully been connected to your main Router/AP and can go to Internet successfully. There are two methods:
- Connect your PC to your Ranger Extender (RE200/RE210) via an Ethernet cable, and check whether your PC can go to Internet successfully.
- Check the wireless signal LED light of your Ranger Extender (shown as the pictures below). If the 2.4G and 5G wireless signal LED are on, it means your Ranger Extender has been successfully connected to the main Router!
Note: If the wireless signal LED is still off, it means you haven’t configured your RE200 correctly. In this situation, please repeat the steps above again. If there is still a problem, please feel free to contact TP-Link tech support.


8. Then you can put RE200/RE210 in a proper place where you want to extend the wireless network’s coverage, and enjoy the extended wireless network.
Get to know more details of each function and configuration please go to Download Center to download the manual of your product.
Is this faq useful?
Your feedback helps improve this site.


TP-Link Community
Still need help? Search for answers, ask questions, and get help from TP-Link experts and other users around the world.