How to Configure TP-Link Range Extender via Web GUI
Before You Start
1. Plug your RE200 into a power outlet near your wireless router or AP.
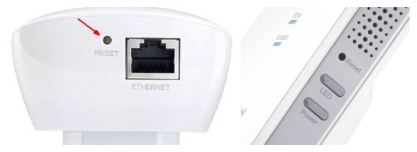
2. Factory Reset Your Extender. With the extender powered on, use a pin to press the RESET button (pinhole) until all the LEDs flash once.
3. Ensure the correct Wi-Fi password for your main router. Forget router Wi-Fi on your mobile phone and manually input the Wi-Fi password to verify that the router’s Wi-Fi password is correct. ( Phone Settings > Wi-Fi >tap router's Wi-Fi SSID to forget network or long-press Wi-Fi name to delete the Wi-Fi profile). Or check the Wi-Fi password on the router's Wireless settings management page.
Configuration
Follow the steps below to set up the range extender:
Interfaces may vary by model, so please refer to the actual interface.
1. Use an Ethernet cable to connect your extender to your PC. If the Ethernet connection is not available, please connect your PC/pad/phone to the TP-Link extender wireless network (default network name is TP-LINK_Extender xxxxxx, no password required).
2. Log into the Range extender by typing http://tplinkrepeater.net or http://192.168.0.254 in the address bar of the web browser (such as Internet Explorer, Google Chrome). A little window will pop out and ask you for the username and password. You may create a new one or use the default username and password, both of which are "admin" (in lowercase).
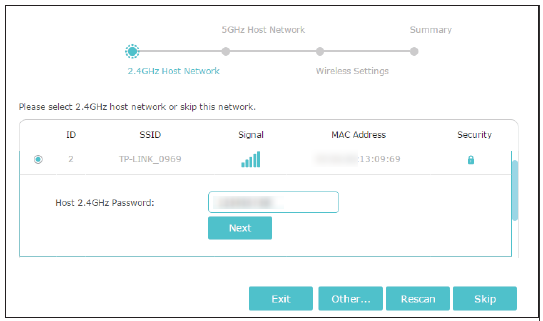
3. Select your host router’s 2.4GHz SSID (network name), enter its password (NOT the password you just created for management), and click Next.
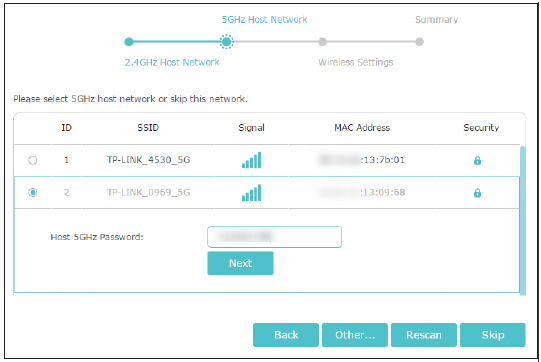
4. Select your host router’s 5GHz SSID (network name), enter its password (NOT the password you just created for management), and click Next.
Tips:
- If your host router does not support a 5GHz wireless network, please click Skip to continue.
- During the configuration of the range extender, if you cannot find your host Wi-Fi network, refer to " Cannot Find the Host Network When Setting up TP-Link Range Extender to do troubleshooting
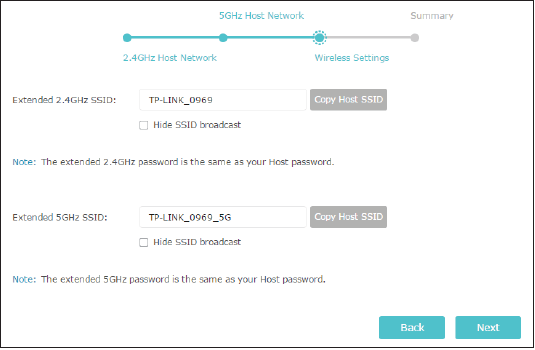
5. If you choose Copy Host SSID, your extender will have the same Wi-Fi name as your main Router/AP.
If you customize it yourself, your extender will have a different Wi-Fi name. It will be xxx_EXT (xxx is the Wi-Fi name of your main Router/AP) by default, but you can name it whatever you like.
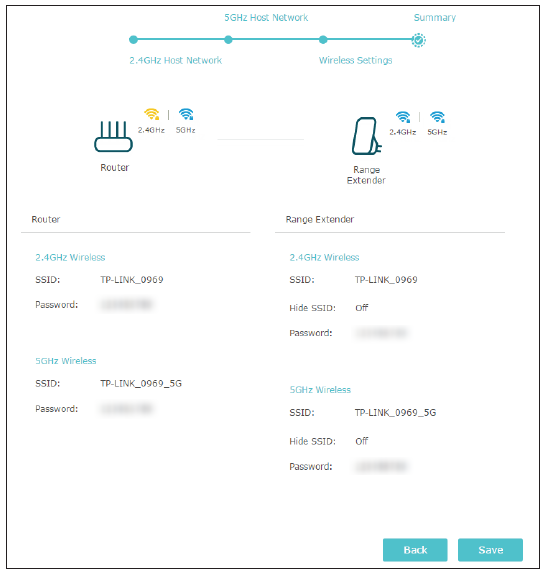
6. Verify your wireless settings and click Save. The corresponding LED(s) (2.4GHz or 5GHz) should be on.
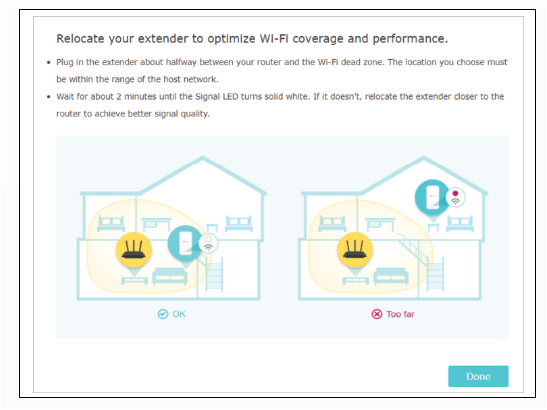
7. Follow web instructions to relocate your extender for optimal Wi-Fi coverage and performance, and then click Done.
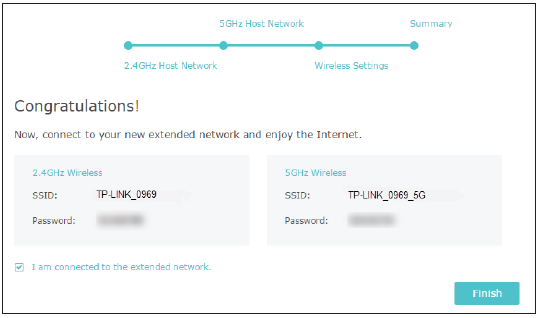
8. Enjoy! Connect to the extended network and enjoy the Internet. Both extended networks share the same wireless passwords as those of your host networks, but may have different network names if you have customized the SSIDs during the configuration.
QA
Q1: Are there other ways to configure the Range extender?
How to configure Range Extender via Tether app
How to configure Range Extender via WPS button
To get to know more details of each function and configuration, please go to the Download Center to download the manual for your product.
Looking for More
Is this faq useful?
Your feedback helps improve this site.


TP-Link Community
Still need help? Search for answers, ask questions, and get help from TP-Link experts and other users around the world.