How to set up my TP-Link Smart Plug or Switch via the Kasa app
For ease of setup of your Kasa smart plug or switch, we recommend viewing our smart plug or smart switch setup below:
TP-Link smart devices can be controlled both locally and remotely via the Kasa App, allowing you to turn your home intuitively and easily into a smart home. This steps in this article are designed to show you how to connect your TP-Link Smart Plug/Switch to your home network.
Note:
If your Apple device is IOS 14 or above, please have the "Local Network" enabled first following the FAQ
Before we begin:
1. Please download and install the Kasa Smart app from the App Store or Google Play.
2. Connect your smartphone to your home Wi-Fi network (2.4 GHz only).
3. Plug your Smart Plug into a power outlet.
The HS110 Smart Plug is used as an example in this case.
How to configure a TP-Link Smart Plug via the Kasa App
1. Open the Kasa App and log in using your TP-Link ID / Cloud account.
a. If you don’t have an account, please sign up for one using the steps outlined in How to create a TP-Link Cloud Account on Kasa
b. Log in to the Kasa App with your TP-Link ID / Cloud account.
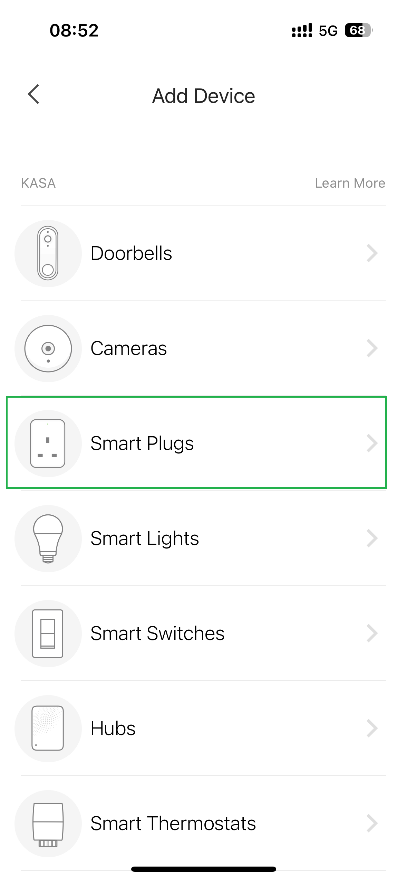
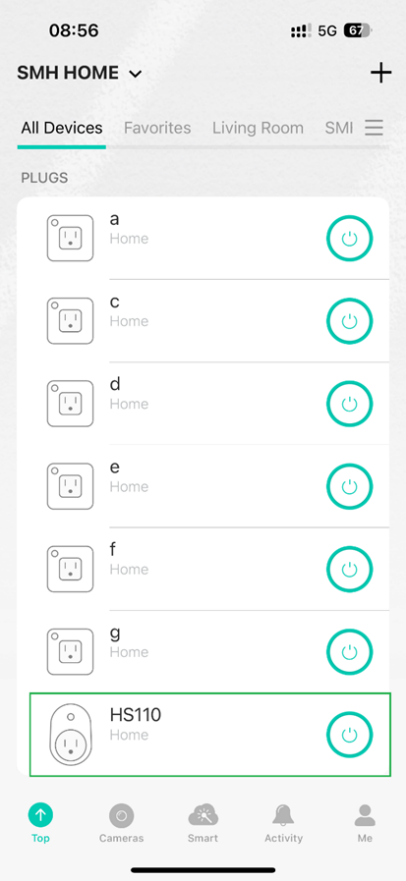
2. Add your Smart Plug on Kasa APP. Tap “+” and “Add a Device”, then click on “Smart plug” and choose an icon according to your model number.
z

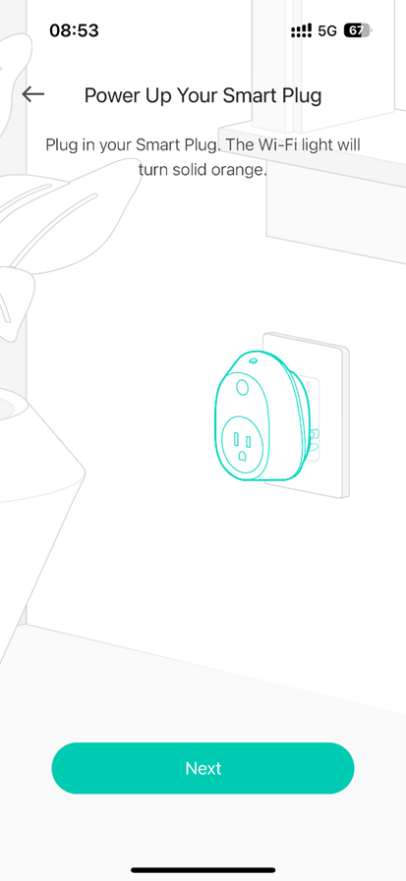
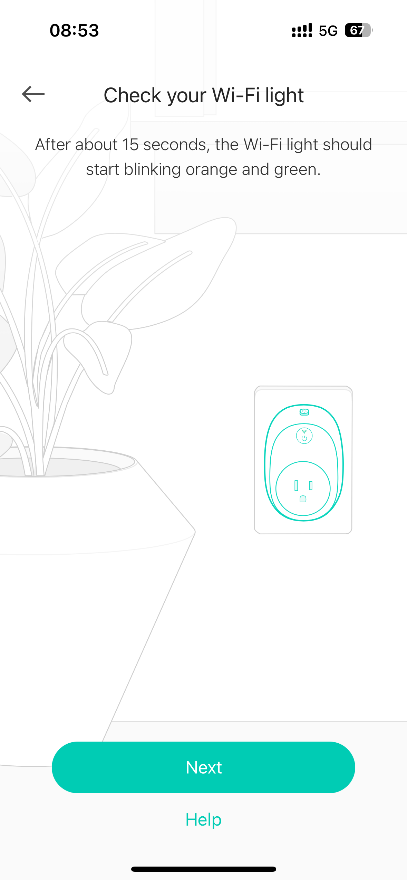
3. Follow the instructions in the Kasa app, power on the HS110, and wait for the Wi-Fi light to blink orange and green.
If the light does not blink orange and green, please reset the HS110 as per the User Guide/Quick Installation Guide.
4. Connect your phone to the Smart Plug’s Wi-Fi. Please note that the process varies between Android and for this step.
For Android: The Kasa app will look for your Kasa device automatically. This may take about a minute.
If you encounter any difficulty with this step, please go to Settings → Wi-Fi on your smart phone and manually connect to the smart plug’s Wi -Fi network.
Note
If a message appears on your phone stating, “this Wi-Fi network is unsecured/unprotected, your privacy and data may be at risk” and presents you with 2 options. Please select, "connect anyway/keep using this Wi-Fi/stay connected", then continue the setup. This connection is not Internet-facing and is only temporarily established between the smart plug and your smartphone to facilitate the setup process. The smart plug will be protected and secured by your Wi-Fi network’s encryption once setup is completed.
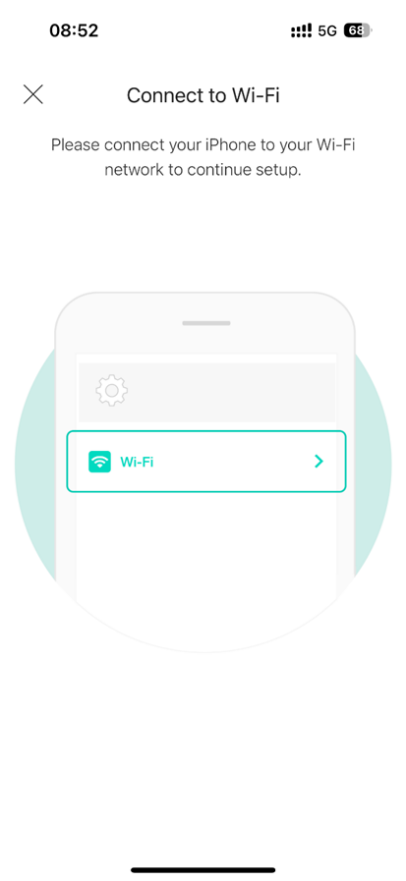
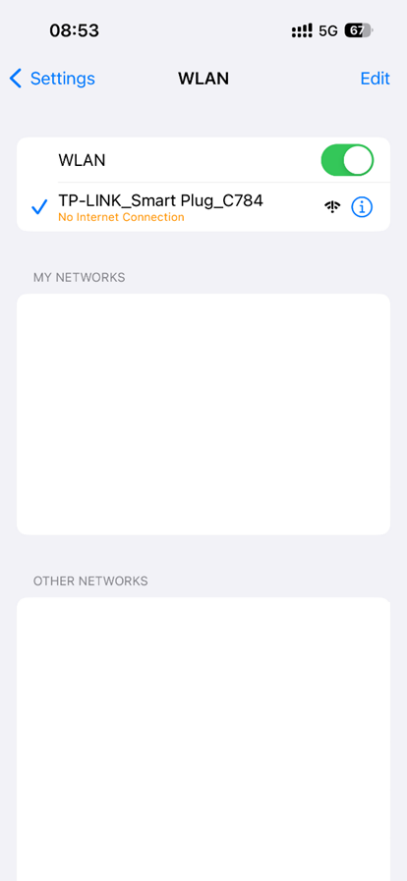
For iOS: You will need to connect to the smart plug’s Wi-Fi network manually. Please go to Settings → Wi-Fi on your smart phone and connect to the smart plug’s Wi-Fi network. The smart plug’s name should appear as “TP-LINK_Smart Plug_XXXX”. Then, return to the Kasa app and continue the setup process.
Note
After connecting to the device’s Wi-Fi, it will prompt that there is No Internet Connection. This message can be ignored, then return to Kasa app to continue the setup.
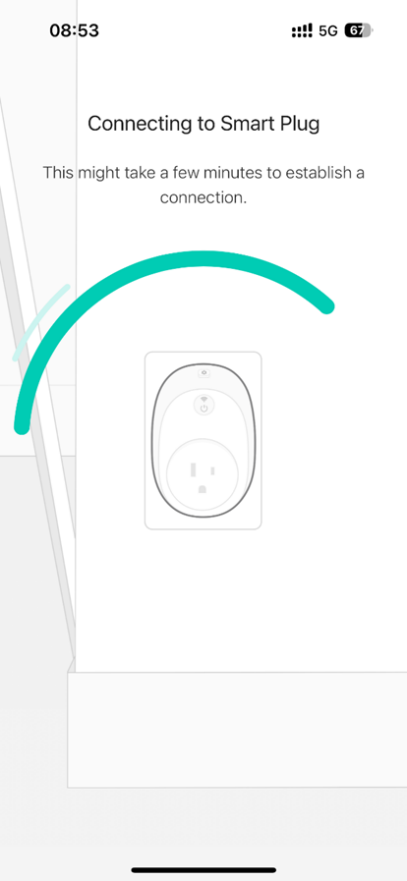
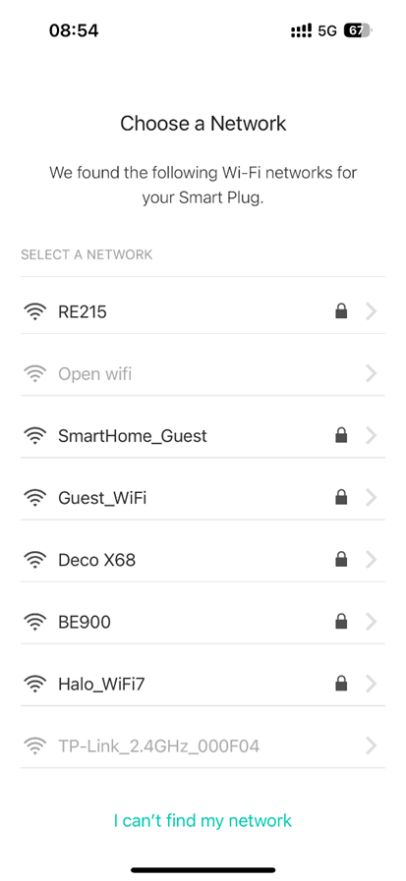
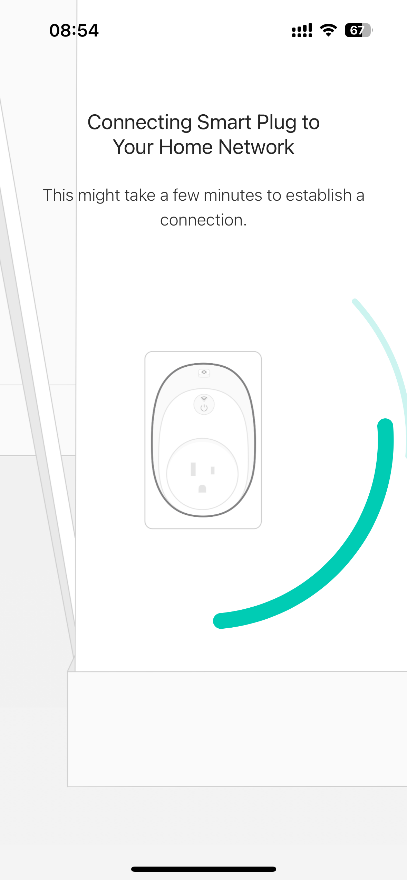
5. Connect the smart Plug to your home network. If you cannot find your home network in the Wi-Fi list, please tap “Join Other Network” at the bottom of the Wi-Fi list, then enter your home network SSID and password manually. After this step, your smart plug will be connected to your home network.
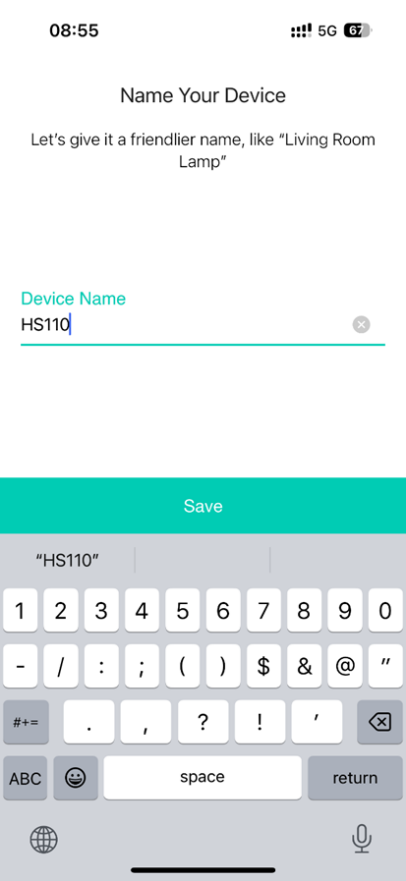
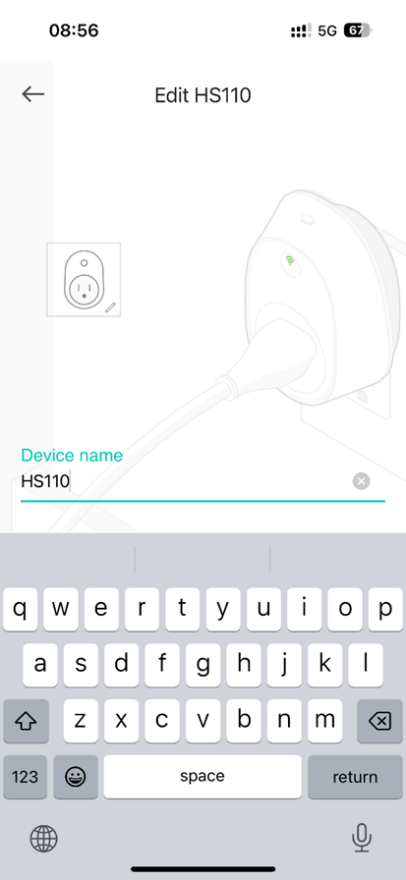
6. Name your smart plug.
7. Customize an icon for this Smart Plug. We can choose an icon from the list, choose from the “Albums” of our smartphone, or take a photo and assign it to the device.

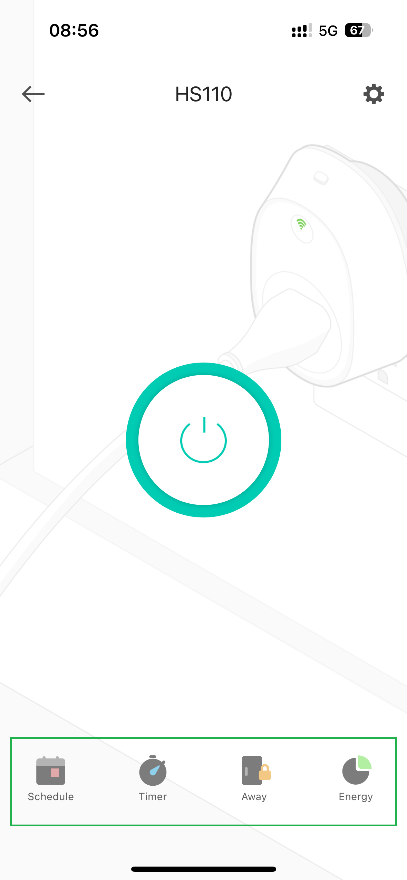
8. Tap the Smart Plug icon and you will see an interface like the one in the screenshot below. From here you can configure the advanced settings of the smart plug, such as Schedule/Timer/Away.
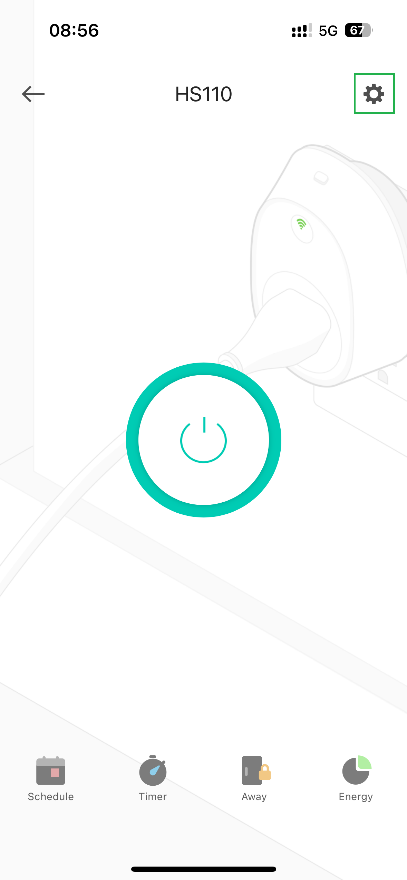
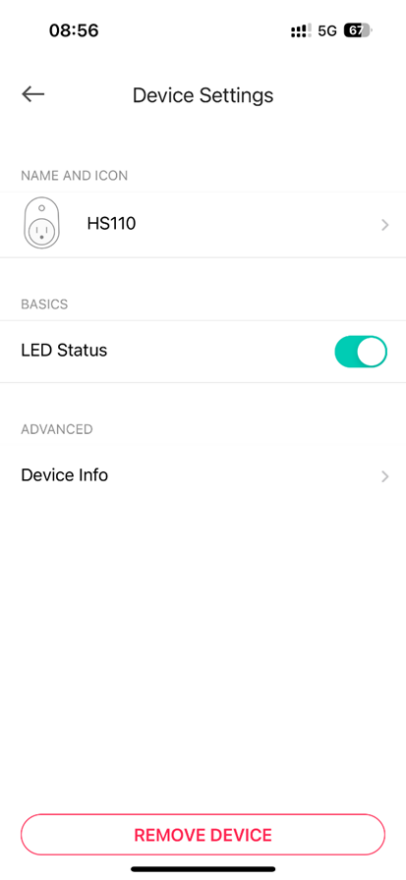
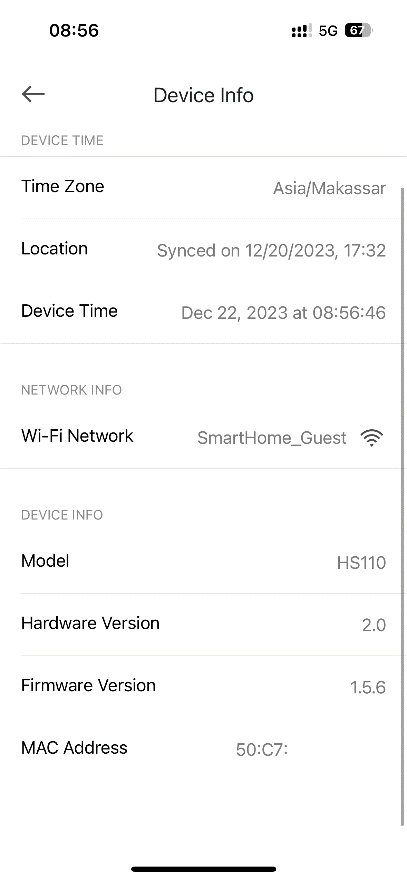
9. Tap ![]() to enter the Device Settings menu. Tap “Name and Icon”, where you can edit the name and icon of the smart plug. Tap “Device Info” to view basic information about the smart plug.
to enter the Device Settings menu. Tap “Name and Icon”, where you can edit the name and icon of the smart plug. Tap “Device Info” to view basic information about the smart plug.
If you encounter difficulty with any of these steps, devices, please refer to the troubleshooting guide: What should I do if I fail to configure the Kasa device?
Note
If you run into any issues when following the above steps, you can press and hold the reset button to reset the smart plug/switch as per the User Guide/Quick Installation Guide.
More features to consider
After completing setup, you may want to use voice control integration services such as Amazon Alexa or Google Assistant to help manage and automate the device. If you would like to utilize either of these services, please to the FAQs below for configuration instructions:
Is this faq useful?
Your feedback helps improve this site.
1.20-L-package_normal_20230906071321t.png)


TP-Link Community
Still need help? Search for answers, ask questions, and get help from TP-Link experts and other users around the world.