Quick Start Guide (Standalone EAP)
CHAPTERS
1. Determine the Management Method
5. Configure and Manage the EAP
|
|
This guide applies to: EAP225-Outdoor 1.0, EAP110-Outdoor 3.0, EAP110 4.0, EAP115 4.0, EAP115-Wall 1.0, EAP225-Wall 2.0, EAP225 3.0, EAP245 3.0, EAP320 2.0, EAP330 2.0. |

This guide introduces how to build a wireless network using the EAPs and how to complete the basic settings:
1. Determine the Management Method
2. Build the Network Topology
3. Log In to the EAP
4. Edit the SSID
5. Configure and Manage the EAP
The following parts detailedly introduces these steps.
1Determine the Management Method
Before building the wireless network, choose a proper method to manage the EAP based on your actual network situation. There are two methods: via EAP Controller and via the web page of the EAP.
Via EAP Controller
If you want to establish a large-scale wireless network and have mass EAPs to be managed, we recommend that you use EAP Controller to centrally manage the EAPs. In such case, the EAPs work in FIT mode.
For detailed instructions about the network topology in such situation and how to use EAP Controller, refer to the User Guide of EAP Controller. To download EAP Controller and its User Guide, go to http://www.tp-link.com/en/download/EAP-Controller.html.
Via the Web Page of the EAP
If you have a relatively small-sized wireless network and only one or just a small number of EAPs need to be managed, you can directly use the web browser to manage each EAP on its own management web page. In such case, the EAP works in Standalone mode (FAT mode), which means that it works independently as a standalone access point.
This guide introduces how to configure the Standalone EAP on its web page.
|
|
Note: The web page of an EAP is inaccessible while it is managed by EAP Controller. To turn the EAP back to Standalone mode and access its web page, you can forget the EAP on EAP Controller to reset the EAP or simply close EAP Controller. |

To manage the EAPs in Standalone mode, refer to the following topology.
Figure 2-1 Network Topology
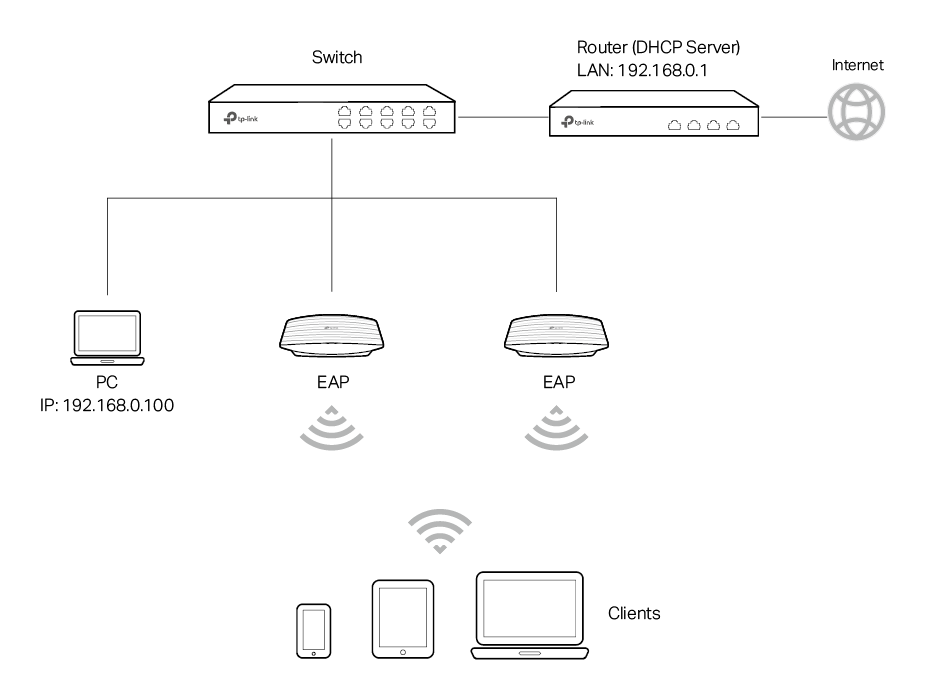
The router is the gateway of the network, and devices in the LAN surf the internet via the router. At the same time, the router acts as a DHCP server to assign dynamic IP addresses to the EAPs and clients.
The layer 2 switch is connected to the LAN interface of the router.
The PC and the EAPs are all connected to the layer 2 switch. Since the PC and the EAPs are in the same network segment, the PC can log in to the web pages of the EAPs and manage them.
There are two methods to log in to the EAP. You can choose one as you like: Log In via the Domain Name and Log in via the IP Address of the EAP.
|
|
Note: EAP320 and EAP330 are not currently available for login via domain name. |
In this method, you needn’t know the IP address of the EAP, but you need to prepare a wireless client device, such as a wireless laptop. Follow the steps below to log in to the EAP wirelessly:
1)Find the default SSID of the EAP. The SSID is printed on the product label at the bottom of the device, and the format is TP-LINK_2.4GHz/5GHz_XXXXXX.
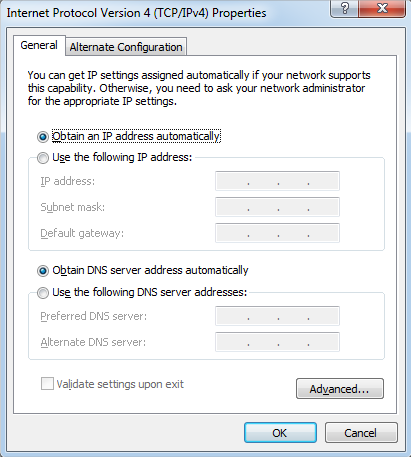
2)Make sure that the wireless client device gets IP settings assigned automatically.
Figure 3-1 Configuring IP Address
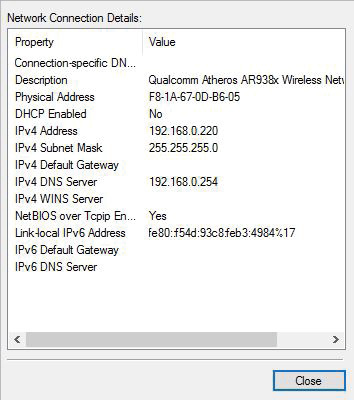
3)Make sure that the wireless client has been assigned with an IP address and has got the IP addresses of the DNS server and the gateway.
Figure 3-2 Getting IP Address
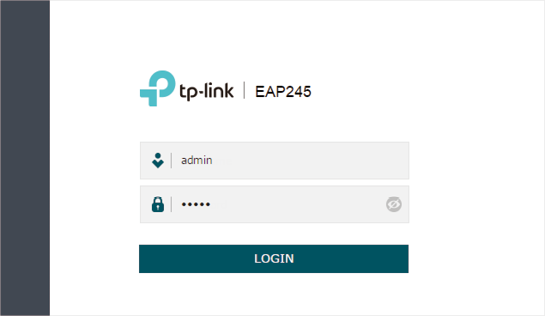
4)Search the default SSID using your wireless client device and connect to the wireless network of the EAP. Launch a web browser on the client device and enter http://tplinkeap.net in the address bar to load the login page of the EAP. Use admin for both of the username and password to log in.
Figure 3-3 Logging In
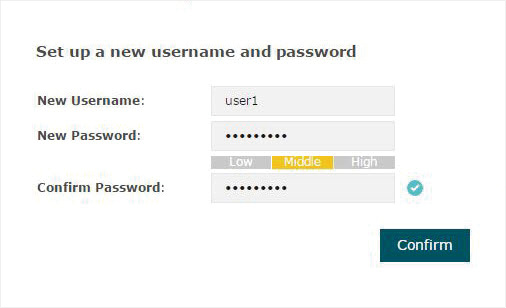
5)In the pop-up window, configure a new username and a new password for your user account.
Figure 3-4 Setting Username and Password
6)Use the new username and password to log in.
Figure 3-5 Using New Account to Logging In
|
|
Tips To facilitate access to the EAP via a wired device, you can set a static IP address for the EAP and remember it well or write it down. But make sure that this IP address is not being used in the same LAN. |
3.2Log In via the IP Address of the EAP
To log in to the EAP through the Ethernet cable, you need to know the IP address of the EAP. Follow the steps below to log in via the IP address of the EAP:
1)Get the IP address of the EAP. There are two methods.
Log in to the router which acts as the DHCP server. In the DHCP client list, find the IP address of your EAP according to its MAC address. The MAC address can be found at the bottom of the EAP.
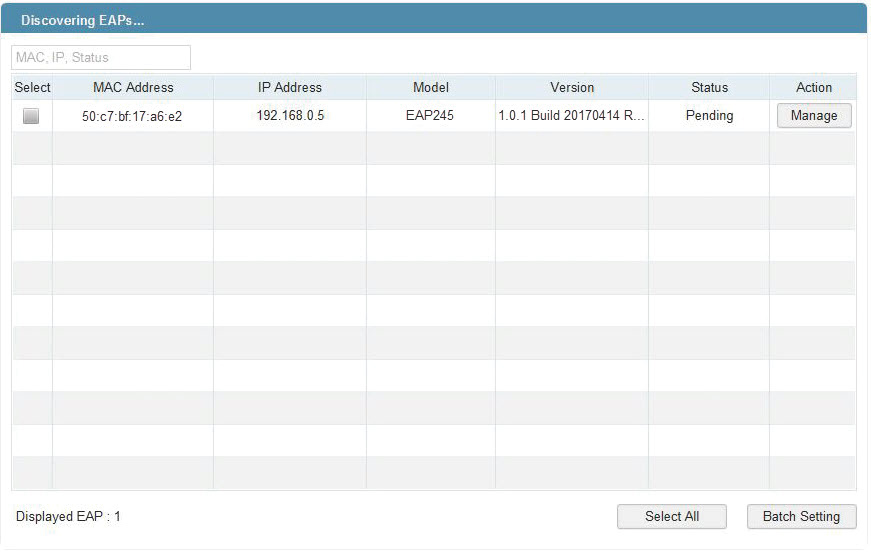
Go to http://www.tp-link.com/en/download/EAP-Controller.html#EAP_Discovery_Tool to download EAP Discovery Utility. EAP Discovery Utility is a software that can scan all EAPs in the same network segment. Install and launch EAP Discovery Utility on the PC, and find the IP address of the EAP. In the following figure, the IP address of the EAP is 192.168.0.5.
Figure 3-6 Discovering EAP
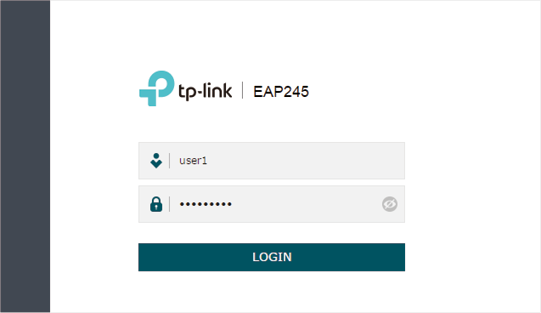
2)Launch a web browser and enter 192.168.0.5 in the address bar to load the login page of the EAP. Use admin for both of the username and password to log in.
Figure 3-7 Logging In
3)In the pop-up window, configure a new username and a new password for your user account.
Figure 3-8 Setting New Username and Password
4)Use the new username and password to log in.
Figure 3-9 Using New Account to Logging In
|
|
Tips To facilitate access to the EAP via a wired device, you can set a static IP address for the EAP and remember it well or write it down. But make sure that this IP address is not being used in the same LAN. |
By default, the dual-band EAP has two default SSIDs named TP-LINK_2.4GHz_XXXXXX and TP-LINK_5GHz_XXXXXX on the 2.4GHz band and 5GHz band, and the single-band EAP has a default SSID named TP-LINK_2.4GHz_XXXXXX on the 2.4GHz band.
The default SSID has no password, so anyone can access the network without authentication. If your network is a private network, for security, we recommend that you change the SSID configuration immediately after login.
Follow the steps below to edit the default SSID:
1)Go to the Wireless > Wireless Settings page. In the SSIDs section, click  in the Modify column of the SSID entry.
Figure 4-1 Configuring SSID
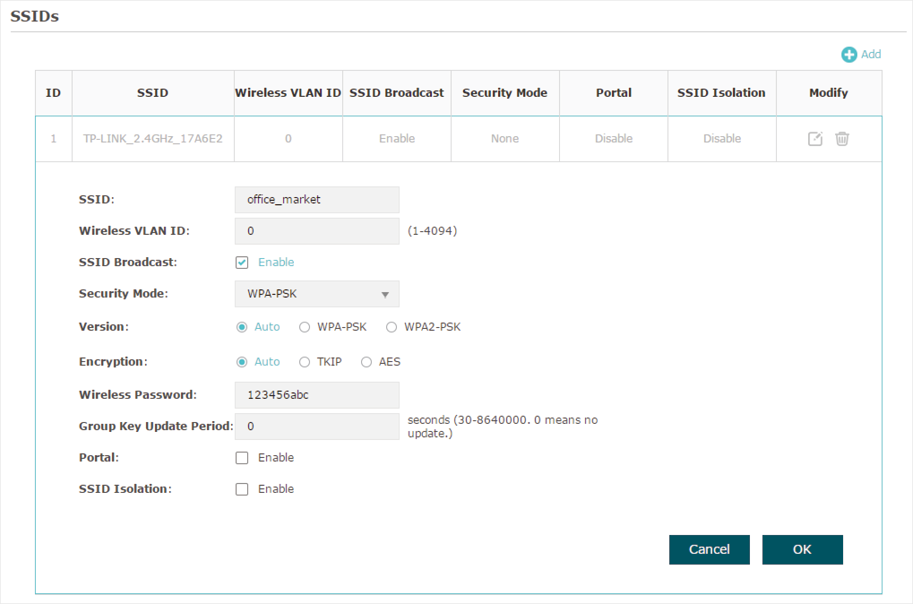
2)The following page will appear. Change Security Mode from None to WEP, WPA-Enterprise or WPA-PSK. Configure the related parameters and click OK. For security, we recommend that you choose WPA-PSK.
Figure 4-2 Editing SSID
|
|
Tips •If needed, you can also create more new SSIDs. •If your EAP is a dual-band EAP, remember to configure the SSID of the 5GHz band in the same way. |
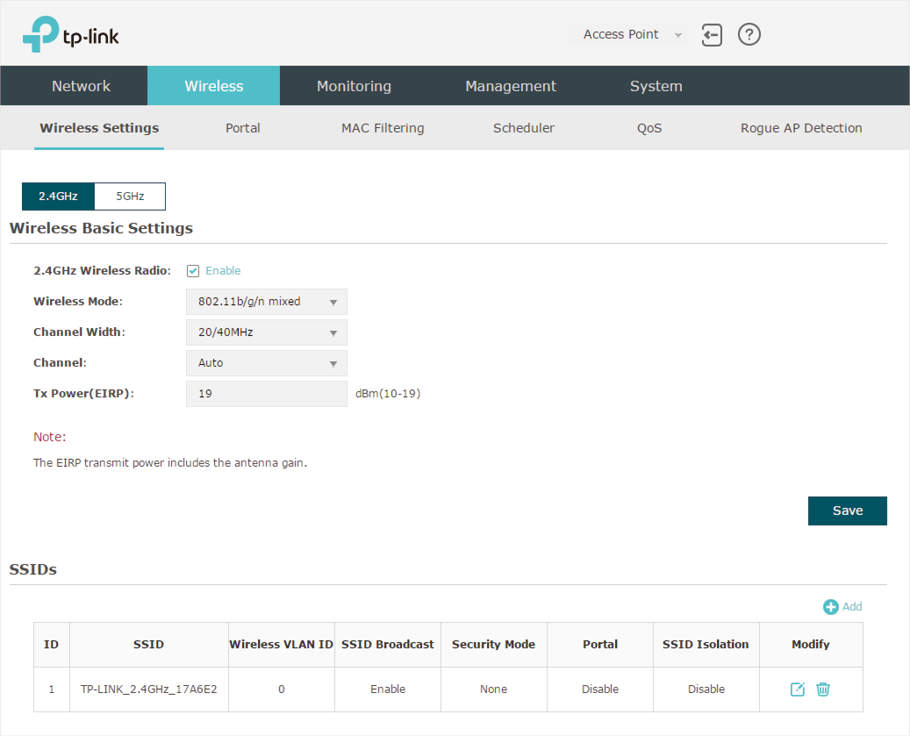
After all the steps above are completed, the legal wireless clients can enjoy the internet via the EAP. Additionally, you can configure the advanced functions of the EAP according to your need, and manage it conveniently on the web page.
Figure 5-1 Managing EAP
On the top of the page, you can click  to log out and click
  to open the technical support website.
There are five tabs: Network, Wireless, Monitoring, Management and System. The following table introduces what you can configure under each tab.
|
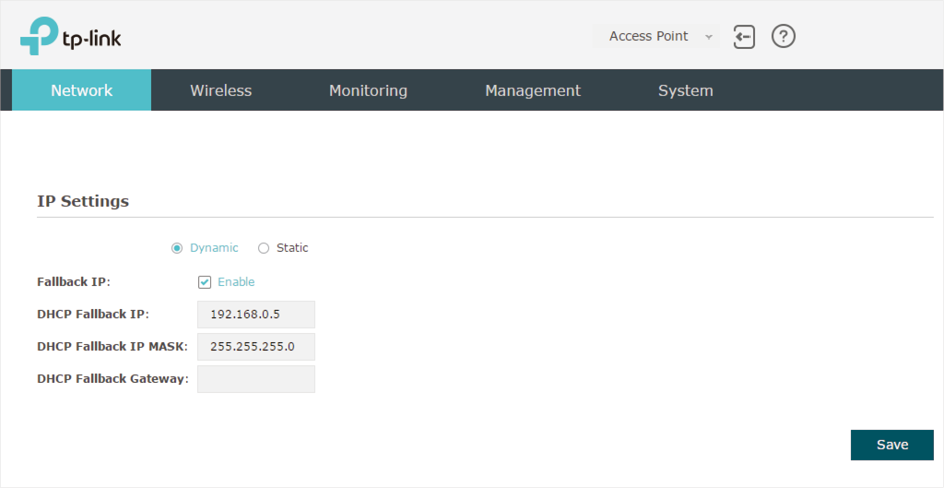
Network |
You can configure the IP address of the EAP. |
|
Wireless |
You can configure the wireless parameters and the advanced features, such as Portal, MAC Filtering, Scheduler, QoS and Rogue AP Detection. |
|
Monitoring |
You can view the information of the EAP, SSIDs and clients. |
|
Management |
You can manage the EAP using the management features, such as System Logs, Web Server, Management Access, Management VLAN and SNMP. |
|
System |
You can configure the system parameters, including the login account and the system time. In addition, you can reboot and reset the EAP, backup and restore the configuration, and upgrade the EAP using the new firmware file. |