Quick Start Guide (Pharos Control)
CHAPTERS
1. Determine the Network Topology
4. Add the Devices to be Managed
5. Monitor and Manage the Network
|
|
This guide applies to: Phaos Control 2.0. |

This guide introduces how to build a wireless network using Pharos Control:
1. Determine the Network Topology
2. Install Pharos Control
3. Log in to Pharos Control
4. Add the Devices to be Managed
5. Monitor and Manage the Network
The following parts detailedly introduces these steps.
1Determine the Network Topology
You can use Pharos Control to centrally manage the devices in the same or different network segment.
1.1Manage Devices in the Same Network Segment
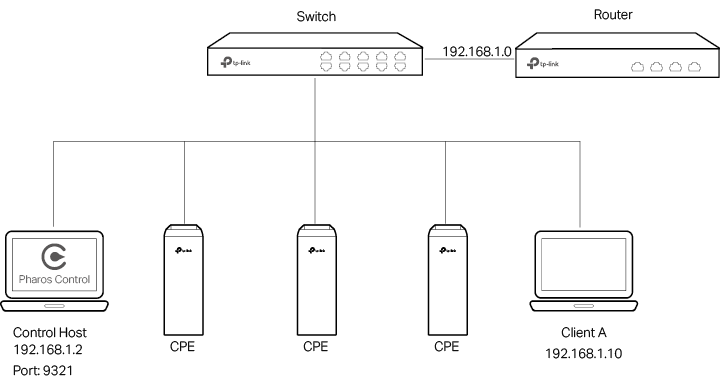
To manage devices in the same network segment, refer to the following topology.
In the LAN, one host must have Pharos Control installed, and this host is called the Control Host. Other hosts in the same subnet can access the Control Host via a web browser to manage the devices. In the following topology, you can visit Pharos Control interface from Client A by entering “http://192.168.1.2: 9321” in a web browser.
|
|
Tips: •Ensure the network reachability between Client and Control Host. •It’s recommended to assign the Control Host with a static IP address to allow more convenient login to Pharos Control interface. •To manage the Pharos devices remotely via Internet, you need to open the service port on the router. For example, here the service port number is 9321. |

Figure 1-1 Managing the device in the Same Network Segment
|
|
Note: Pharos Control server must be running at all the times while you manage the network. |
1.2Manage Devices in Different Network Segment
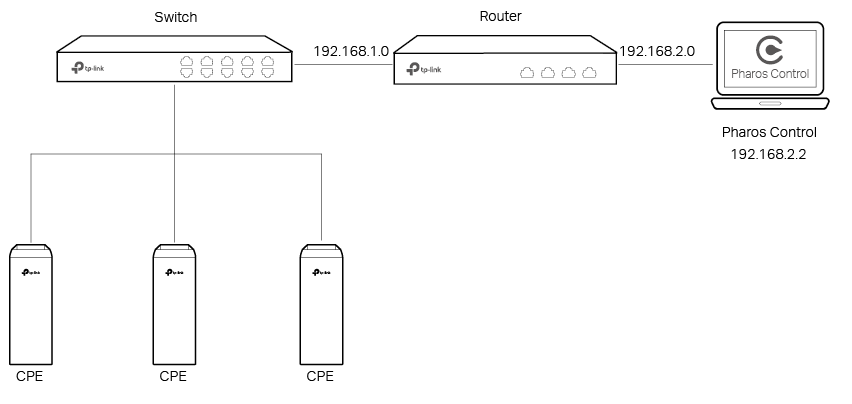
If the Control Host needs to manage devices in different network segments, refer to the following topology.
The Control Host and the devices are connected to different network segments of the router. Ensure the Pharos devices are able to reach the Control Host, and the Control Host will be able to manage the devices centrally. Similarly, other hosts on the network can access the Control Host via a web browser to manage the devices.
|
|
Tips: •The router should work in non-NAT mode. •For all the Pharos devices, make sure that firewall doesn’t block port 20002 and port 22. Port 20002 is used for discovery and port 22 is used for management by Pharos Control server. |
Figure 1-2 Managing the Device in Different Network Segment
Make sure the computer being used as the Control Host meets the system requirements and then follow the instructions below to install the Pharos Control software.
2.1System Requirements
Operating System: Microsoft Windows Vista/7/8, Linux.
Web Browser: Mozilla Firefox 32 (or above), Google Chrome 37 (or above), Opera 24 (or above), or Microsoft Internet Explorer 8 (or above).
|
|
Note: We recommend that you deploy Pharos Control on a 64-bit operating system to guarantee software stability. |

2.2Install Pharos Control Software
The installation procedures for Windows and Linux systems are different. Determine your operation system and follow the introduction below to install Pharos Control.
Installation on Windows System
Follow the steps below to install the Pharos Control software on your Windows system.
1)Go to http://www.tp-link.com/en/download/Pharos-Control.html, and download the Pharos Control software for Windows.
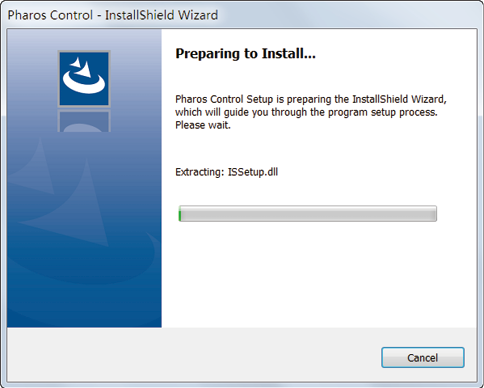
2)Double-click the icon  to execute the installation file. Please wait while the InstallShield Wizard is being prepared, as shown in the screen below.
Figure 2-1 Executing the Installation File
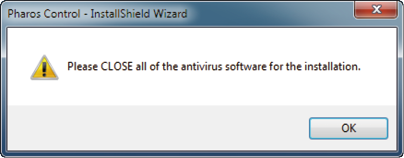
3)The following dialog box will pop up. Ensure that all the antivirus softwares are closed and click OK to continue.
Figure 2-2 Dialog Box
4)Click Next to continue.
Figure 2-3 Clicking Next
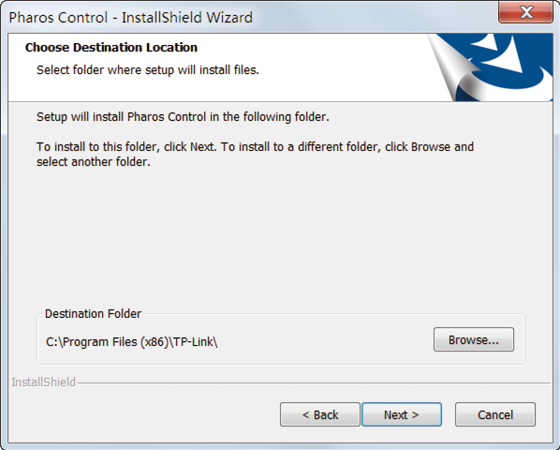
5)Choose the destination location for the installation files and click Next to continue.
Figure 2-4 Choosing the Destination location
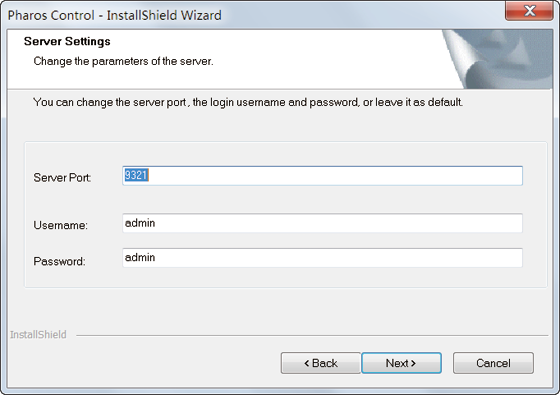
6)The following screen shows the default settings of Pharos Control. You can customize the Server Port number, Username and Password. Click Next to continue.
Figure 2-5 Customizing the Settings
|
|
Tips: •The Control Host can be accessed remotely using another host (Client Host). The Client Host can use the IP address of the Control Host and the server port number configured here to access it. For example, if the IP address of the Control Host is 192.168.0.10, and the server port is 9321, the you can enter “http://192.168.0.10:9321” in a web browser to access the Control Host from the Client Host and monitor or manage the devices. •The username and password set here will be used to log in to the Pharos Control software. Please make a note of them. |
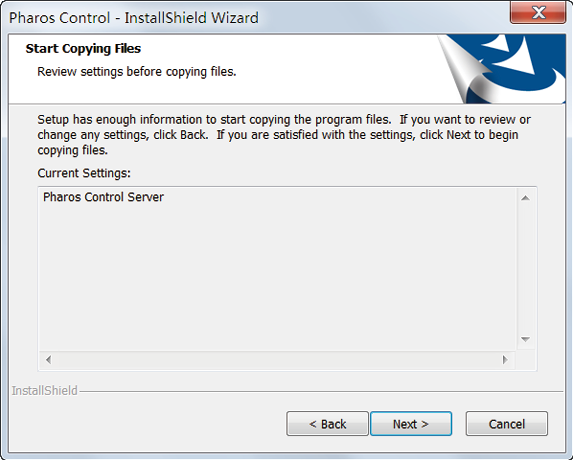
7)Click Next.
Figure 2-6 Clicking Next
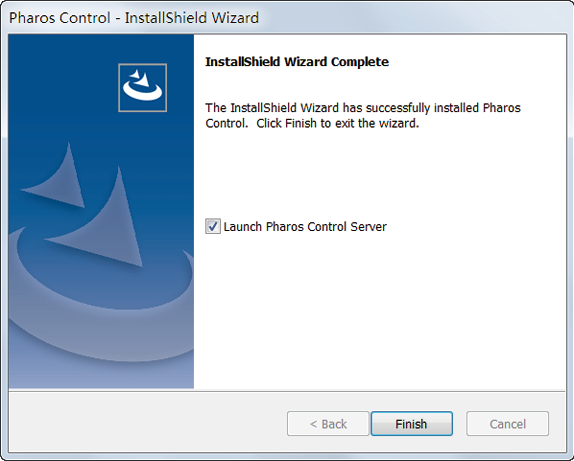
8)Wait for a moment and the following window will appear. Click Finish to complete the installation and launch Pharos Control. Additionally, a shortcut icon  for Pharos Control server will be created on your desktop.
Figure 2-7 The Finish Window
Installation on Linux System
Pharos Control is a Java application, which requires Java Runtime Environment (JRE). Make sure that your Linux system has been installed with JRE 1.7 (or above).
1)Go to http://www.tp-link.com/en/download/Pharos-Control.html and download the software package for Linux. Decompress the package and you can find three software files: one for Deb system and two for RPM system (32-bit and 64-bit). Determine your Linux system type and choose the proper software file.
2)Go to the download path of the software and enter the command line.
For Deb: sudo dpkg -i PharosControl-2.0.0-1.ub16.deb
For 32-bit RPM: sudo rpm -ih PharosControl-2.0.0-1.fc25.i686.rpm
For 64-bit RPM: sudo rpm -ih PharosControl-2.0.0-1.fc25.x86_64.rpm
3)Enter your system password.
Launch the software and follow the instructions to complete the basic configuration and then log in to the management interface.
3.1Launch Pharos Control Server
Launch on Windows System
For Windows system, double-click the software icon to launch Pharos Control server. Then the following window will pop up. You can minimize the window but do not close it.
Figure 3-1 Launching the Pharos Control Server
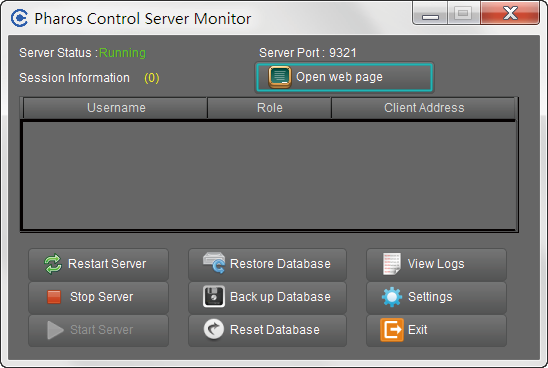
The upper half of the window displays the running status of Pharos Control. The lower half contains corresponding operation buttons. For details, refer to the following table:
|
Server Status |
Displays the status of Pharos Control. Running: Pharos Control is running normally and you can use it to manage devices. Stopped: Pharos Control is stopped. |
|
Server Port |
Displays the current server port of Pharos Control. |
|
Open Web Page |
Click this button to open the management interface with a web browser. |
|
Session Information |
Displays the information of the Client Hosts connecting to Pharos Control, including Username, Role and Client Address. You can right-click a client and choose to disconnect it. |
|
Restart Server |
Click this button to restart Pharos Control. |
|
Stop Server |
Click this button to stop Pharos Control. |
|
Start Server |
Click this button to start Pharos Control. |
|
Back up Database |
Click this button to back up the current database and save it as a backup file on your local computer. If needed, you can restore the database with this backup file. |
|
Restore Database |
Click this button to restore the database with a previous backup file. |
|
Reset Database |
Click this button to reset the database. |
|
View Logs |
Click this button and you will be directed to a file folder. Open the txt file in this folder and you can view the server logs. |
|
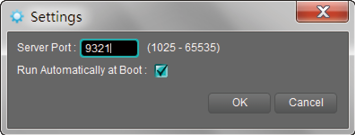
Settings |
Click this button and the following window will pop up. You can change the port setting and select whether Pharos Control will run automatically upon booting up.
|
|
Exit |
Click this button to exit Pharos Control. Note: Do not exit Pharos Control while managing and monitoring devices. |
Launch on Linux System
For Linux system, use the command sudo /etc/init.d/pharoscontrol start to launch Pharos Control server. You can also use the following commands to execute other operations:
|
sudo /etc/init.d/pharoscontrol shutdown |
Exit Pharos Control server. |
|
sudo /etc/init.d/pharoscontrol stop |
Force a shutdown of Pharos Control server. |
|
sudo /etc/init.d/pharoscontrol status |
View the current status and server port of Pharos Control server. |
|
sudo /etc/init.d/pharoscontrol list |
View the information of the client hosts connecting to Pharos Control, including username, role, client address and session number. |
|
sudo /etc/init.d/pharoscontrol kick [session] |
Disconnect the specific Client Host using its session number. |
|
sudo /etc/init.d/pharoscontrol reset |
Reset the database. |
|
sudo /etc/init.d/pharoscontrol backup [file directory] |
Back up the current database and save it as a backup file on your local computer. If needed, you can restore the database with this backup file. |
|
sudo /etc/init.d/pharoscontrol restore [file directory] |
Restore the database with a previous backup file. |
|
|
Tips: To change the server port number of Pharos Control, you can open the file /opt/pharoscontrol/conf/setting/me.properties, find the field “port=9321”, and change “9321” to your desired port number. |
3.2Log in to the Management Interface
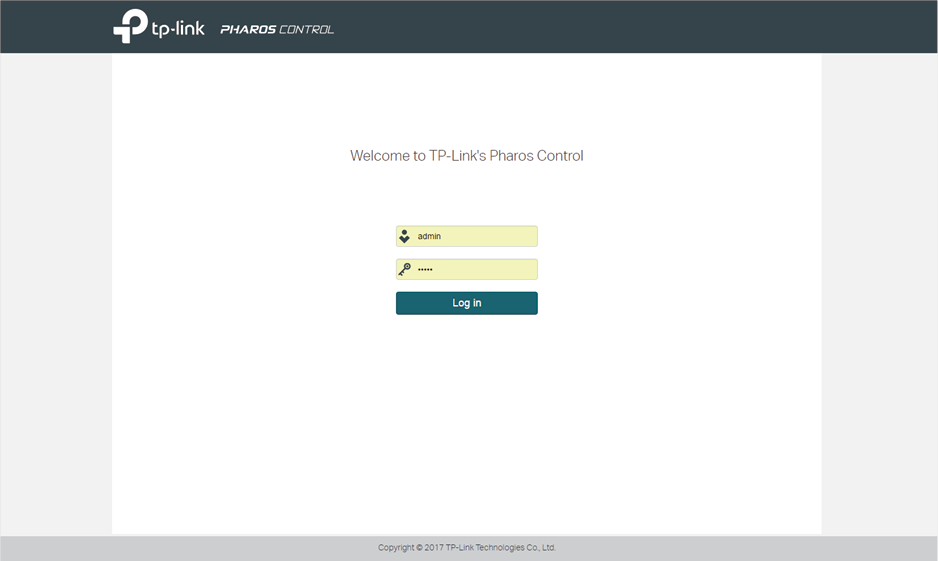
For Windows system, click Open Web Page on the server interface and the web browser will open automatically. For Linux system, open the web browser and enter “http://127.0.0.1:9321”.
On the login interface, enter the username and password you have set in the installation process, and click Log in.
Figure 3-2 Login Page
|
|
Tips: Other hosts which are able to reach the Control Host can also manage the devices via remote access. For example, when the IP address of the Control Host is 192.168.0.100 and the server port number is 9321, you can enter http://192.168.0.100:9321/login or http://192.168.0.100:9321 in the web browser of other hosts to log in to the management interface and manage the devices. |
4Add the Devices to be Managed
Before managing the devices, you need to add them to Pharos Control. There are two methods: discovering the devices automatically and adding them manually.
4.1Discover the Devices Automatically
Pharos Control can discover all Pharos devices currently connected to the network. Follow the steps below to discover and add the devices to Pharos Control:
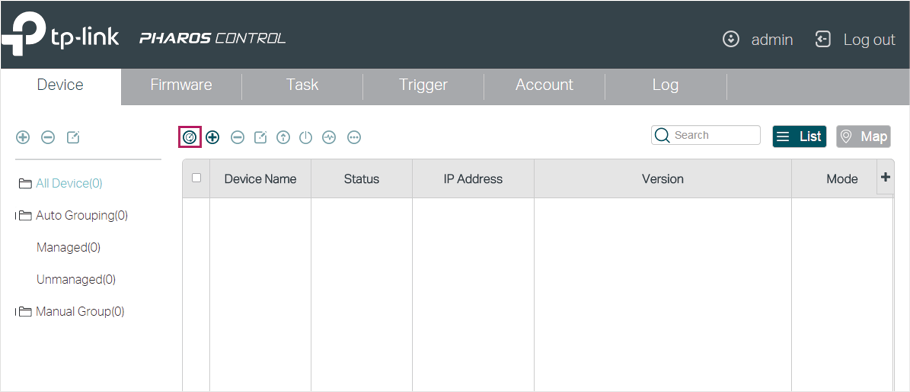
1)Go to the Device page, and click  .
.
Figure 4-1 Device Page
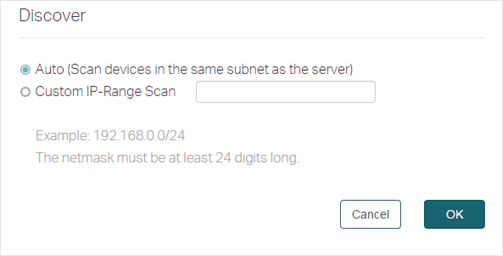
2)In the pop-up window, select your desired scanning method, and click OK. There are two methods provided: Auto and Custom IP-Range Scan. With Auto selected, Pharos Control will scan the devices in the same subnet. With Custom IP-Range Scan selected, you can specify the IP range of the devices, and Pharos Control will scan the devices in the IP range. Custom IP-Range Scan should be selected if you want to scan the devices in a different subnet.
Figure 4-2 Selecting the Scanning Method
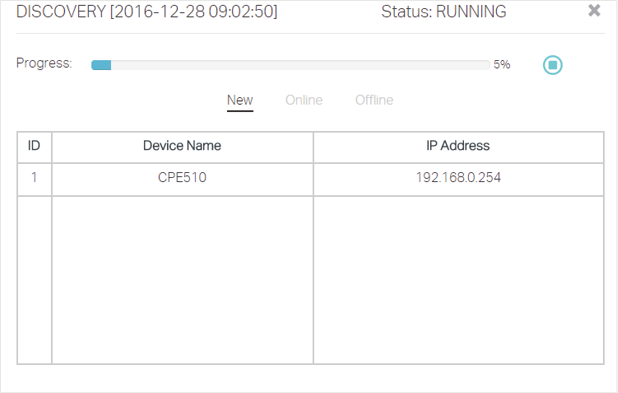
3)Pharos Control will start scanning the devices. After the discovery is completed, close the window.
Figure 4-3 Scanning the Devices
4)Select one or more devices to be managed, and click  .
.
Figure 4-4 Selecting the Devices
5)The following window will pop up. Specify a description for the device if you like. Check the box of Set Managing Option, and enter the username, password and port number of the device. The username and passport are both admin by default; if you have changed them, enter the new ones. The port here means the SSH server port which is configured on the device, and you can find this value on the Management page of the device. Click Start Managing.
|
|
Note: If you want to do this operation for multiple devices at the same time, make sure that the username, password and port number of these devices are the same. |
Figure 4-5 Specifying the Parameters
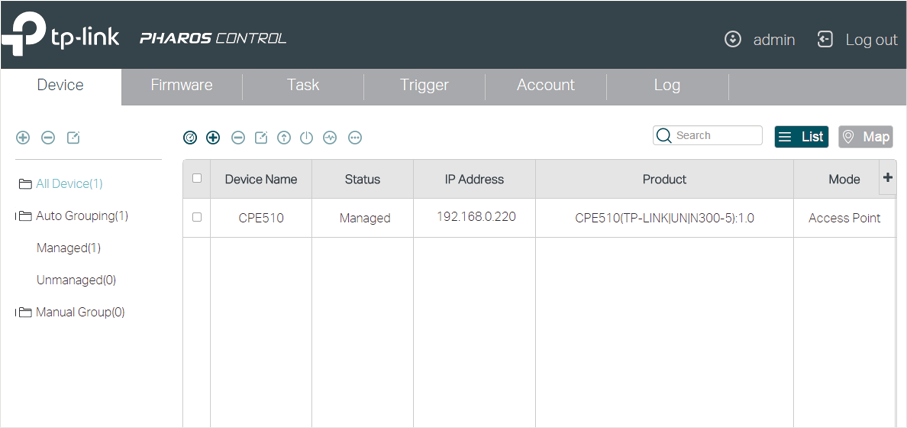
6)If the input device information is correct, the status will change from Unmanaged to Managed, and you can manage the device via Pharos Control.
Figure 4-6 Displaying the Status of the device
4.2Add the Devices Manually
Follow the steps below to add the devices manually.
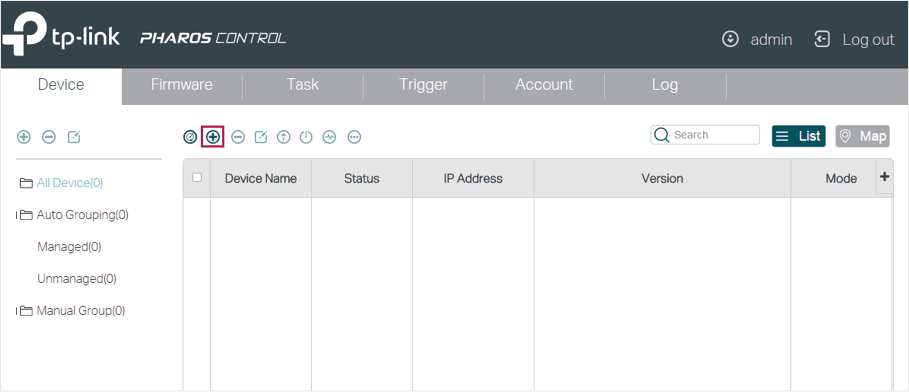
1)Go to the Device page, and click  .
.
Figure 4-7 Clicking Add
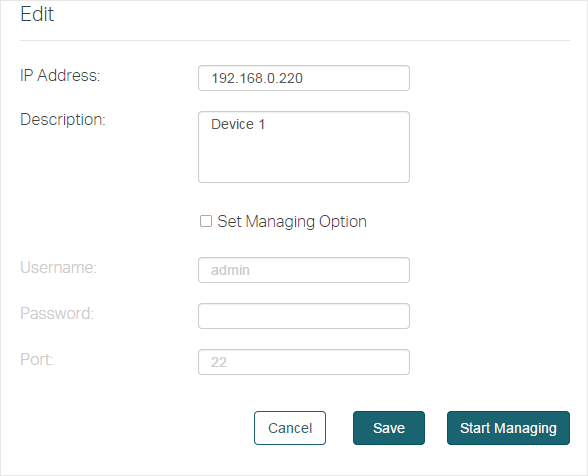
2)In the pop-up window, specify the IP address of the device and give a description for identification. Check the box of Set Managing Option, and enter the username, password and port number of the device. The username and passport are both admin by default; if you have changed them, enter the new ones. The port here means the SSH server port which is configured on the device, and you can find this value on the Management page of the device. Then click OK.
Figure 4-8 Specifying the Parameters

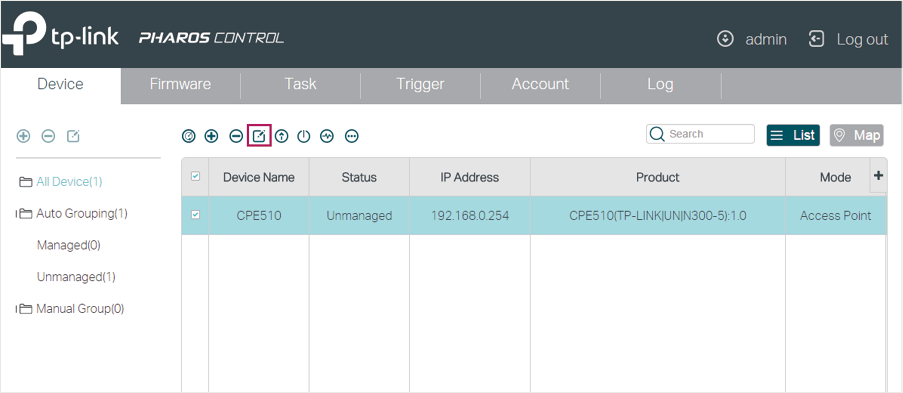
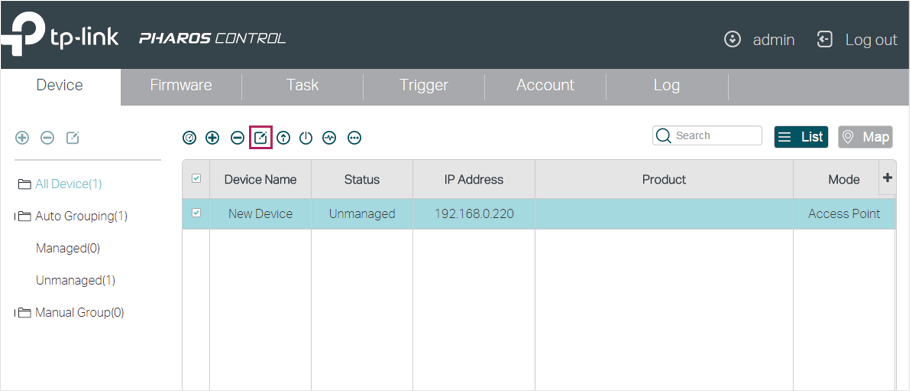
3)Select the device and click .
Figure 4-9 Clicking Edit
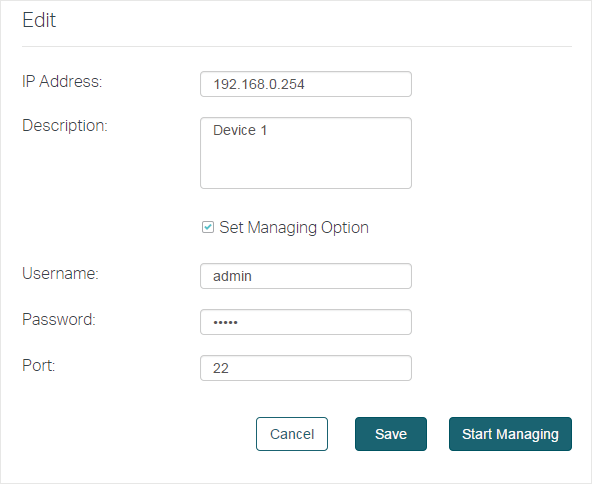
4)Then the following window will pop up. Click Start Managing.
Figure 4-10 Specifying the Parameters
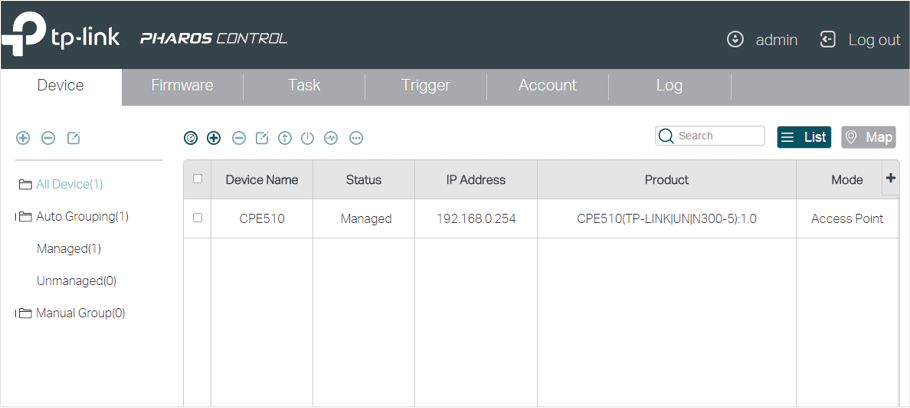
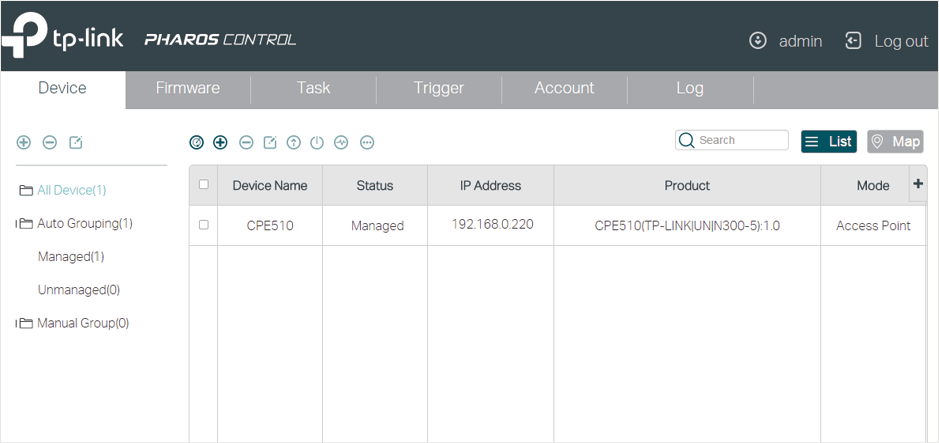
5)If the input device information is correct, the status will change from Unmanaged to Managed, and you can manage the device via Pharos Control.
Figure 4-11 Displaying the Status of the Device
5Monitor and Manage the Network
When all the configurations above are finished, you can centrally monitor and manage the devices on Pharos Control’s management interface.
Figure 5-1 Monitoring and Managing the Network
Pharos Control has the following management tabs, providing a wide range of management functions.
|
Device |
You can discover, add and group the devices. For the managed devices, you can monitor their information and running status, upgrade and reboot them in batch, and so on. |
|
Firmware |
You can import the firmware files for the Pharos devices and centrally manage these files. |
|
Task |
You can set scheduled rules for the specified devices on the specified time. For example, you can configure the devices to reboot every two weeks, or configure Pharos Control to discover the devices in the LAN at 8:00 am every day. |
|
Trigger |
You can configure Pharos Control to notify you of the device status change via email. For example, if a device in Managed status breaks down and changes to Unmanaged status, Pharos Control will send an email to inform the network administrator of this event. |
|
Account |
You can manage your account information, including username, password, email and so on. As the original administrator, you can also create multiple accounts with different privileges and distribute these accounts to other administrators. |
|
Log |
You can view and manage the system logs. |