Managing Accounts and Logs (Pharos Control)
CHAPTERS
|
|
This guide applies to: Phaos Control 2.0. |

This guide introduces how to manage Pharos Control accounts and logs:
1. Manage Accounts
2. Manage Logs
The following parts detailedly introduces these features.
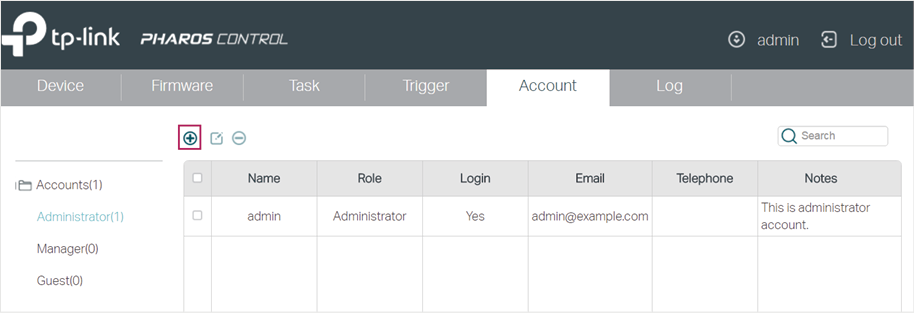
Pharos Control supports three account types: Administrator, Manager and Guest. The account created in the installation process is an Administrator account and cannot be deleted. If your current account type is Administrator, you can follow the steps below to create another account.
1)Go to the Account page and click  .
.
Figure 1-1 Account Page
2)Then the following window will pop up. Configure the required parameters and click OK.
Figure 1-2 Configuring the Parameters

|
Role |
Select the type of the account to be created. The following options are provided: Administrator, Manager and Guest. Administrator can view and configure the devices, and can change the configurations of Pharos Control. Manager can view and configure the devices, but cannot change the configurations of Pharos Control. Guest can only view the devices. |
|
User Name |
Specify a username. |
|
Password |
Specify a password. |
|
Confirm Password |
Enter the password again for confirmation. |
|
|
Specify the email for the user. |
|
Telephone |
(Optional) Specify the telephone number of the user. |
|
Note |
(Optional) Specify a note. |
Also, you can select an account and click  to edit it.
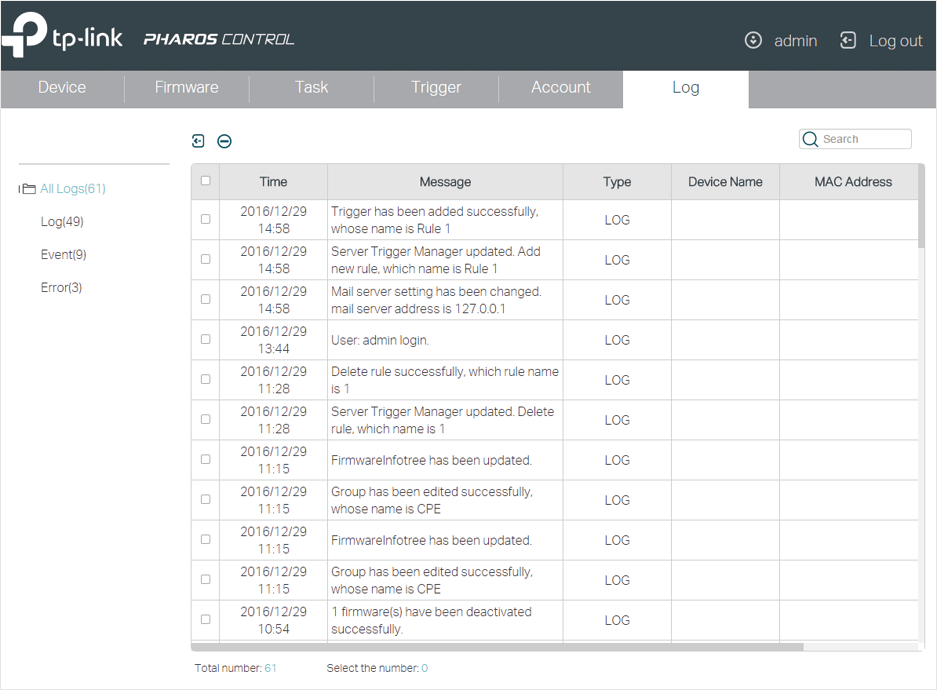
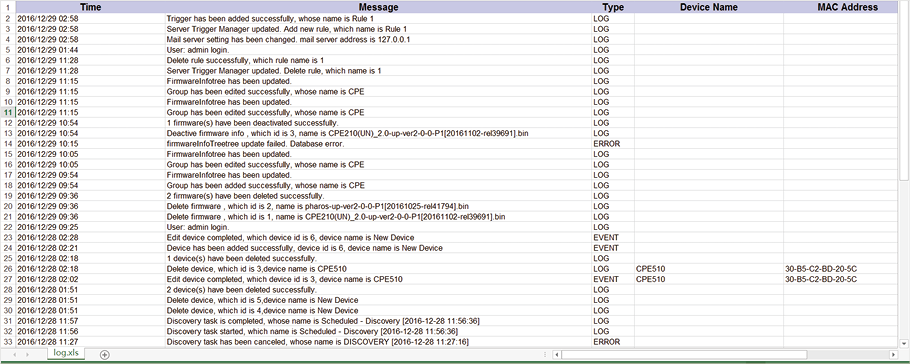
The logs of Pharos Control can effectively record, classify and manage the system information of the managed devices, providing powerful support for you to monitor network operations and diagnose malfunctions.
Go to the Log page, and you can view all the logs. Also, you can click the tags in the left column to view the classified logs, including normal logs, events and errors.
Figure 2-1 Log Page
Pharos Control provides two operations for the logs: exporting the logs to your local host and deleting the logs.
Export the Logs
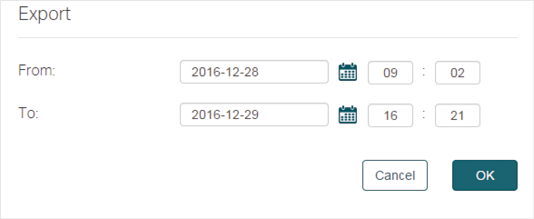
You can export the logs which are recorded in a specific period of time. But exporting a single log is not supported.
Follow the steps below to export the logs:
1)Click  and the following window will pop up. Specify a time range and click OK.
Figure 2-2 Specifying a Time Rage
2)The logs will be exported in the excel file. Select a file path to save the logs in your local host.
Figure 2-3 Exporting the Logs
Delete the Logs
There are two ways to delete the logs: delete the selected logs and delete the logs recorded in a period of time. Also, you can delete all logs in the table with one click.
Follow the steps below to delete the selected logs:
1)Select one or more logs you want to delete and click  .
.
Figure 2-4 Selecting Logs
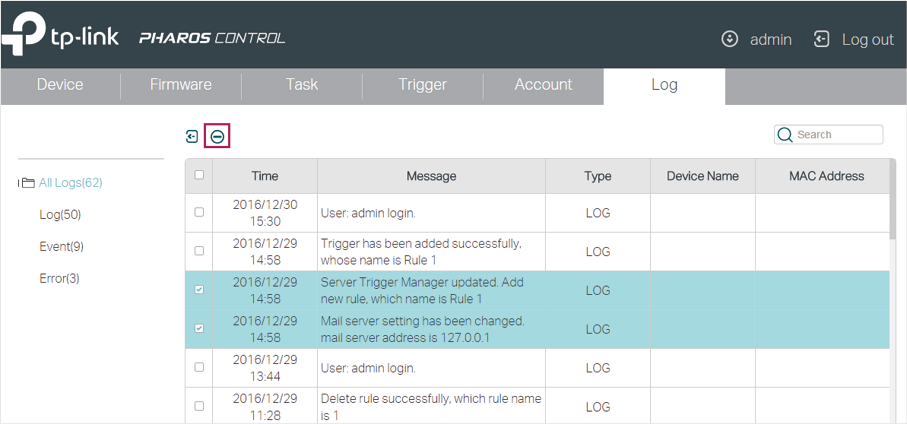
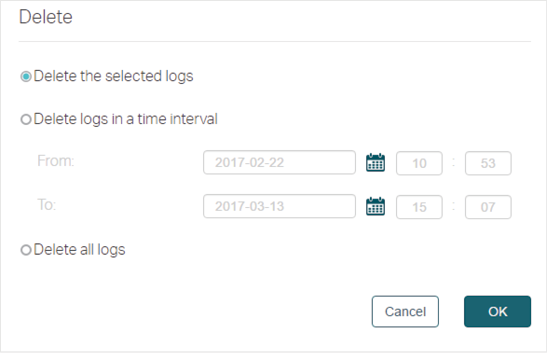
2)The following window will pop up. Select Delete the selected logs and click OK.
Figure 2-5 Selecting to Delete the Selected Logs
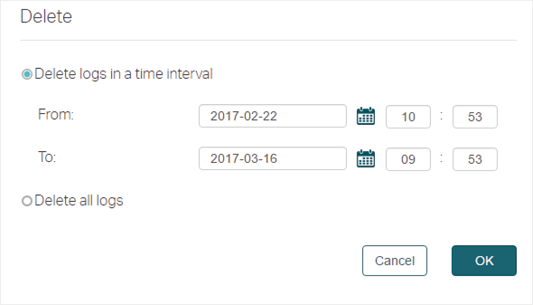
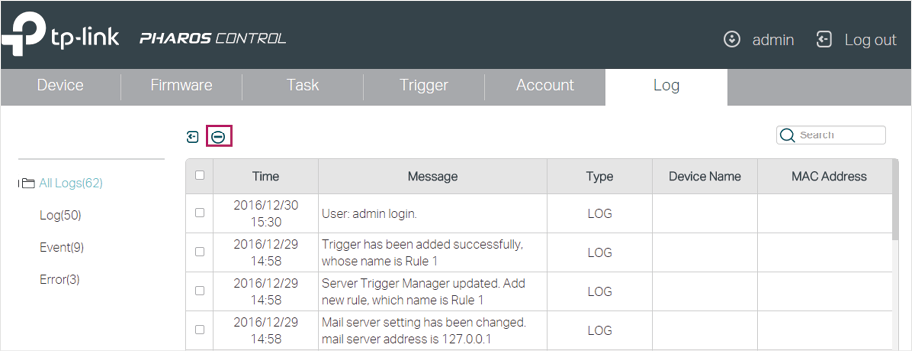
Follow the steps below to delete the logs recorded in a period of time or delete all logs in the table.
1)Click  directly.
Figure 2-6 Log Page
2)The following window will pop up. To delete the logs in a period of time, select Delete the logs in a time interval , and specify a time range. To delete all logs, select Delete all logs. And then click OK.
Figure 2-7 Deleting the Logs in a Period of Time