Configuring Preferences
CHAPTERS
|
|
This guide applies to: TL-R470T+ v6 or above, TL-R480T+ v9 or above, TL-R600VPN v4 or above, TL-ER5120 v3 or above, TL-ER6020 v2 or above, TL-ER6120 v3 or above |

You can preset certain preferences, such as IP groups, time ranges, IP Pools and service types. These preferences will appear as options for you to choose when you are configuring the corresponding parameters for some functions. For example, the IP groups configured here will appear as options when you are configuring the effective IP addresses for functions like Bandwidth Control, Session Limit , Policy Routing and so on.
Once you configure a preference here, it can be applied to multiple functions, saving time during the configuration. For example, after configuring a time range in the Preferences > Time Range > Time Range page, you can use this time range as the effective time of Bandwidth Control rules, Link Backup rules, Policy Routing rules, and so on.
IP groups configured here can be used as effective IP addresses for multiple functions like Bandwidth Control, Session Limit , Policy Routing and so on.
To complete IP Group configuration, follow these steps:
1)Add IP address entries.
2)Add IP address entries to an IP group.
2.1Adding IP Address Entries
Choose the menu Preferences > IP Group > IP Address and click Add to load the following page.
Figure 2-1 Add an IP Address Entry
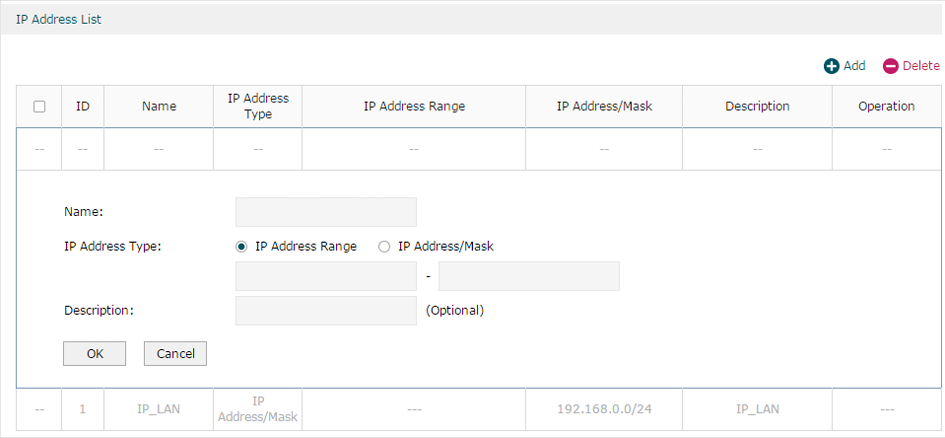
Follow these steps to add an IP address entry:
1)Enter a name and specify the IP address range.
|
Name |
Enter a name for the IP address entry. Only letters, digits or underscores are allowed. |
|
IP Address Type |
Choose a type and enter the IP address in the corresponding format. Two types are provided: IP Address Range: Specify a starting IP address and an ending IP address. IP Address/Mask: Specify a network address and the subnet mask. |
|
Description |
(Optional) Enter an brief description of this IP address entry to make identifying it easier. |
2)Click OK.
2.2Grouping IP Address Entries
Choose the menu Preferences > IP Group > IP Group and click Add to load the following page.
Figure 2-2 Create an IP Group
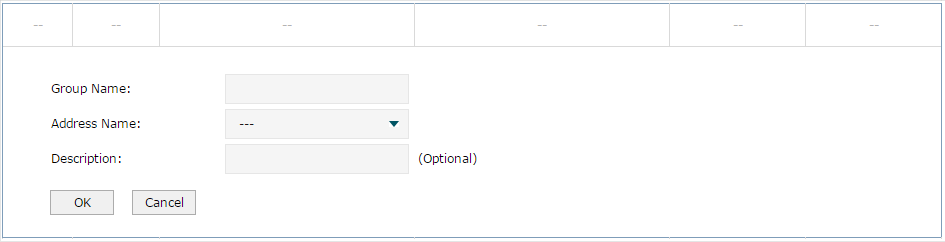
Follow these steps to create an IP group and add IP address entries to the group:
1)Specify a name and configure the range to add an IP address range.
|
Group Name |
Enter a name for the IP group. Only letters, digits or underscores are allowed. |
|
Address Name |
Select the IP address entries as the members of the group from the drop-down list. It is multi-optional. If no IP address entries are selected, the rule that references this IP group will have no effect on any IP addresses. |
|
Description |
(Optional) Enter an brief description of this IP group to make identifying it easier. |
2)Click OK.
You can also choose an existing IP group and click  to add or remove the IP address members.
|
|
Note: An IP group that is being referenced by a rule cannot be deleted. |

Time range configuration allows you to define time ranges by specifying the period in a day and days in a week. The time range configured here can be used as the effective time for multiple functions like Bandwidth Control, Link Backup, Policy Routing and so on.
Choose the menu Preferences > Time Range > Time Range and click Add to load the following page.
Figure 3-1 Add a Time Range Entry
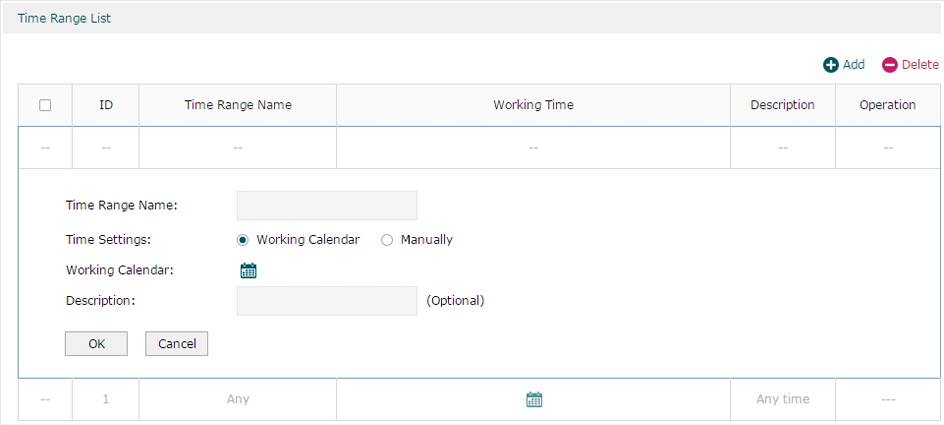
Follow these steps to add a time range entry:
1)Enter a name for the time range entry.
|
Time Range Name |
Enter a name for the time range entry. Only letters, digits or underscores are allowed. |
2)Choose a mode to set the time range. Two modes are provided: Working Calendar and Manually.
»Working Calendar
Working Calendar mode allows you to set the time range on a calendar. In this mode, the effective time can be accurate to the hour.
Choose Working Calendar mode and click  to load the following page.
Figure 3-2 Working Calendar Mode
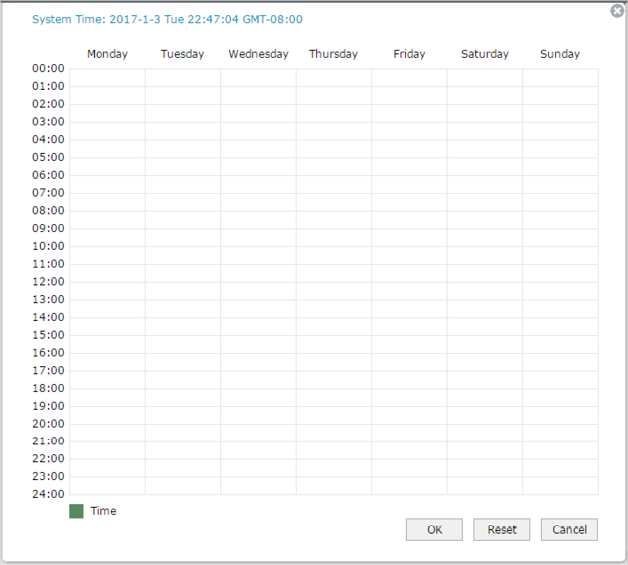
Select the time slices and click OK to set the time range. You can click the time slices, or alternatively drag the areas to select or deselect the time slices.
»Manually
Manually mode allows you to enter the time range and select the effective days in a week manually. In this mode, effective time can be accurate to the minute.
Choose Manually mode to load the following page.
Figure 3-3 Manually Mode

|
Week |
Select the effective days in a week. |
|
Time Range |
Enter a start and end time. If the effective time is discontinuous, click |
 to add another time range.
3)(Optional) Enter an brief description of this time range to make identifying it easier.
4)Click OK.
|
|
Note: A time range entry that is being referenced by a rule cannot be deleted. |
|
|
Note: TL-ER5120 does not support VPN IP Pool. |
The VPN IP pools configured here can be used as the VPN IP address pools when configuring L2TP VPN and PPTP VPN.
Choose the menu Preferences > VPN IP Pool > VPN IP Pool and click Add to load the following page.
Figure 4-1 Add an IP Pool Entry
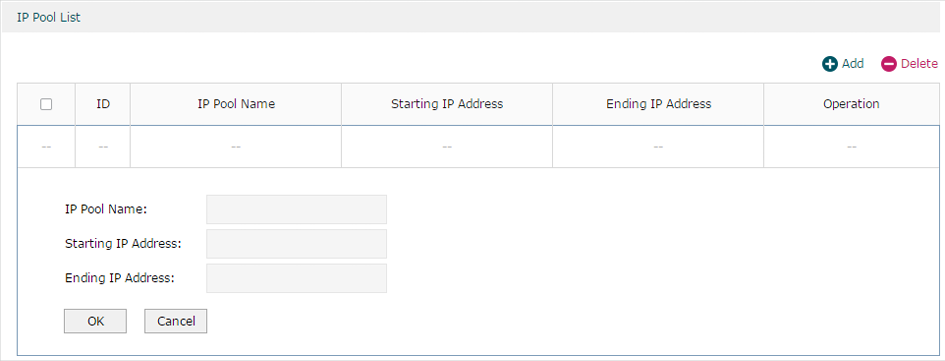
Follow these steps to add an IP Pool:
1)Enter a name and specify the starting and ending IP address of the IP Pool.
|
IP Pool Name |
Enter a name for the IP Pool. Only letters, digits or underscores are allowed. |
|
Starting IP Address/Ending IP Address |
Specify the starting and ending IP address. The range of the IP pool cannot overlap with the existing IP pools. |
2)Click OK.
|
|
Note: An IP pool entry that is being referenced by a rule cannot be deleted. |
The service type entries configured here can be used as part of the matching conditions when configuring the Access Control rules in Firewall.
Choose the menu Preferences > Service Type > Service Type to load the following page.
Figure 5-1 Service Type List
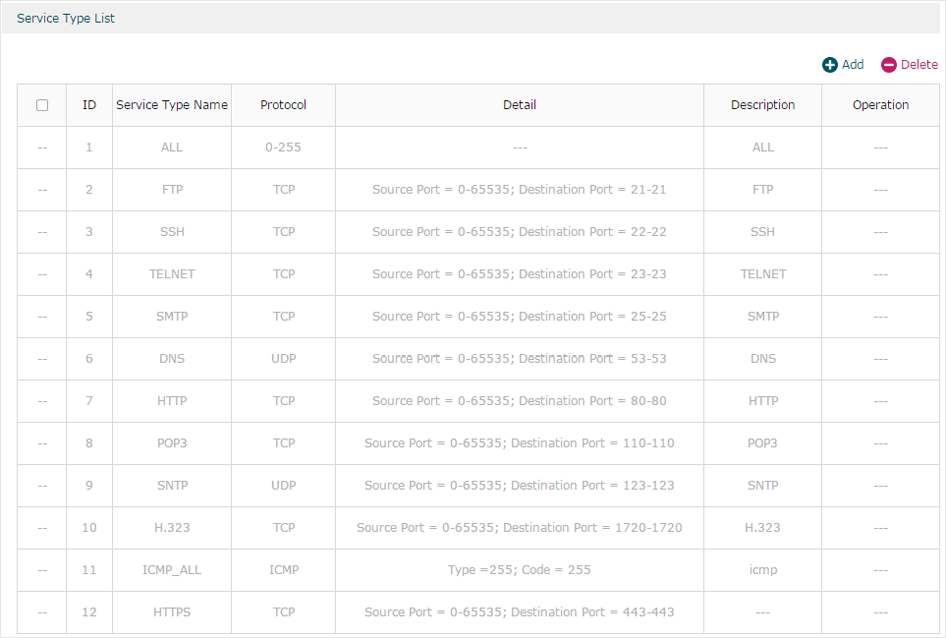
The entries in gray are system predefined service types. You can add other entries if your service type is not in the list.
Click Add to load the following page.
Figure 5-2 Add an Service Type Entry
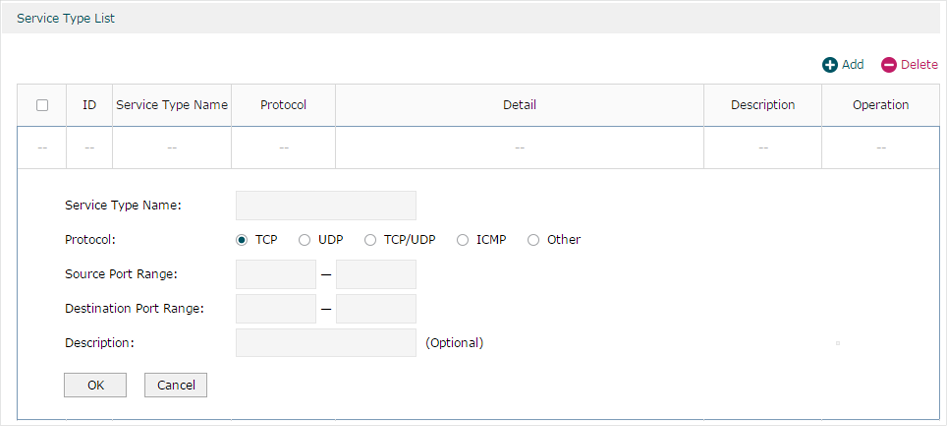
Follow these steps to add a service type entry:
1)Enter a name for the service type.
|
Service Type Name |
Enter a name for the service type. Only letters, digits or underscores are allowed. |
2)Select the protocol for the service type. The predefined protocols include TCP, UDP, TCP/UDP and ICMP. For other protocols, select the option Other.
When TCP, UDP, or TCP/UDP is selected, the following page will appear.
Figure 5-3 TCP/UDP Protocol

|
Source Port Range/Destination Port Range |
Specify range of the source port and destination port of the TCP or UDP packets. Packets whose source port and destination port are both in the range are considered as the target packets. |
When ICMP is selected, the following page will appear.
Figure 5-4 ICMP Protocol

|
Type/Code |
Specify the type and code of the ICMP packets. ICMP packets with both the type and code fields matched are considered as the target packets. |
When Other is selected, the following page will appear.
Figure 5-5 Other Protocols

|
Protocol Number |
Specify the protocol number of the packets. Packets with the protocol number field matched are considered as the target packets. |
3)(Optional) Enter a brief description of this service type to make identifying it easier.
4)Click OK.
|
|
Note: A service type entry that is being referenced by a rule cannot be deleted. |