Application Example of Omada Controller
CHAPTERS
|
|
This guide applies to: Omada Controller 2.6.0. |

A restaurant has a wireless network with three EAPs managed by the Omada Controller. The network administrator wants to:
Monitor the EAPs with the Map.
Enable Portal function to drive customers’ attention to the ads of the supermarket when customers attempt to access the network. The costumers need to use a simple password to pass the authentication.
Allow the employees of the restaurant to access the network resources without portal authentication.
Schedule the radio to operate only during the working time (8:00 am to 22:00 pm) in order to reduce power consumption.
Follow the steps below to achieve the requirements above.
Follow the steps below to do the basic configuration.
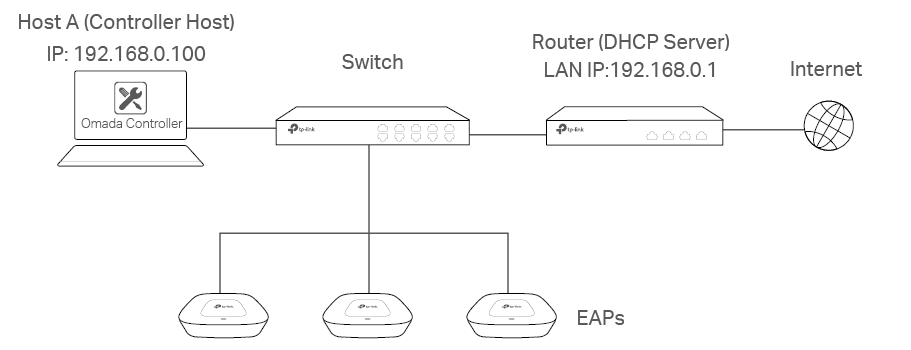
1)Connect the hardware by referring to the following topology.
Figure 1-1 Network Topology
2)Install the Omada Controller on Host A.
3)Launch the software and follow the instructions to complete some initial configurations.
4)Log into the management interface.
5)Adopt the pending EAP devices.
After the basic configuration, refer to the following content to meet the network administrator’s requirements.
2.1Monitor the EAPs with Map
Follow the steps below to create a map and monitor the EAPs with the map.
1)Go to the Map.
2)Import a local map and set the map scale.
3)Drag the EAPs to the appropriate locations on the map.
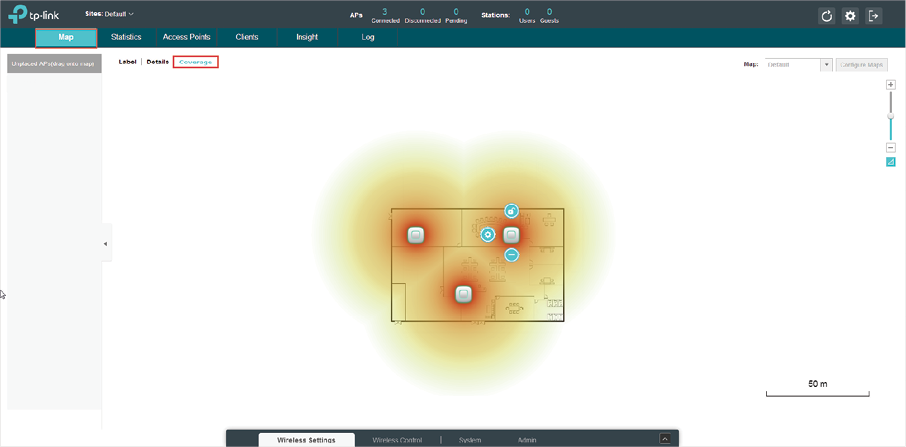
4)Click Coverage and you can see the representation of the EAPs’ wireless coverage.
Figure 2-1 Coverage
2.2Configure Portal Authentication
Follow the steps below to configure Portal function.
1)Go to Basic Wireless Settings and edit the SSID we created in the basic configuration.
Figure 2-2 Editing the SSID
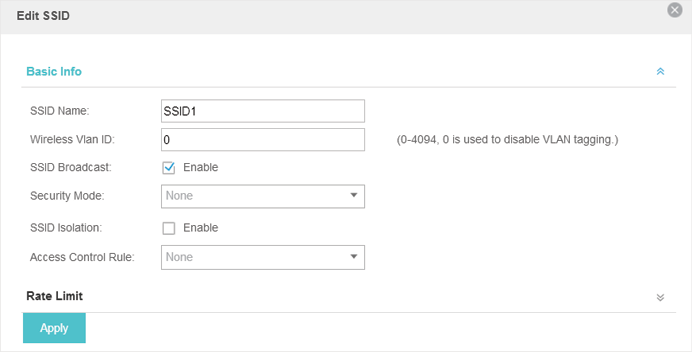
To make it easier for customers to connect, change the Security Mode from WPA-PSK to None. Customers can connect to the EAPs without password and be redirected to the Portal Authentication where the correct password will be required.
2)Open the global configuration window and go to Portal. Click  . The configuration window will pop up.
3)In the Basic Info section, complete the basic settings for the portal.
Figure 2-3 Basic Info
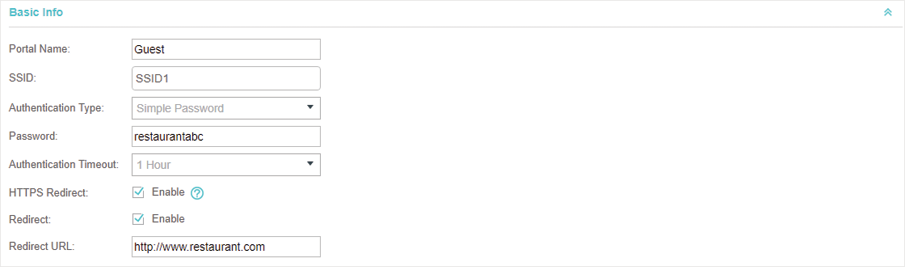
1. Specify a name for the portal.
2. Select an SSID for the portal.
3. Select the Authentication Type as Simple Password. Specify a simple password for the guests.
4. Select the Authentication Timeout. For example, 1 Hour is suitable for the customers at the restaurant.
5. Enable the Redirect to drive the costumers to the restaurant’s homepage after successful login. We can put some promotion information on the page.
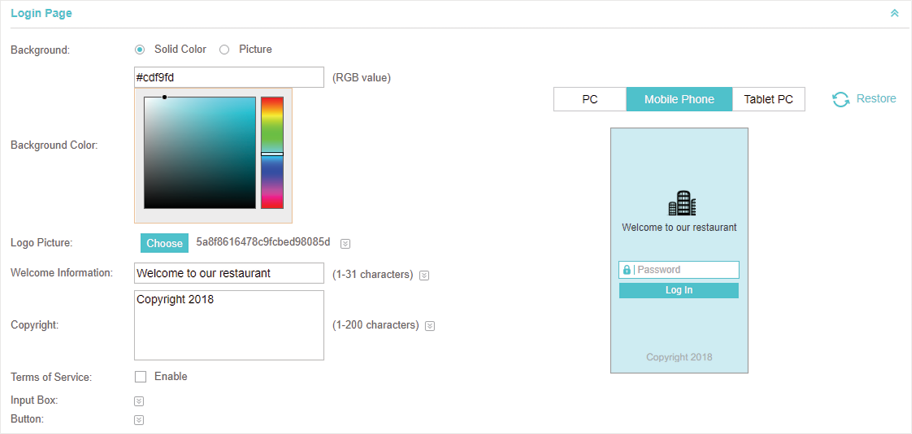
4)In the Login Page section, configure the login page.
Figure 2-4 Configuring the Login Page
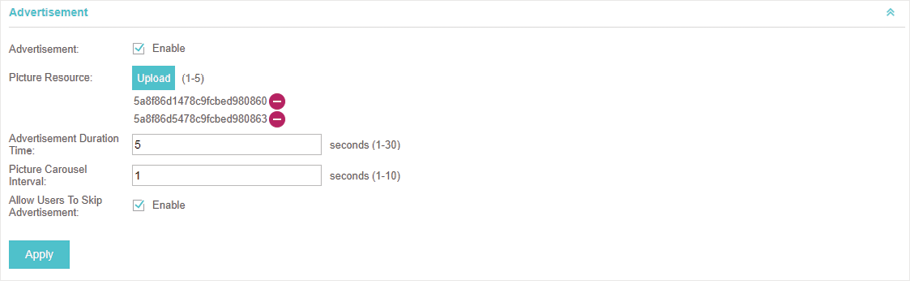
5)In the Advertisement section, upload two pictures of the restaurant and set the related parameters.
Figure 2-5 Configuring the Advertisement
6)Click Apply.
2.3Create a SSID for the Employees
We have created a SSID in the basic configuration for the customers. Here we need to create another SSID for the employees to allow them to access the network without portal authentication. In addition, the new SSID should be invisible for the customers.
Follow the steps below to create a SSID for the employees.
1)Open the global configuration window and go to Basic Wireless Settings.
2)Click Add to add a new SSID.
Figure 2-6 Adding a New SSID
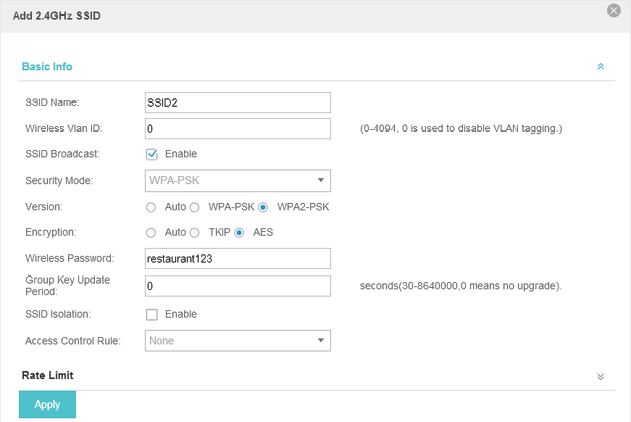
Configure the parameters.
1. Disable the SSID Broadcast to hide this SSID from the customers.
2. Specify the SSID Name, Security Mode and Wireless Password. Let the employees manually enter the SSID name and password, and choose the security mode you set to access the network.
3. Click Apply to save the configuration.
2.4Configure Scheduler
Follow the steps below to schedule the radio to operate only during the working time (from 8:00 to 22:00).
1)Open the global configuration window and go to Scheduler.
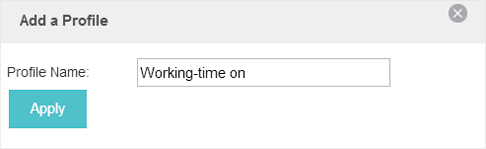
1. Add a profile.
Figure 2-7 Adding a Profile
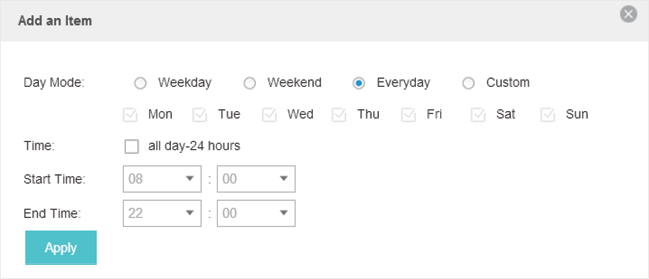
2. Add an item for the profile. The parameters are set as shown on the following screen.
Figure 2-8 Adding an Item
2)Go to Scheduler Association tab.
Figure 2-9 Scheduler Association
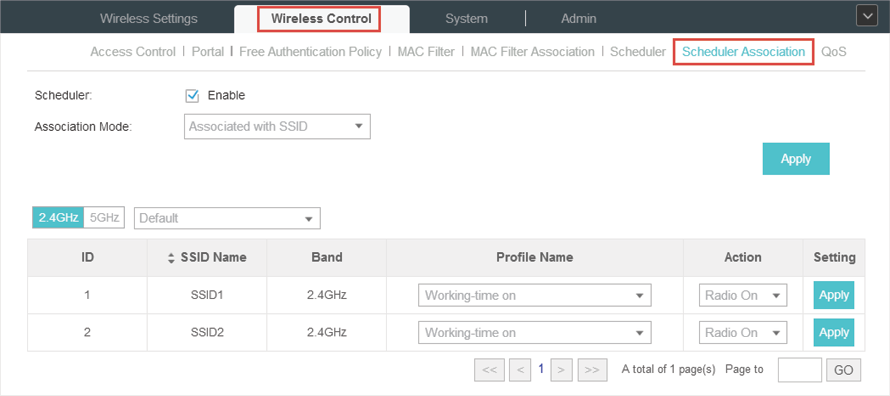
1. Enable the function and select Associated with SSID. Click Apply.
2. In the Profile Name column of both SSIDs, select the profile we just created.
3. In the Action column of both SSIDs, select Radio On.
4. Click Apply in the Setting column of both SSIDs.
5. Select 5GHz and do the same configurations as above.