Omada License Configuration Guide
Contents
Get Licenses and Review their Status
Assign licenses to Organization or Customers
Muanlly assign licenses to organizations
Manually assign licenses to customers in MSP mode
Automatically assign licenses to customers in MSP mode
Assign and unbind Licenses to Omada Devices
Manually assign Licenses to devices
Automatically assign Licenses to devices
Unbind license from Omada devices
Reokve license from Customers in MSP mode
Export and Import Licenses in a batch
Export activation code from TP-Link ID account
Export activation code from organizations
Export activation code from MSP
Export activation code from Customer
Import activation code in organizations
Import the activation code in Customer
Requirements
- Omada Central
Introduction
Each device must be bound to an active license to manage and configure devices through Omada Central. Ensure you have purchased the necessary licenses before proceeding with device binding.
Two license types are available: Standard Network and Standard Camera.
- A Standard Network license can only be applied to network devices.
- A Standard Camera license can only be applied to camera devices.
Get Licenses and Review their Status
Purchase Licenses
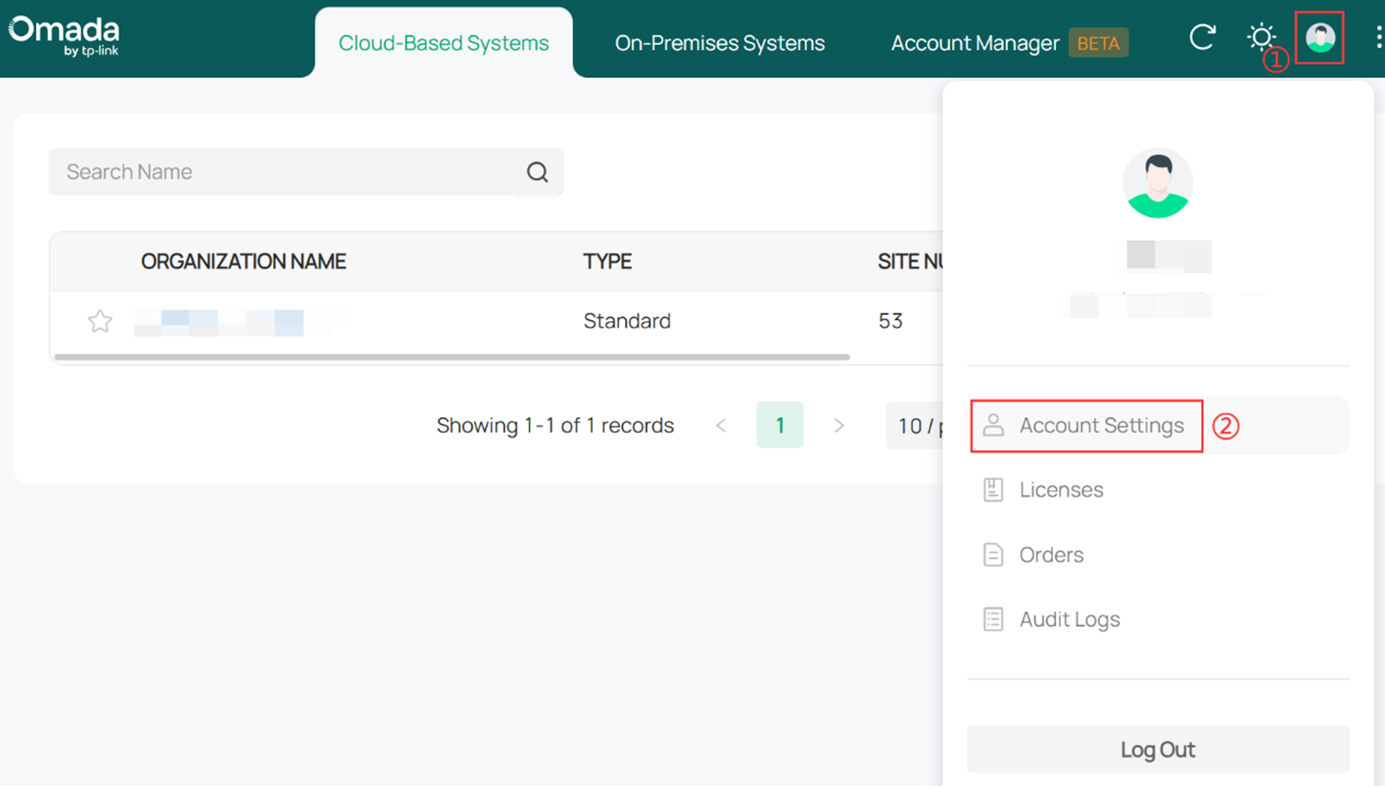
Step 1. Visit https://omada.tplinkcloud.com and log in with your TP-Link ID.
Note: If you don’t have a TP-Link ID, you can register and activate one for free.
Step 2. Navigate to Account Settings > Billing Information and complete your billing details.
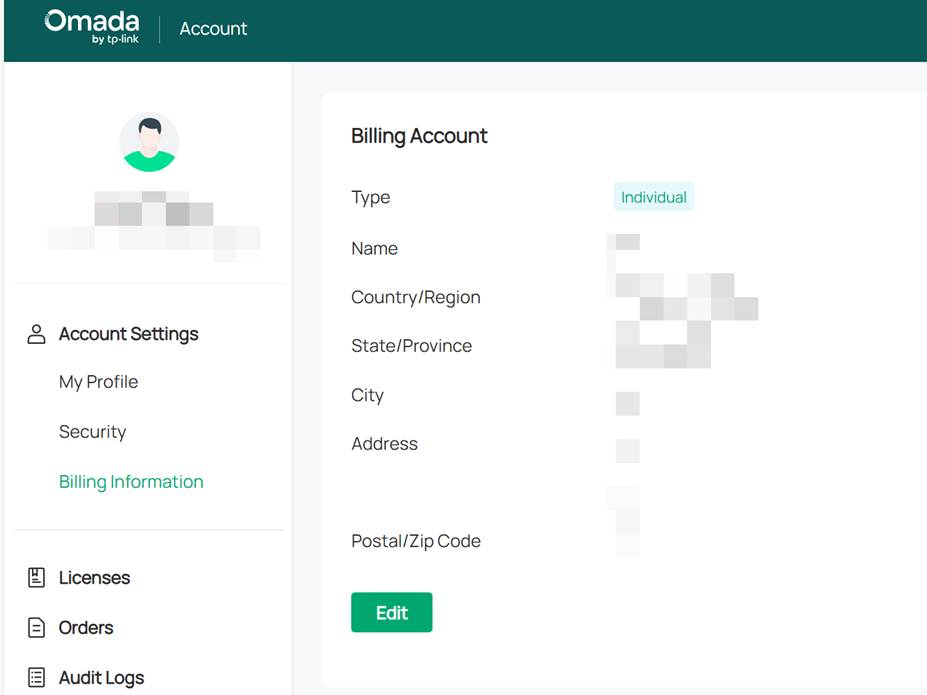
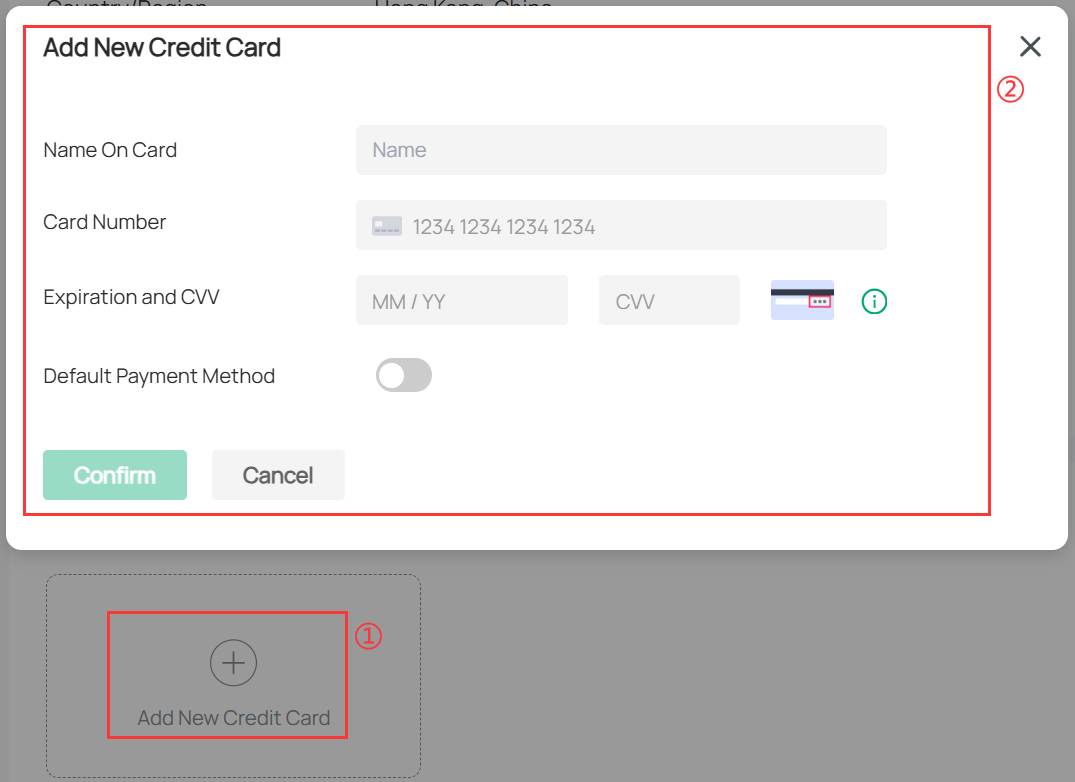
Click Add New Credit Card to enter payment information.
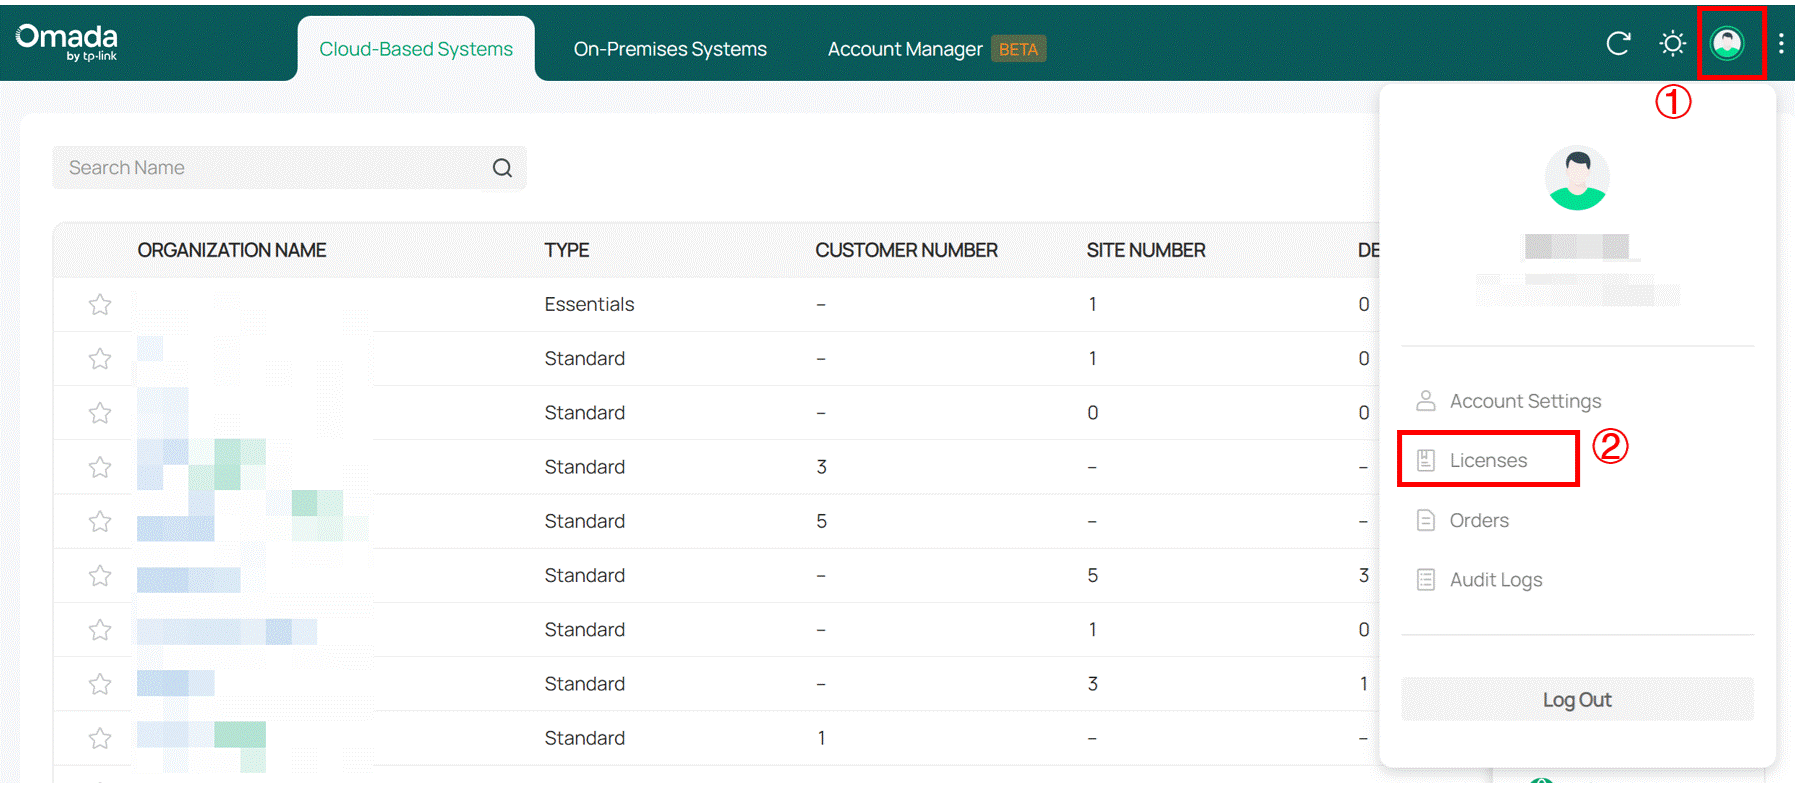
Step 3. Go to License > Purchase License to access the Choose License page.
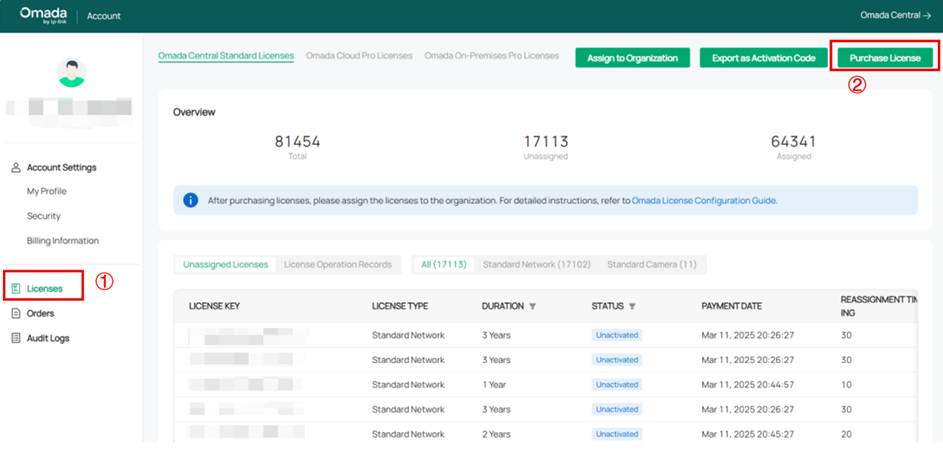
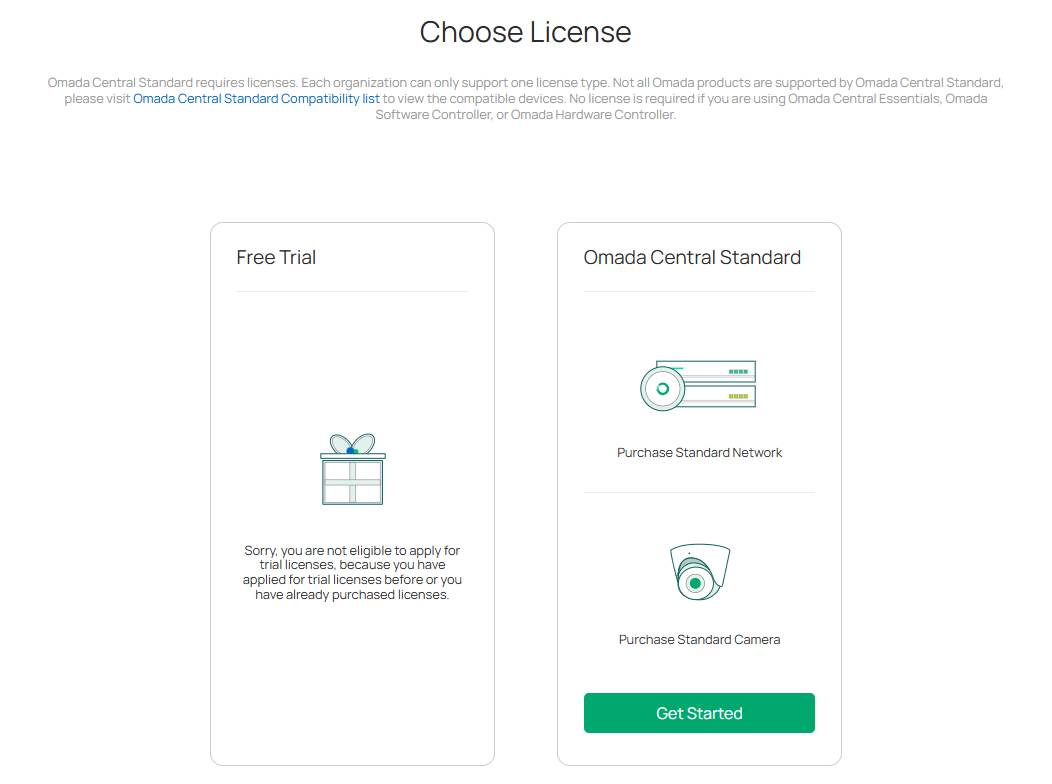
Currently, two types of licenses are provided: Free Trial and Omada Central Standard. The Omada Central Standard card lists the functions supported by Omada Central.
Note: Users who have never purchased any licenses can apply for 10 one-month trial licenses, which will be activated immediately after successful application. Users who have purchased licenses do not meet the conditions for applying for the trial license.
Step 4. Click Get Started to enter the license purchase page. The page displays the license type, quantity, price of a single license, and total price.
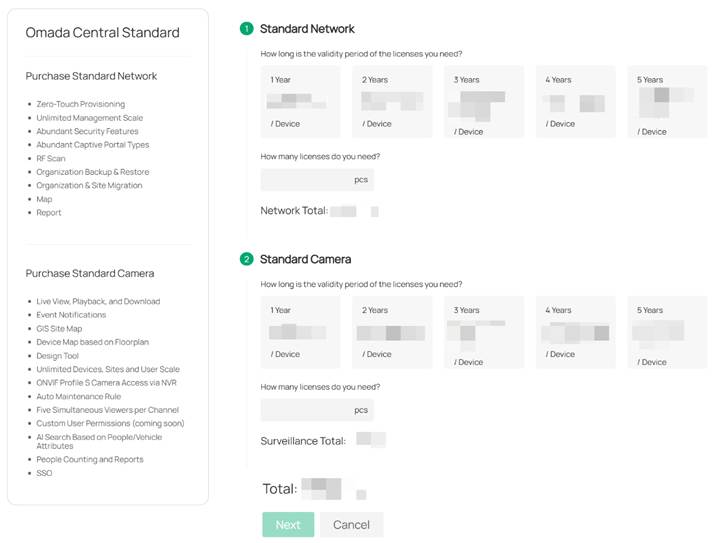
Step 5. Click Next to enter the order details page. Confirm the order details and payment account, then click Submit to submit the order. Then, the purchase would be successful.
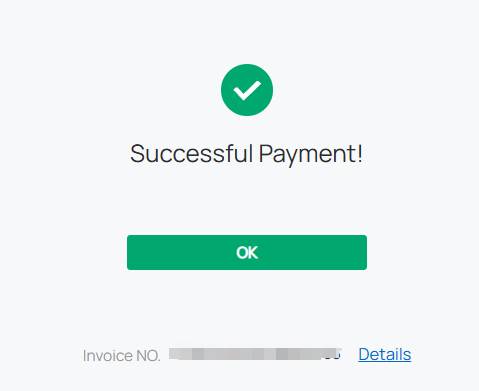
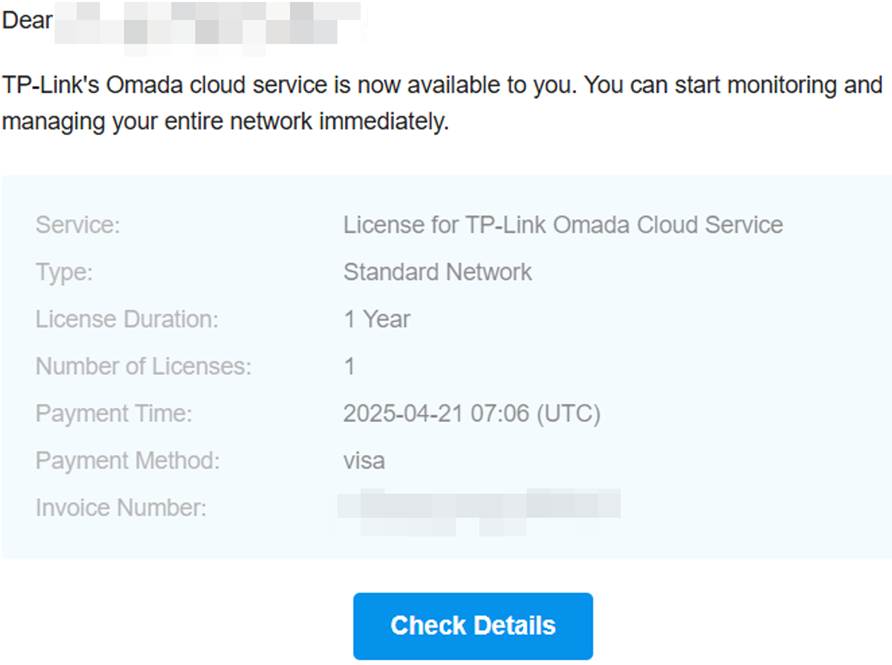
You will receive an email with the order details. The email content includes information such as the purchased license type, license duration, license quantity, payment time, payment method, and order number.
Check License Status
Step 1. Visit https://omada.tplinkcloud.com and log in with your TP-Link ID.
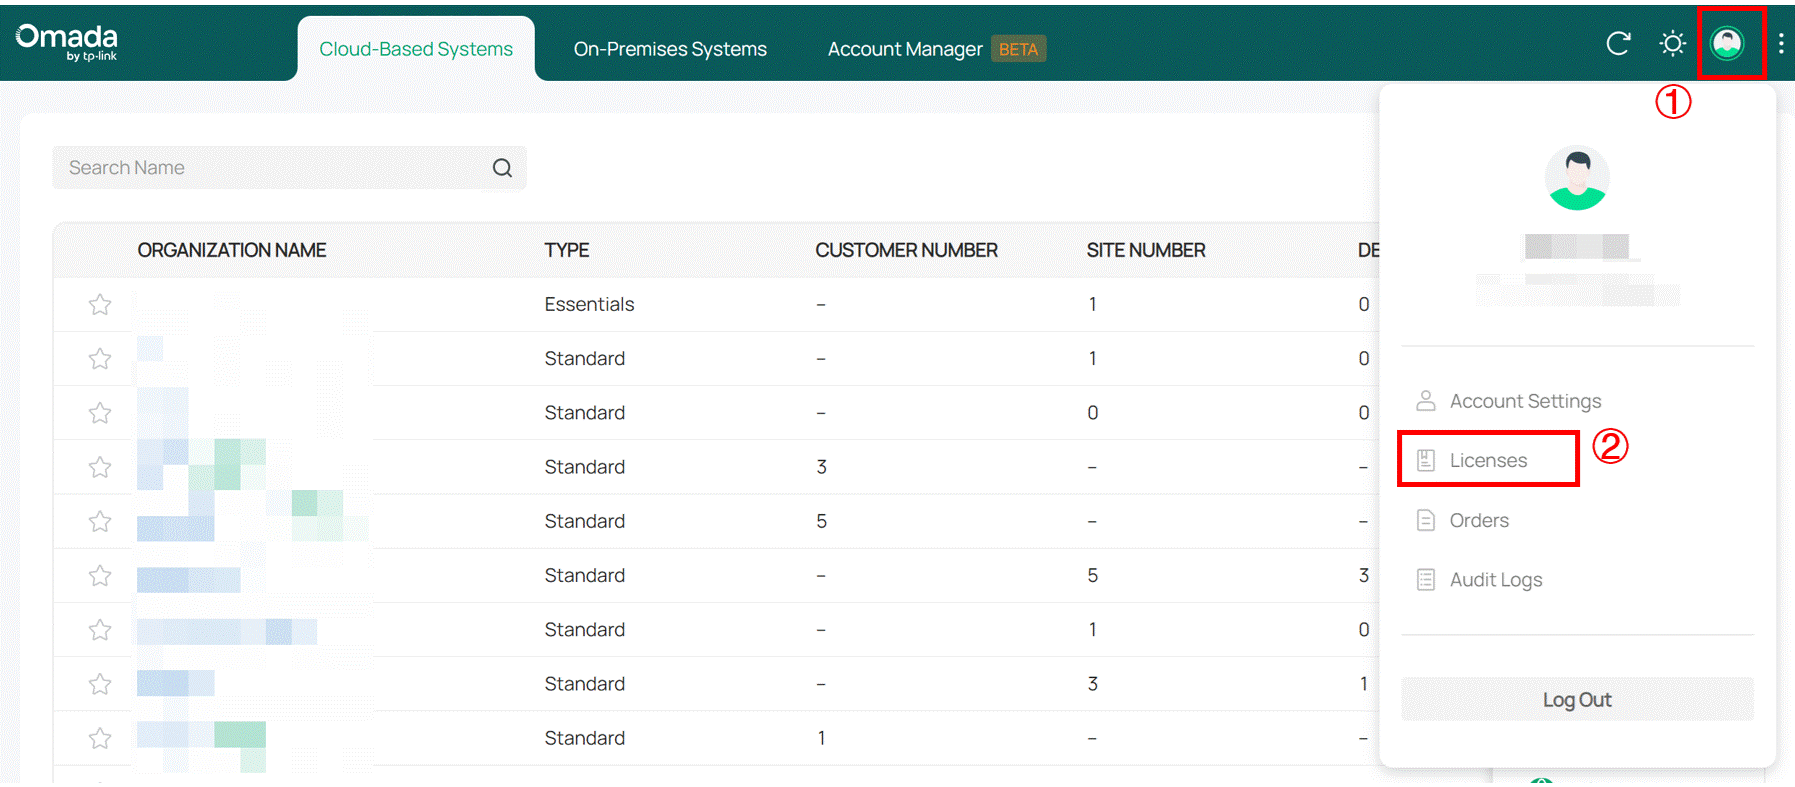
Step 2. Go to Profile icon > License page.
Click Orders and you will be redirected to the Orders list, which displays the order number, license type, purchase time, license duration, quantity, payment amount, and invoice
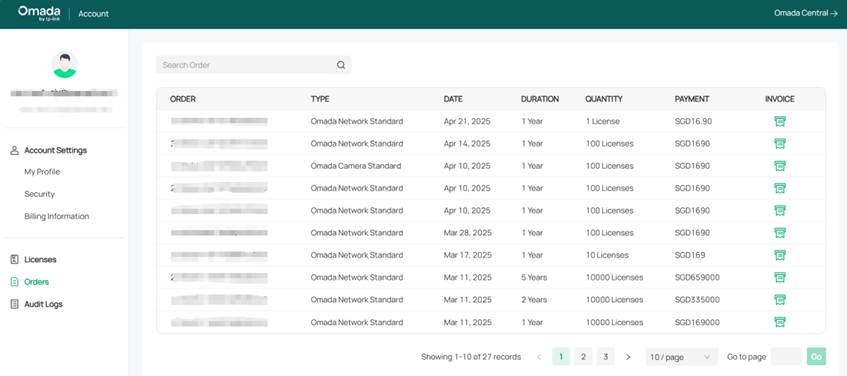
Click the button under the INVOICE column to view order details.
Assign licenses to Organization or Customers
Muanlly assign licenses to organizations
Step 1. Visit https://omada.tplinkcloud.com and log in with your TP-Link ID.
Step 2. Go to Profile icon > License page.
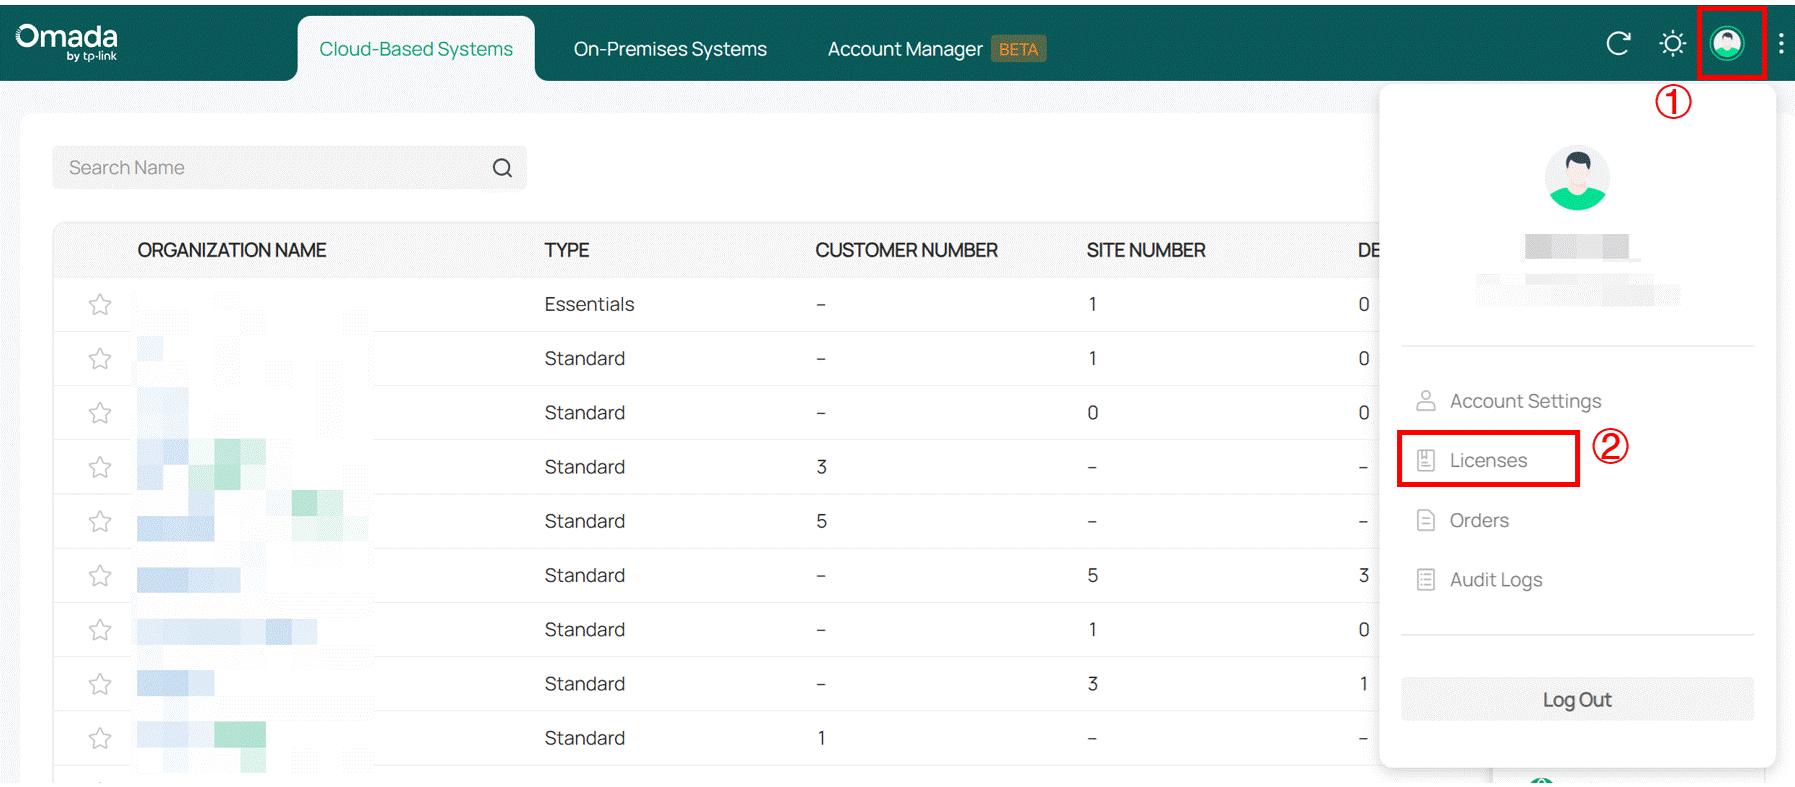
Click Assign to Organization in the upper right corner.
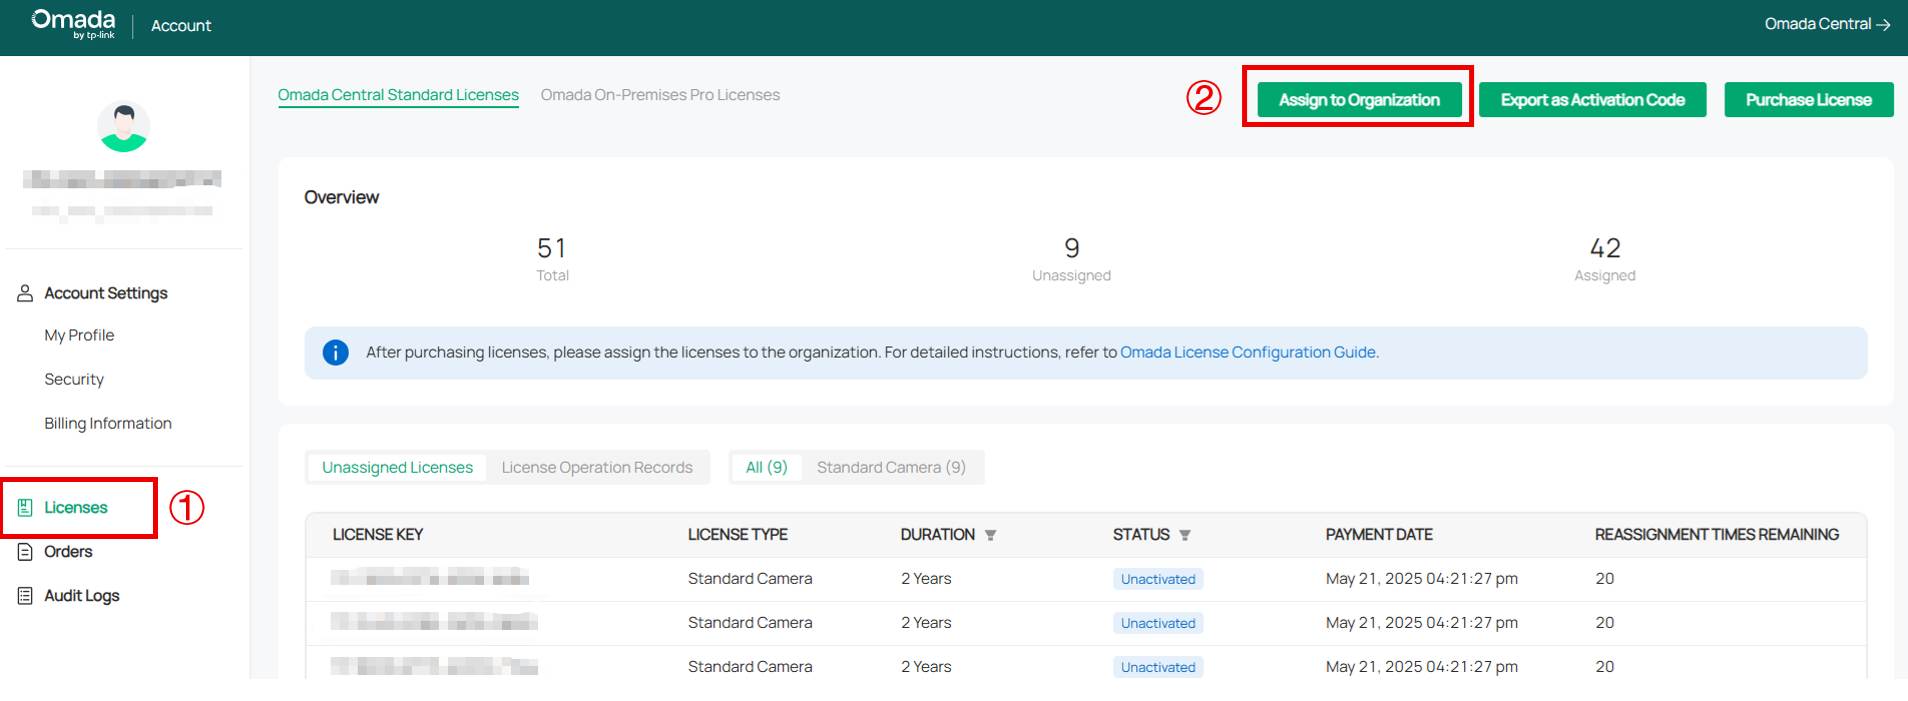
Step 3. Check your remaining licenses, select the organization, and specify the quantity of licenses to assign.
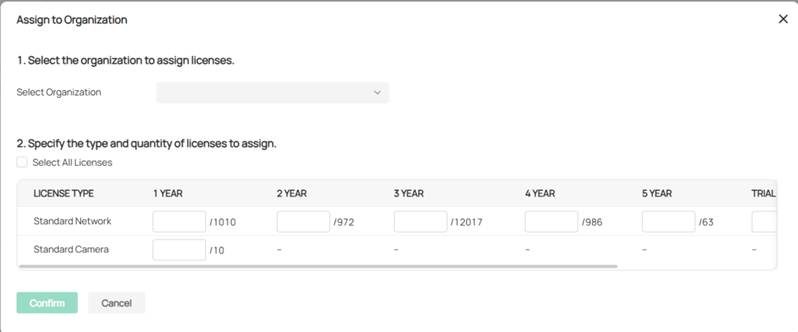
Step 4. Click Confirm. The licenses will be assigned to the controller.
Manually assign licenses to customers in MSP mode
If you have enabled MSP (Managed Service Provider) mode, follow the steps below to assign a license to your customers:
Step 1. Enter your organization
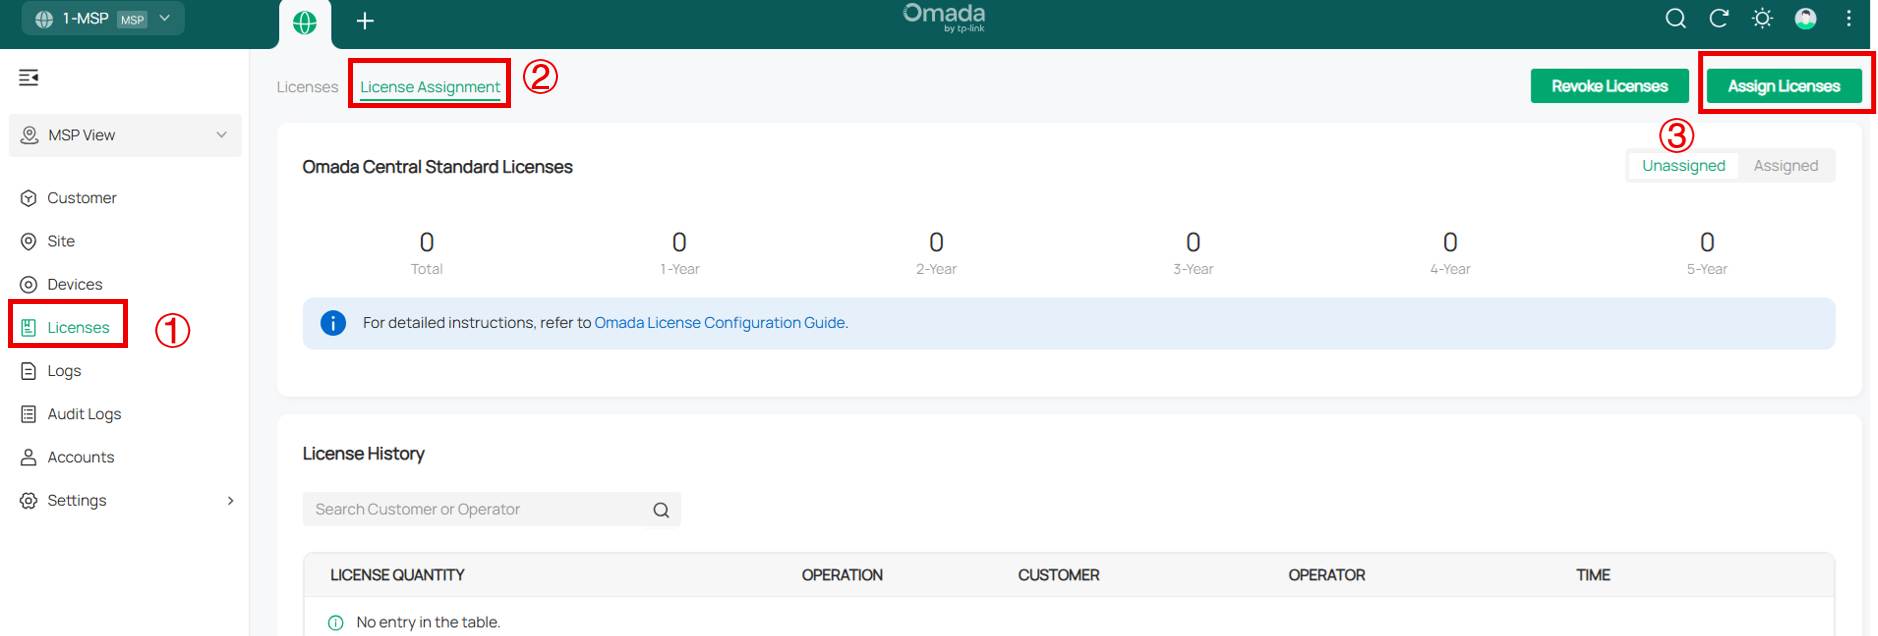
Step 2. In MSP View, go to License > License Assignment. Click Assign Licenses in the upper right corner.
Step 3. Check your remaining licenses, select the customer, and specify the licenses to assign.
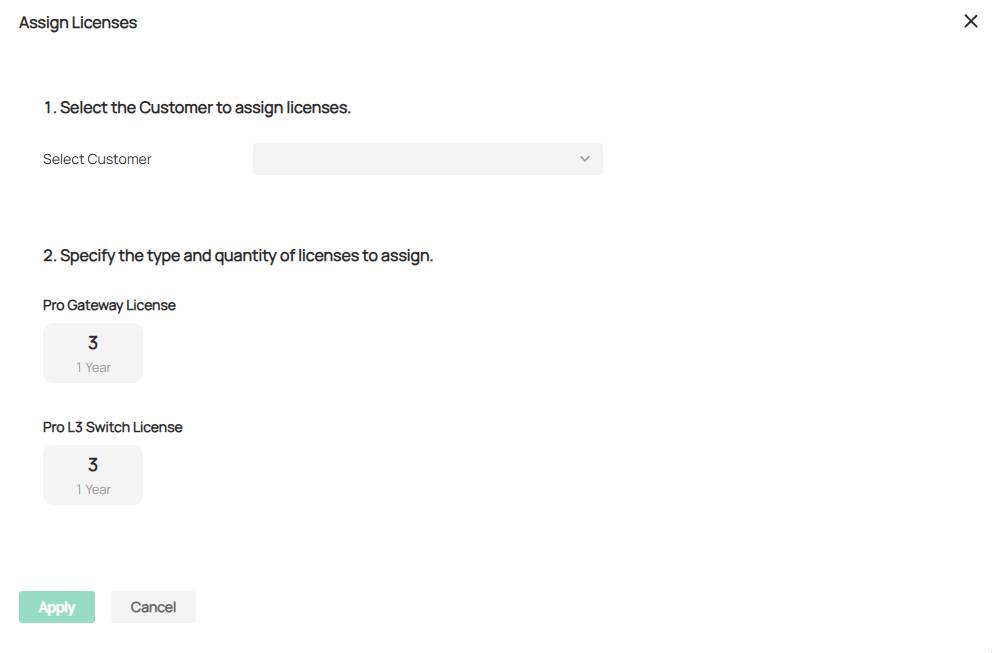
Step 4. Click Apply. The licenses will be assigned to the customer.
Automatically assign licenses to customers in MSP mode
Step 1. Enter your organization
Step 2. Go to the License page. Enable Auto-Assign for customers.
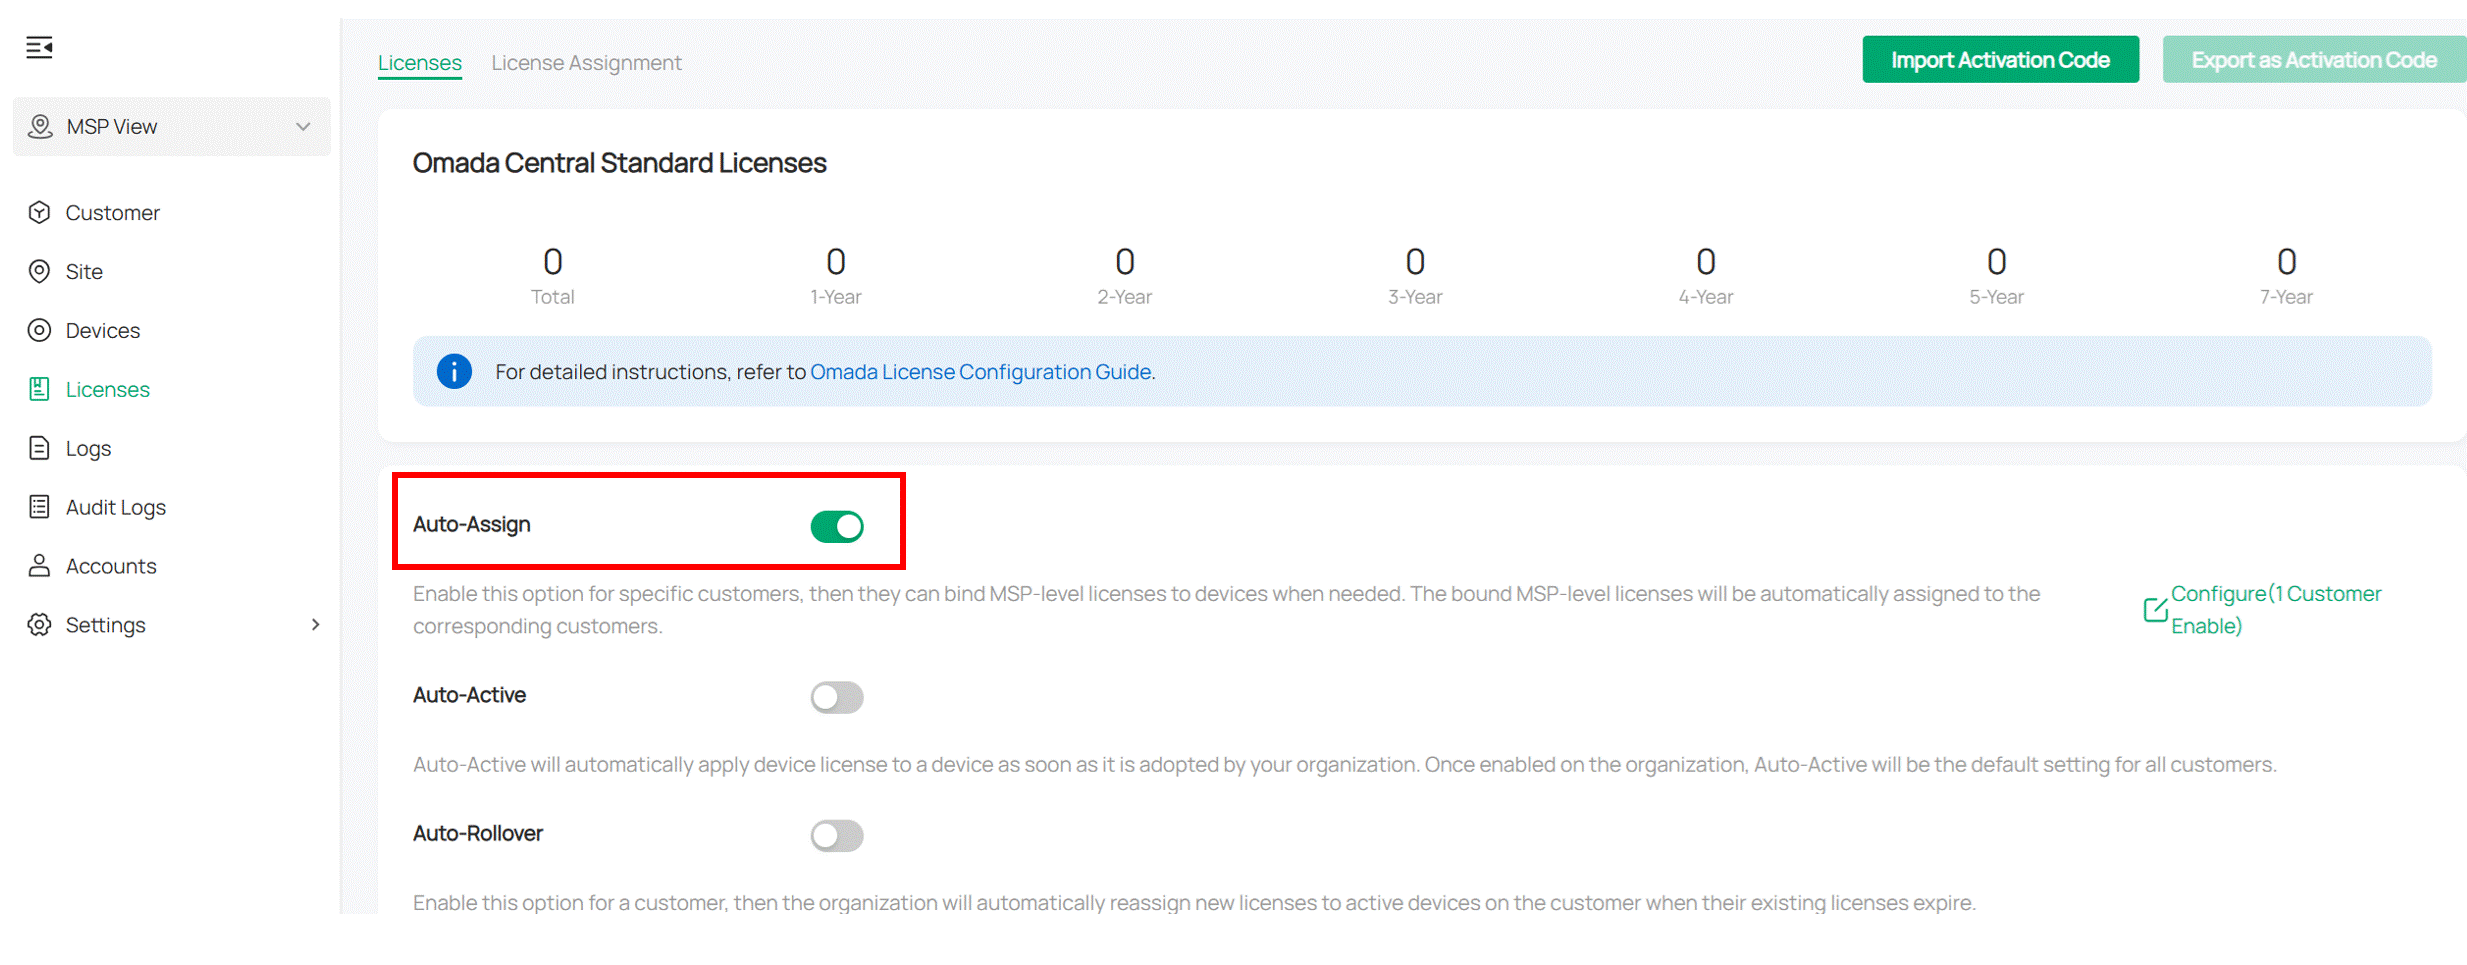
Note: If this option is enabled for specific customers, they can bind MSP-level licenses to devices when needed. The bound MSP-level licenses will be automatically assigned to the corresponding customers.
Assign and unbind Licenses to Omada Devices
Manually assign Licenses to devices
Step 1. After adding a device, referring to How to discover and manage Omada Devices via Omada Central, an active option will appear in the Action column of the device list.

Step 2. Click Active to jump to the device page's license details, where you can manually select the license.
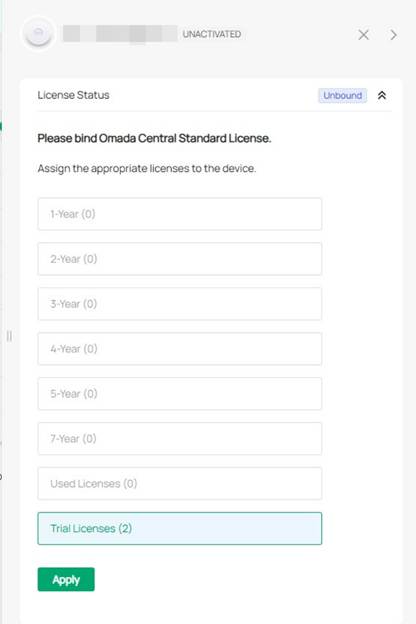
Automatically assign Licenses to devices
Step 1. Enter your organization.
Step 2. Go to the License page. Enable Auto-Active, and enable Auto-Rollover for customers.
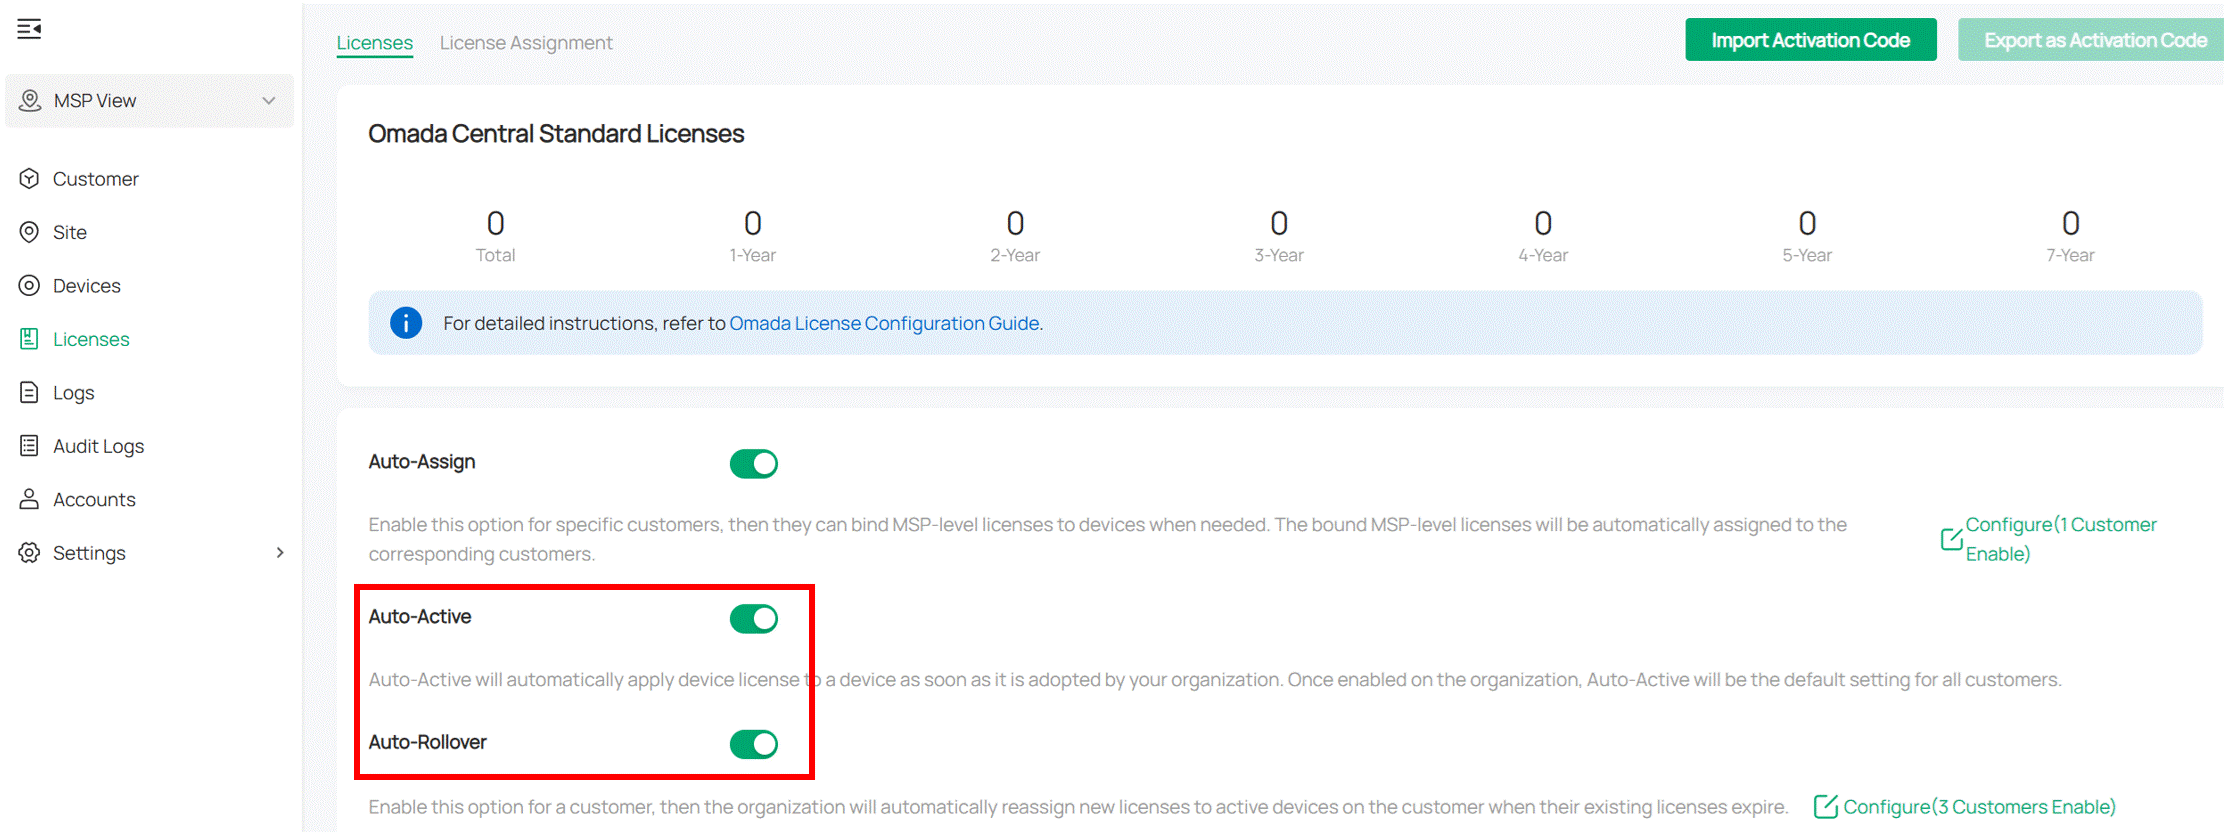
Note:
- Auto-Active will automatically apply a device license to a device as soon as your controller adopts it. After Auto-Active is enabled on the controller, all its customers will enable Auto-Active by default.
- If Auto-Rollover is enabled for a customer, the controller will automatically reassign new licenses to active devices on the customer when their existing licenses expire.
Unbind license from Omada devices
Click an activated device to open the Properties window. In the License Status section, click Unbind. The license will be unbound and can be bound to another device if needed.
Note:
- When the reassignment time remaining is 0, the license cannot be bound to other devices except the current one.
- Reassignment Times are calculated according to the license year multiplied by 10. If the license duration is 1 year, the Reassignment Times after the device is activated are 10.
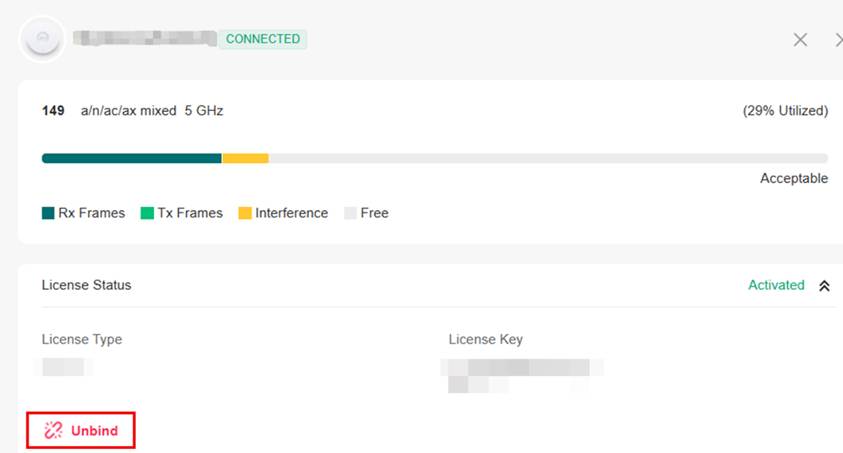
Reove license from Customers in MSP mode
After license assignment, you can revoke licenses if the customer no longer needs them.
Step 1. Enter your organization
Step 2. In MSP View, go to License > License Assignment. Click Revoke Licenses in the upper right corner.
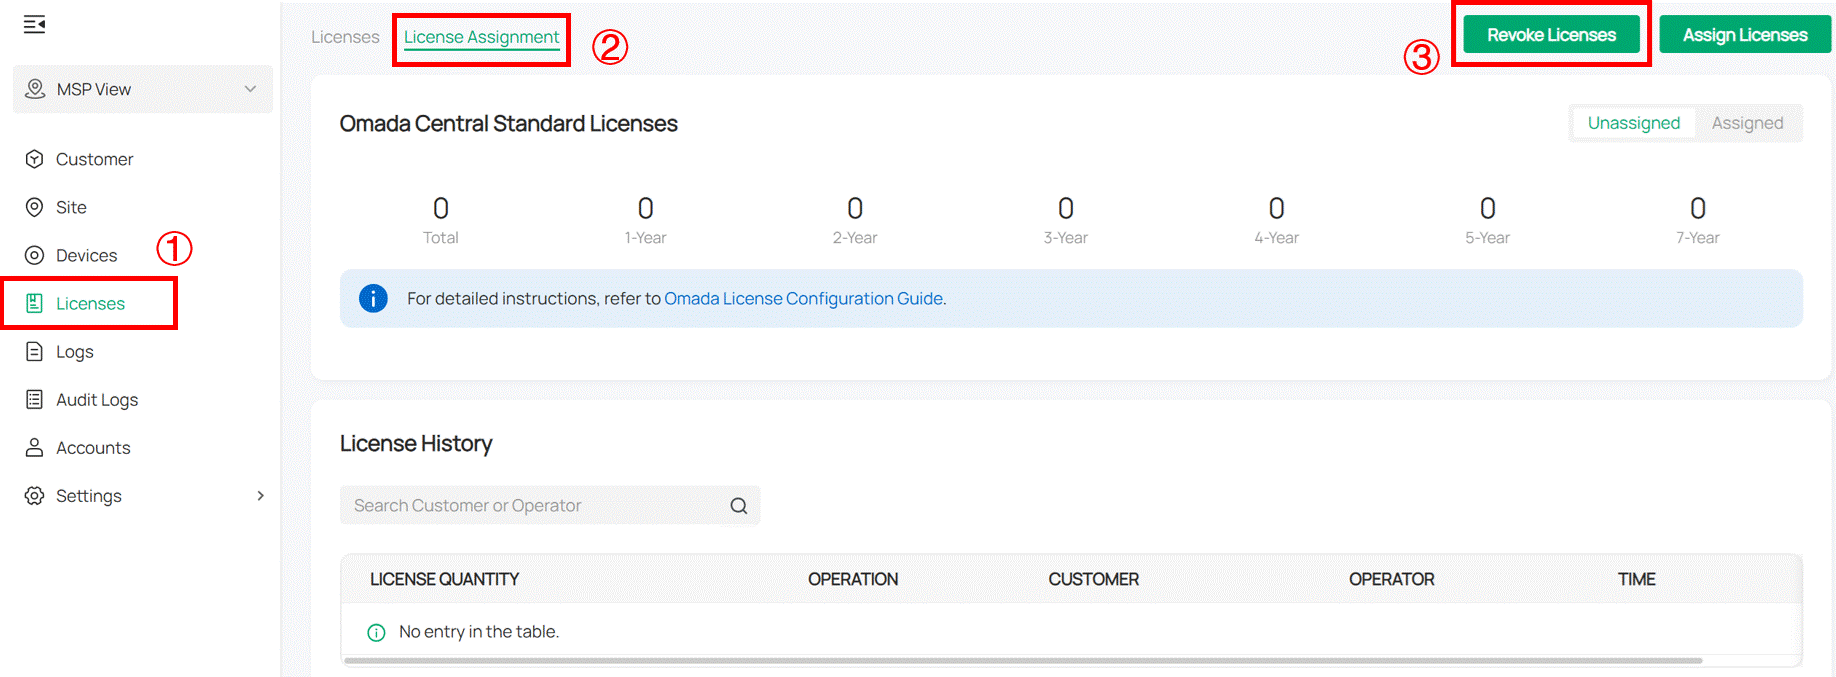
Select the customer and specify the quantity of licenses to revoke.
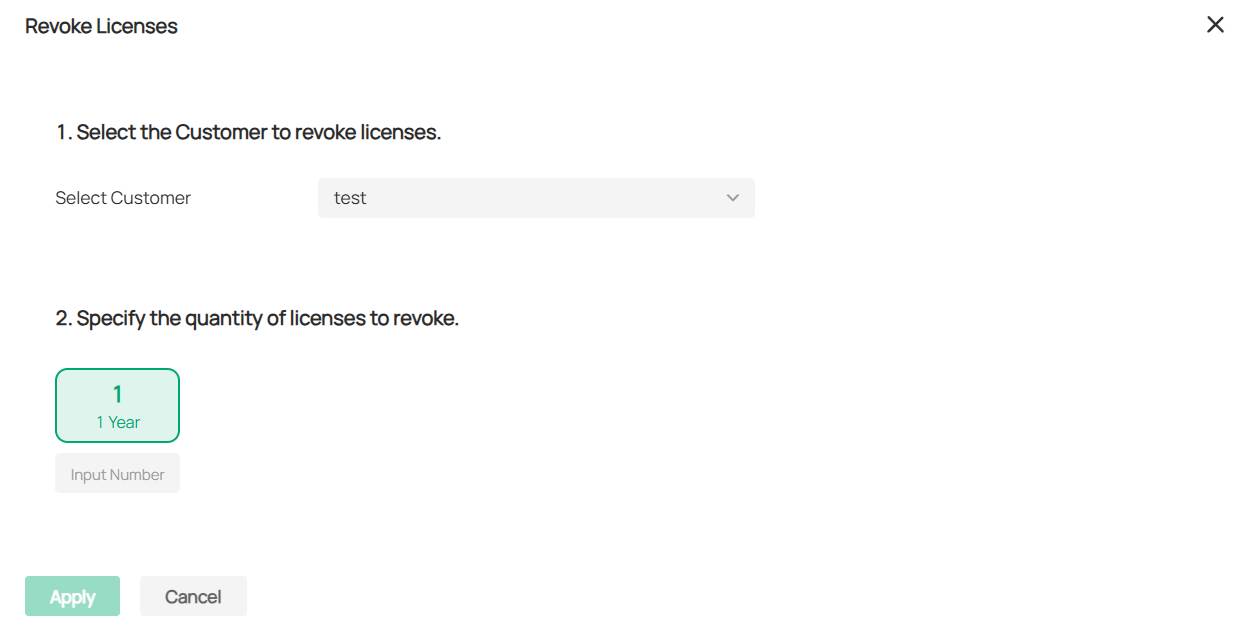
Step 3. Click Apply. The licenses will be revoked and can be assigned to another customer if needed.When you delete the organization, the corresponding license will be automatically revoked from your account.
Export and Import Licenses in a batch
Licenses can be exported as activation codes and delivered between different organizations & customers through activation codes.
Export activation code from TP-Link ID account
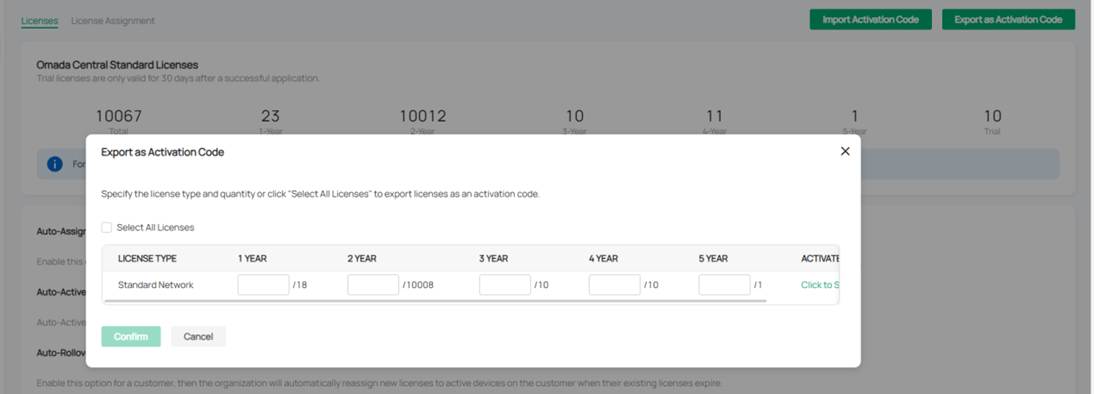
Step 1. Enter Account > License > Export as Activation Code.
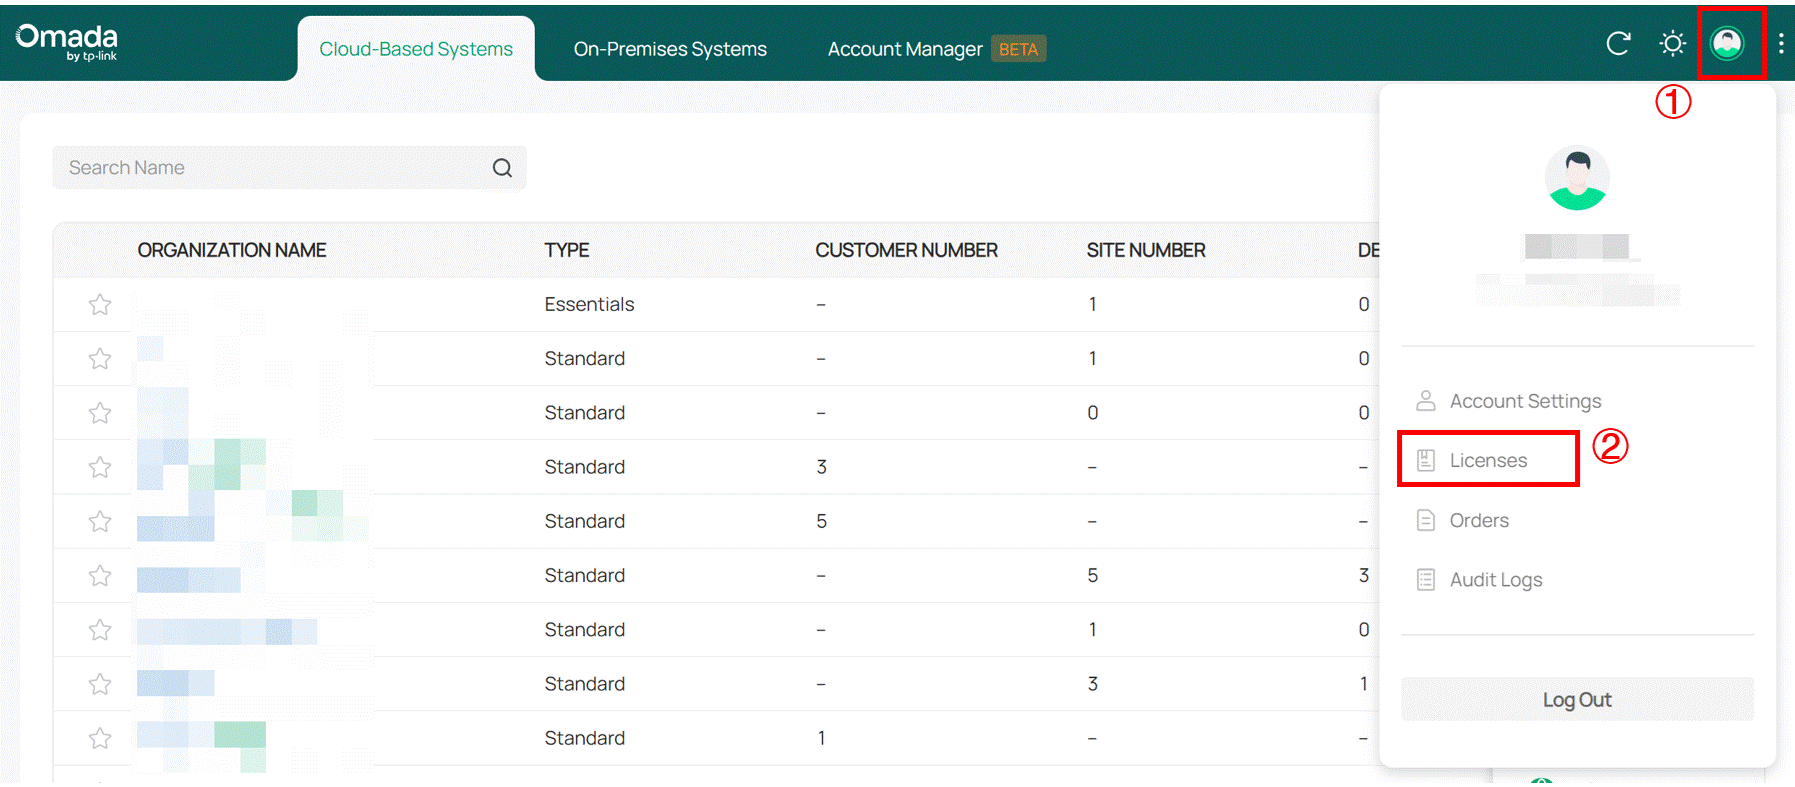
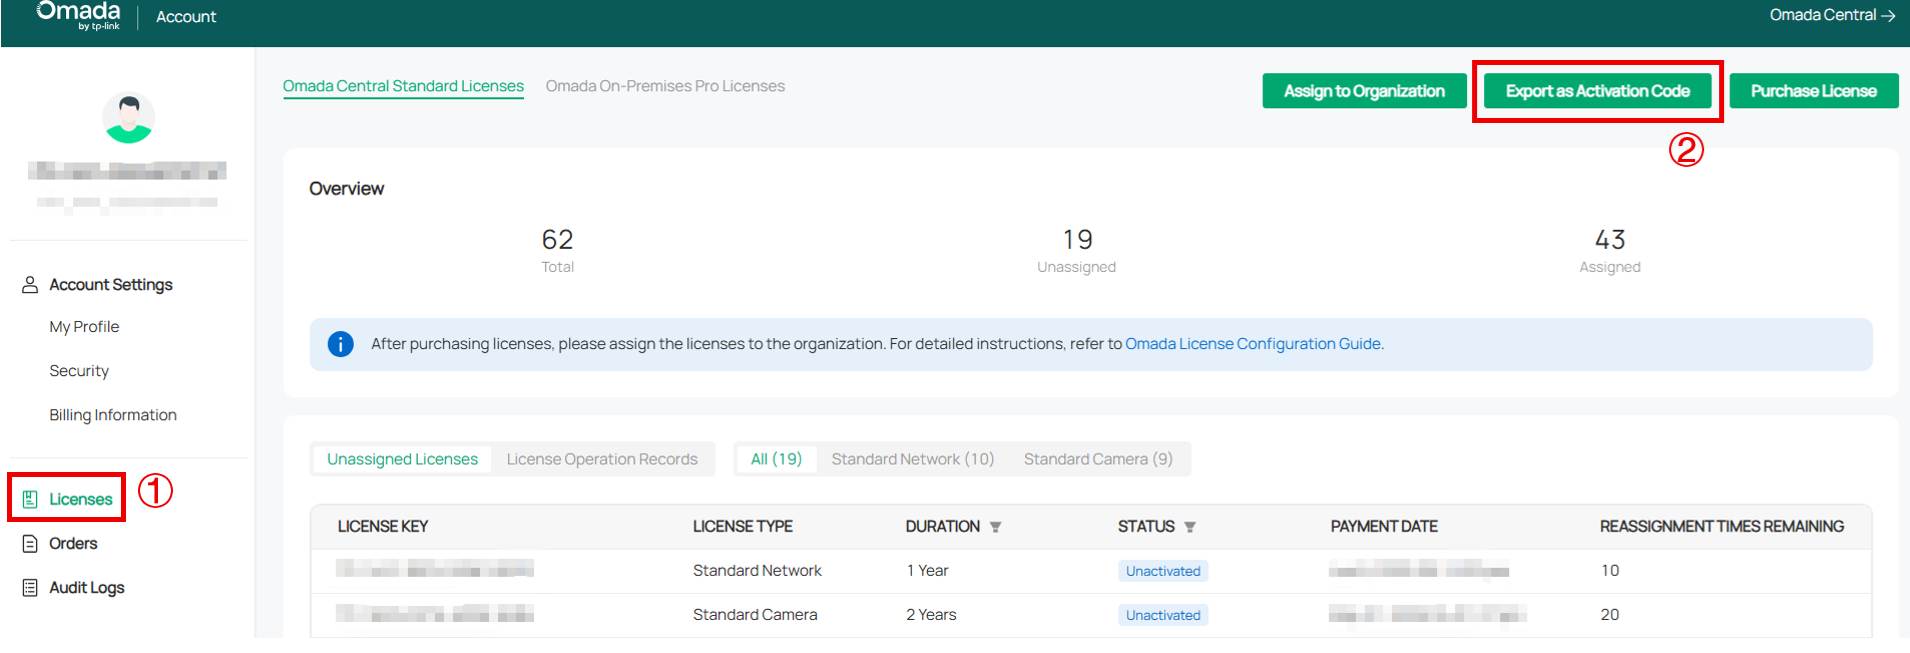
Step 2. Select the license and click Confirm. Export successful.


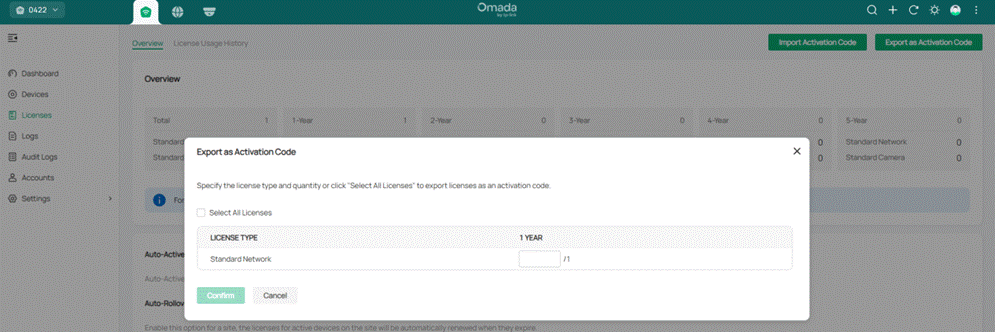
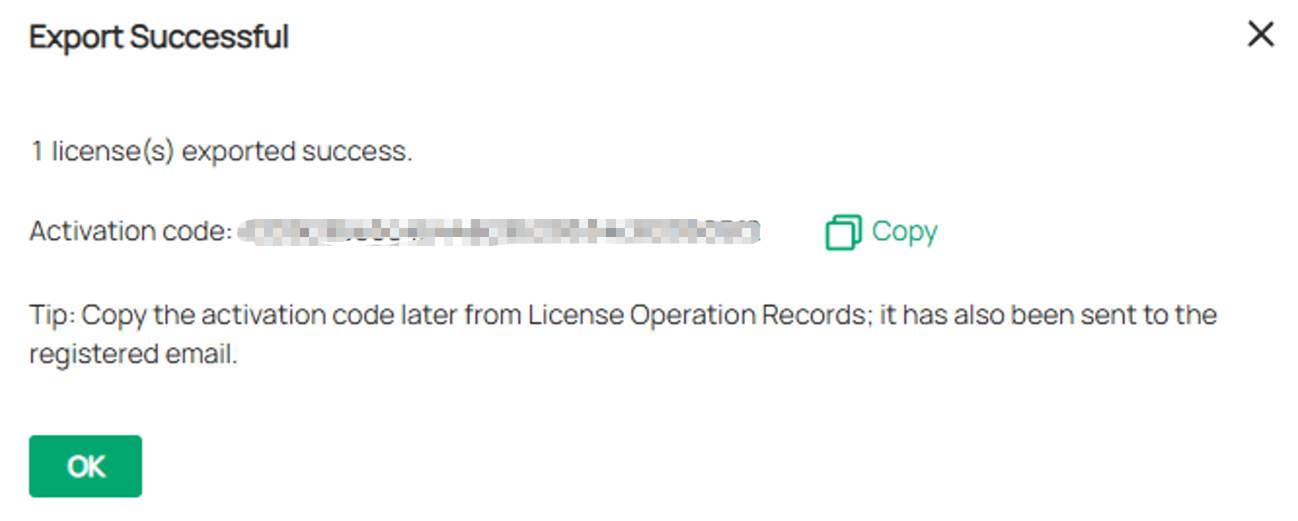
Export activation code from organizations
Step 1. Enter Organization and go to Licenses > Export as Activation Code.

Step 2. Select the license and click Confirm. Export successful.
Export activation code from MSP
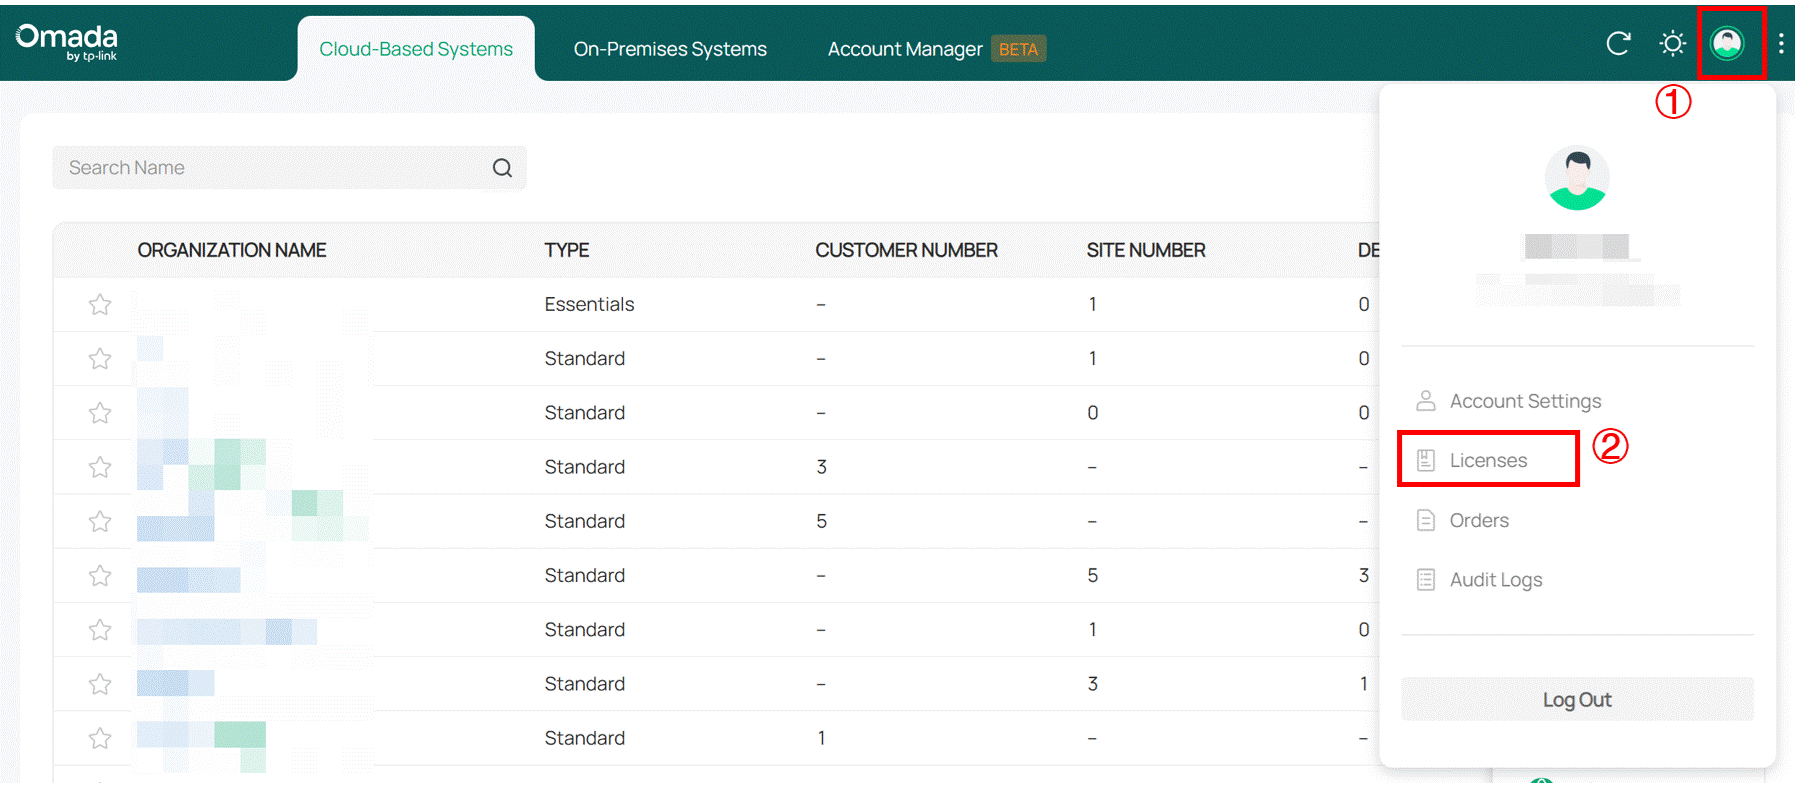
Step 1. Enter MSP view > License>Export as Activation Code.
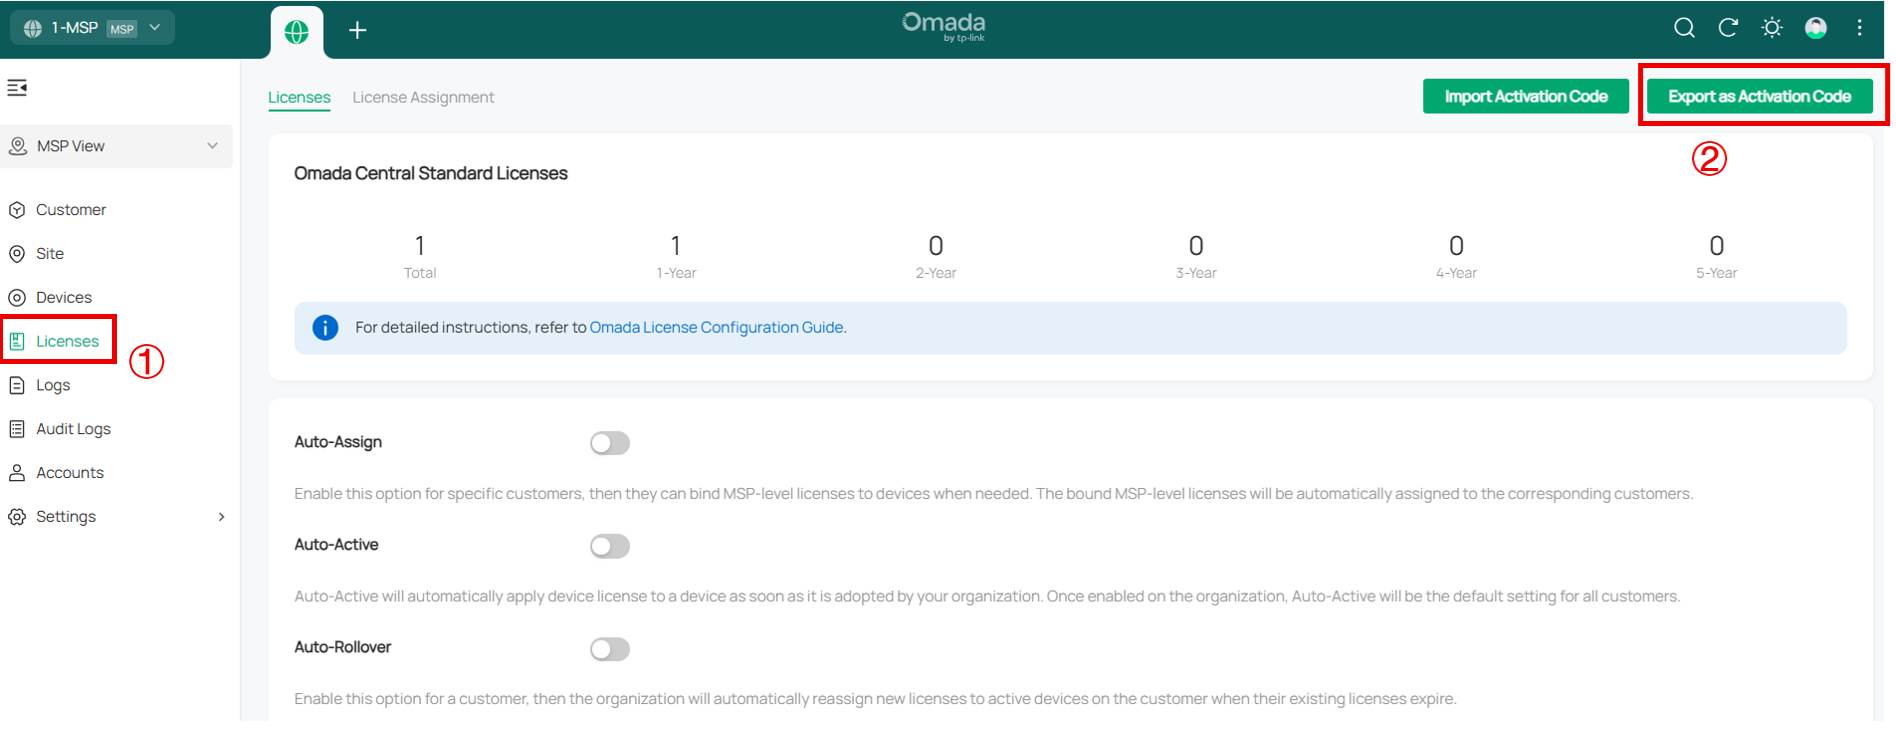
Step 2. Select the license and click Confirm. Export successful.

Export activation code from Customer
Step 1. Enter Customer view > License>Export as Activation Code.
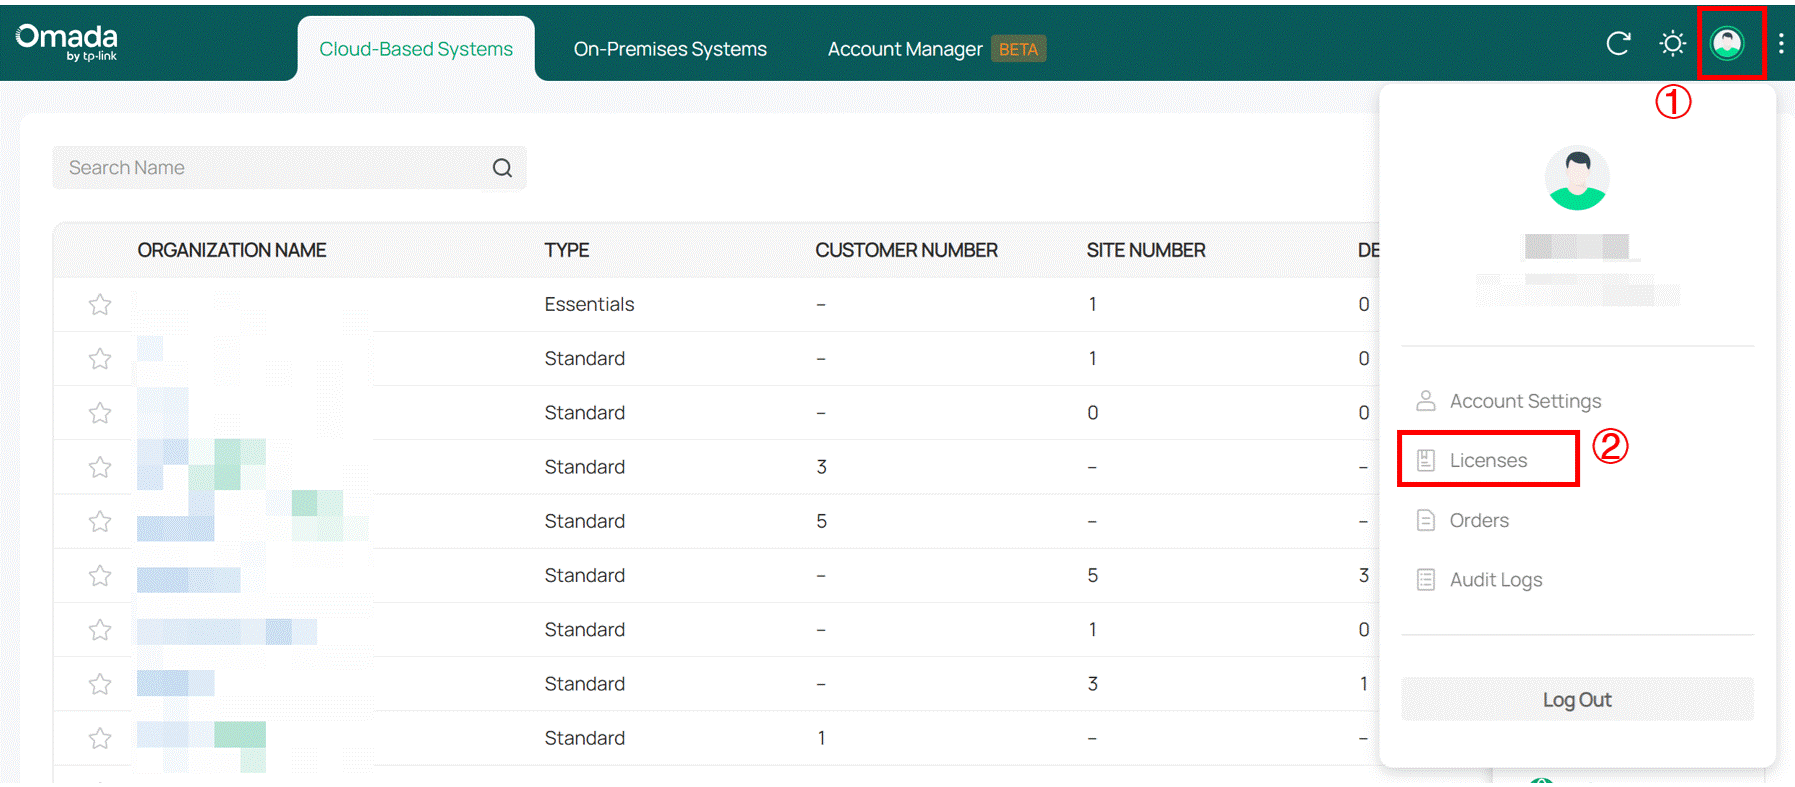
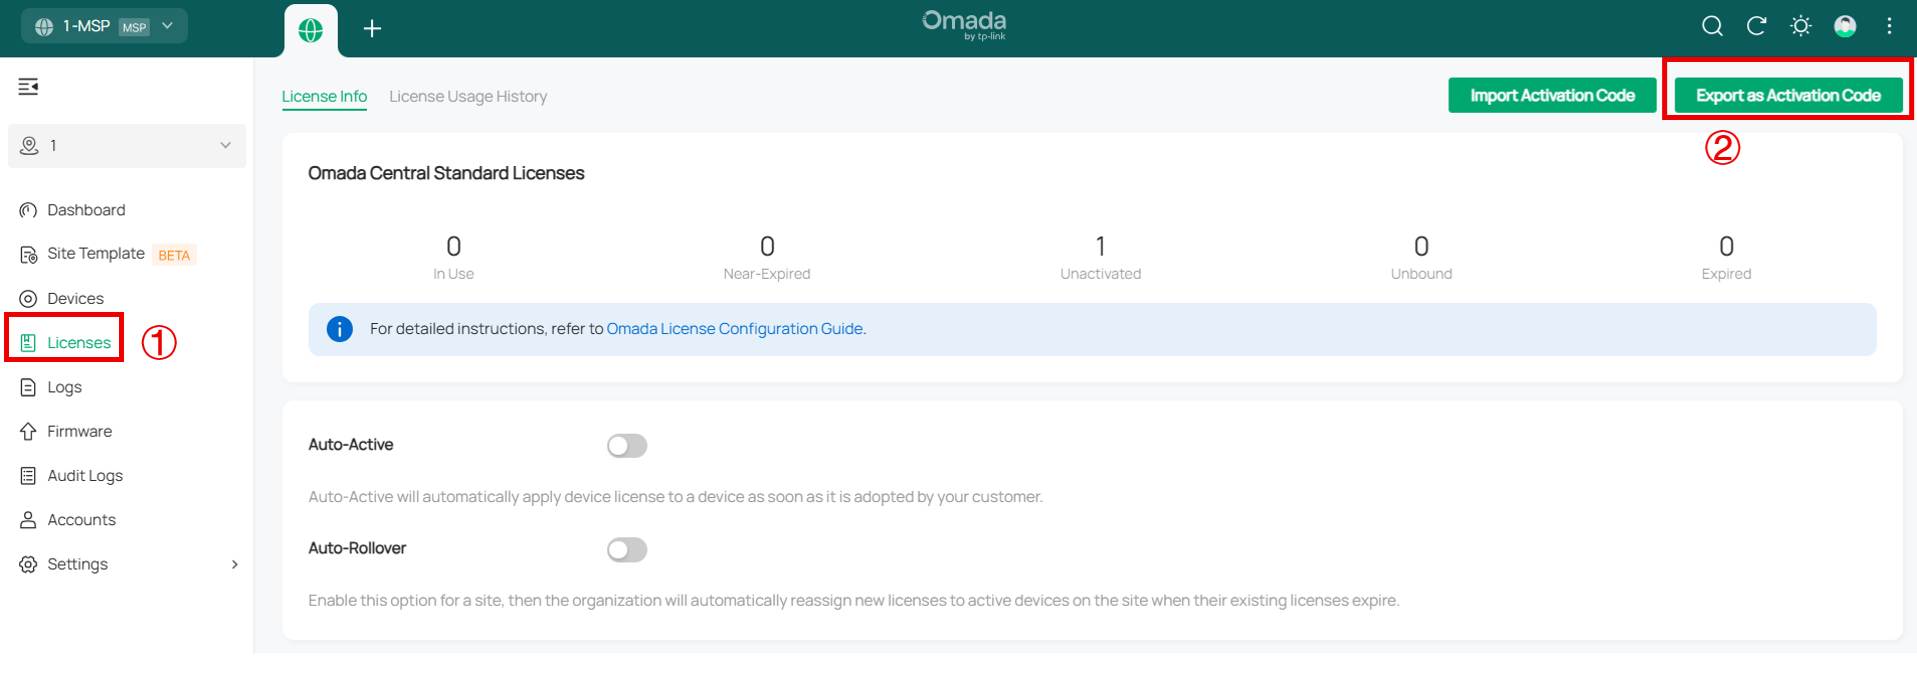
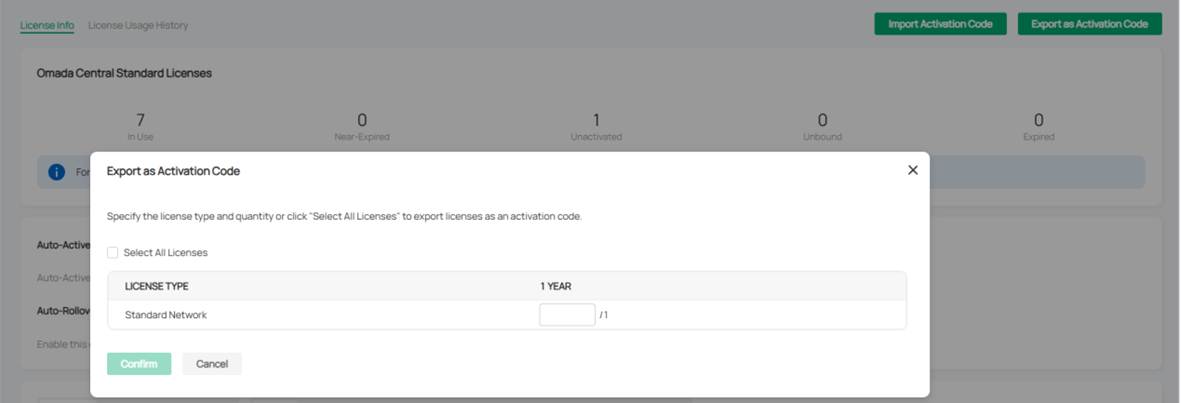
Step 2. Select the license and click Confirm. Export successful.

Import activation code in organizations
Step 1. Enter Organization and go to Licenses > Import Activation Code.
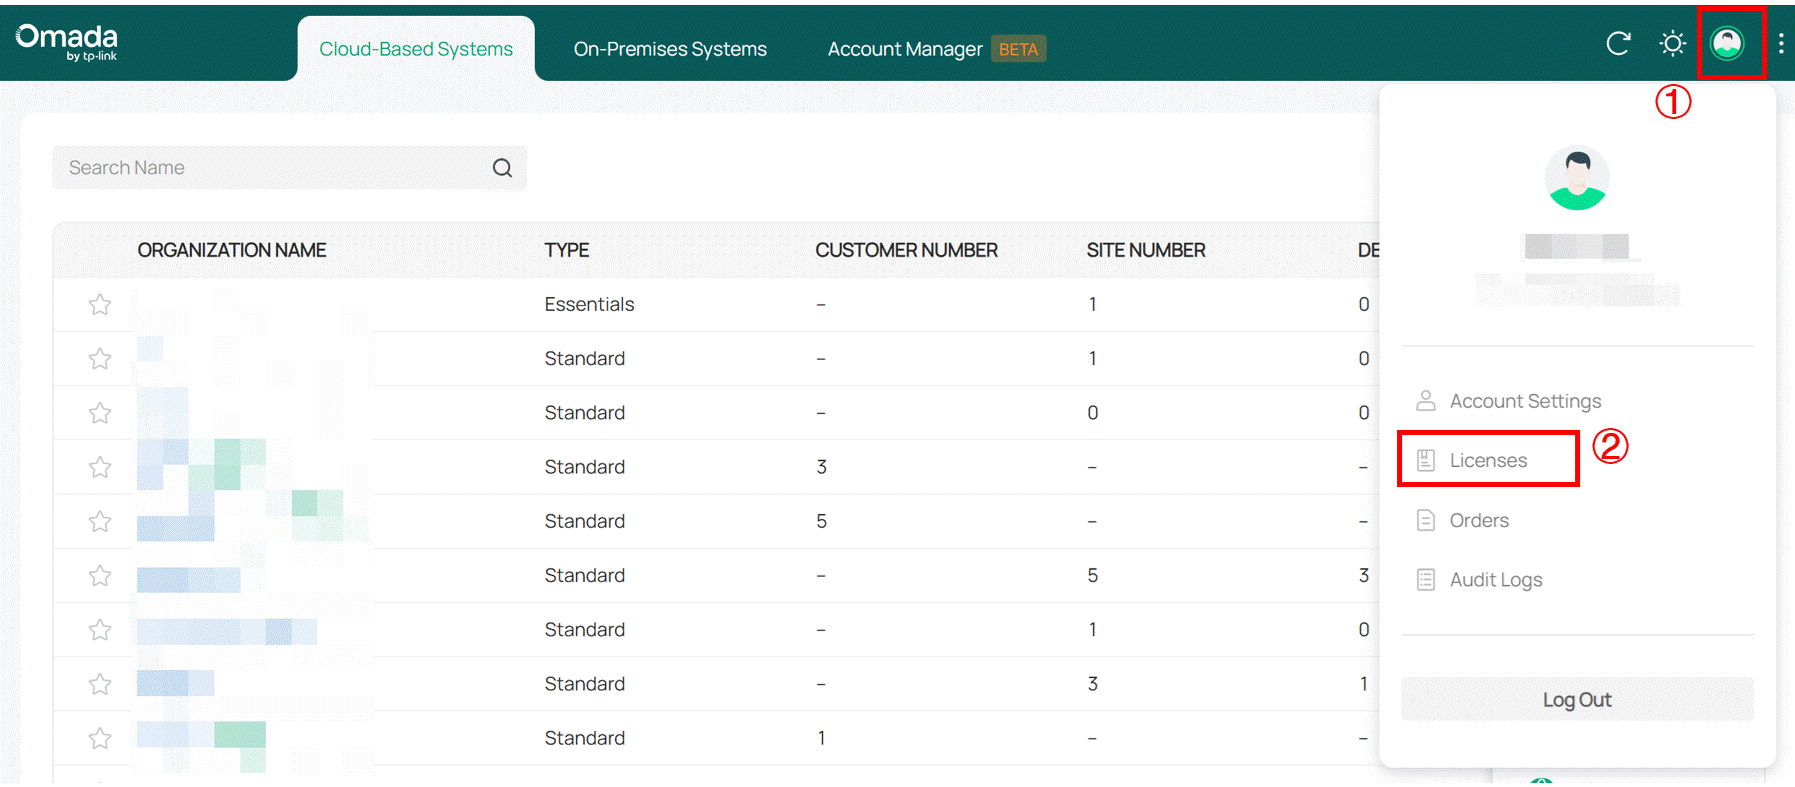

Step 2. Select the license, and click Confirm.

Import activation code in MSP
Step 1. Enter MSP View and go to Licenses > Import Activation Code
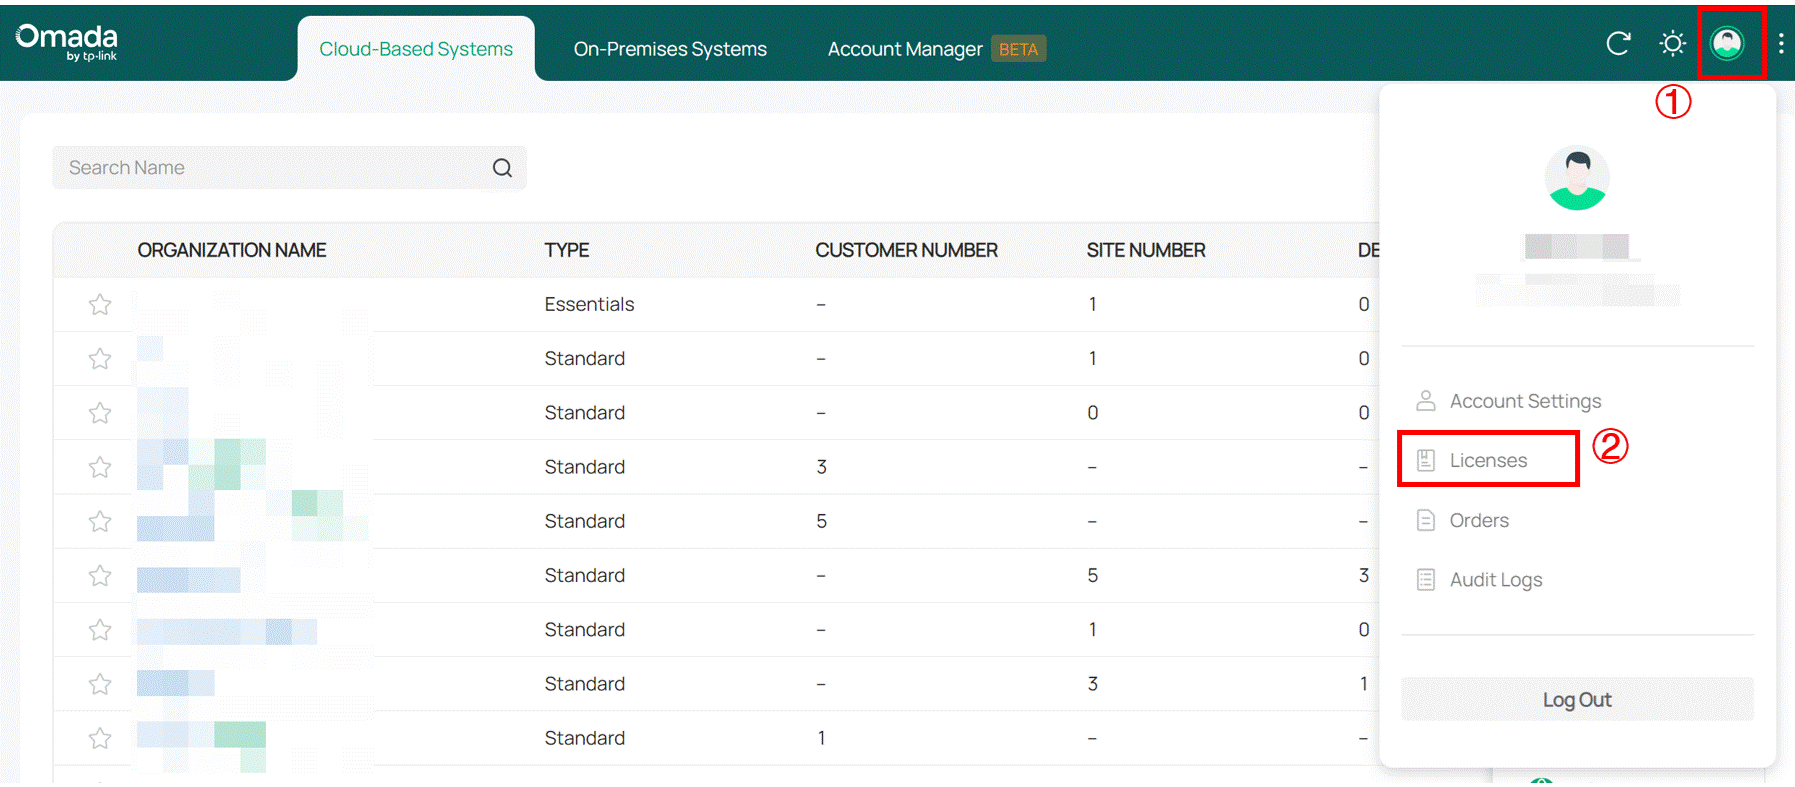
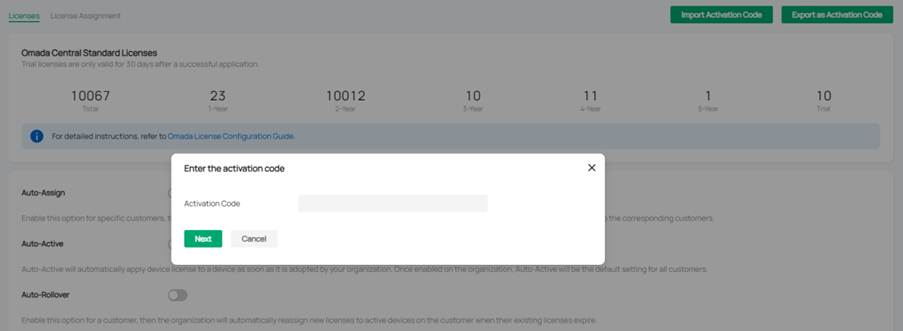
Step 2. Select the license, and click Confirm.

Import the activation code in Customer
Step 1. Enter customer view and go to Licenses > Import Activation Code.
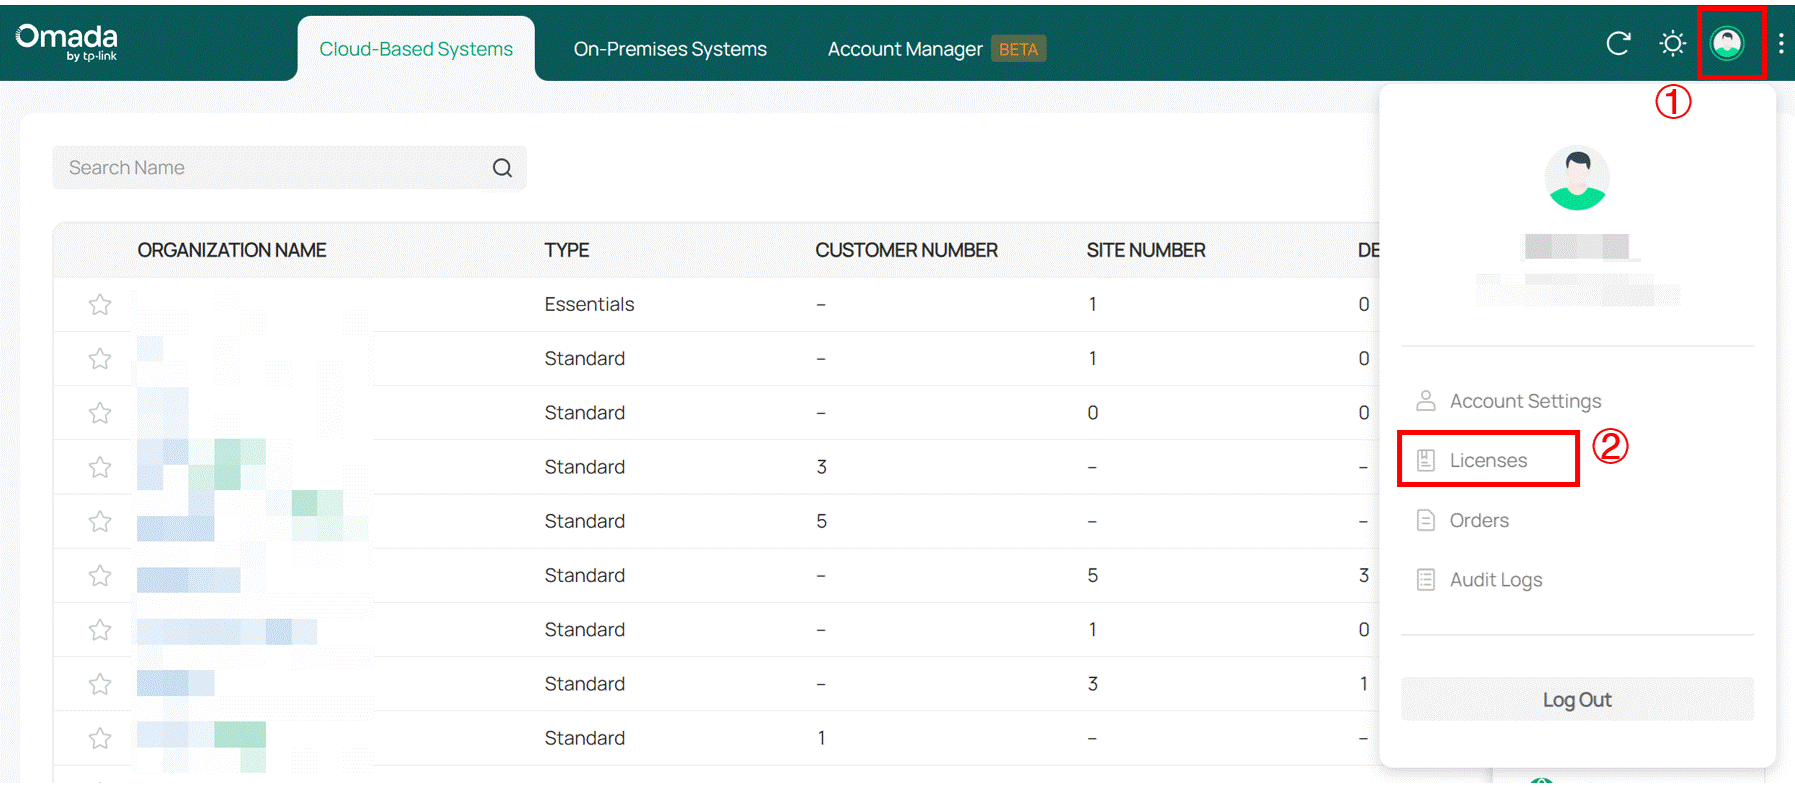

Step 2. Select the license, and click Confirm.

Get to know more details of each function and configuration please go to Download Center to download the manual of your product.
A fost util acest FAQ?
Părerea ta ne ajută să îmbunătățim acest site.


