


How to configure LAN-to-LAN IPsec VPN on TP-Link Router using the new GUI
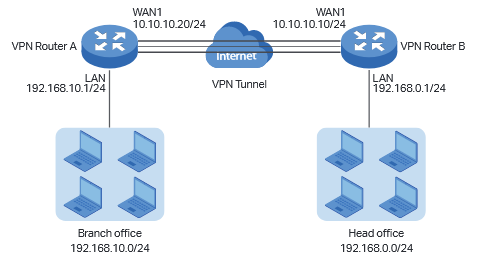
With LAN to LAN VPN function, different private networks can be connected together via the internet. Take the following topology as an example, we will learn how to configure the LAN to LAN IPsec VPN.
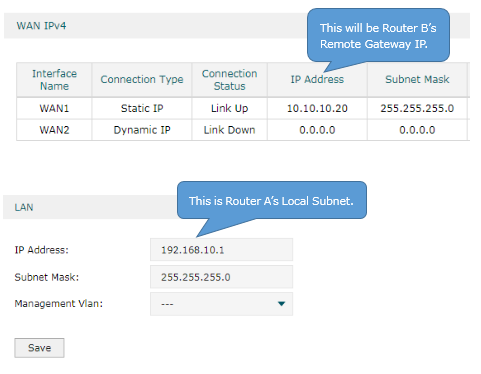
Check the VPN Router A.
Choose the menu Status > System Status and Network > LAN.
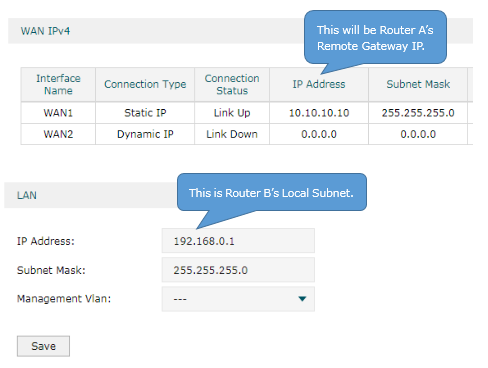
Check the VPN Router B.
Choose the menu Status > System Status and Network > LAN.
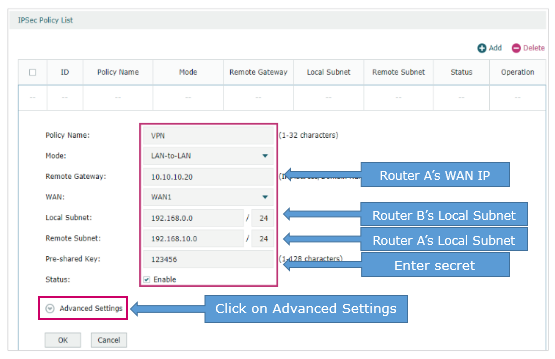
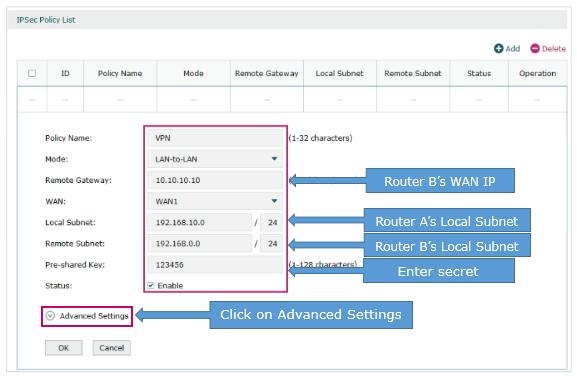
(1) Choose the menu VPN > IPSec > IPSec Policy and click Add to load the following page on the VPN router. Configure the basic parameters for the IPsec policy.
· Specify the mode as LAN-to-LAN.
· Specify the Remote Gateway as 10.10.10.20.
· Specify the WAN as WAN1.
· Specify local subnet as 192.168.0.0/24 and remote subnet as 192.168.10.0/24.
· Specify the Pre-shared Key as you like. Here we enter 123456.
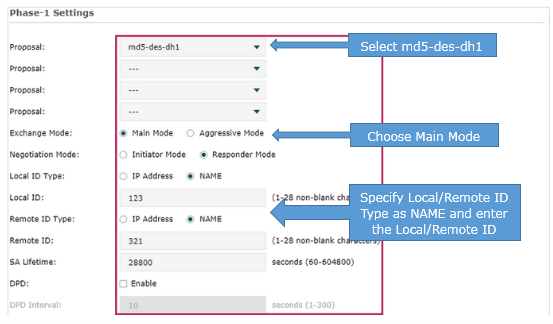
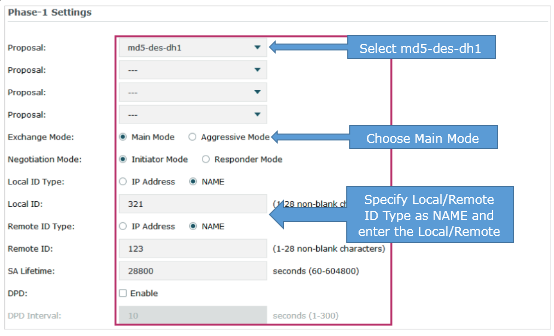
(2) Click Advanced Settings to load the following page. In the Phase-1 Settings section, configure the IKE phase-1 parameters.
· Select md5-des-dh1 as the proposal.
· Specify Exchange Mode as Main Mode.
· Specify Negotiation Mode as Responder Mode.
· Specify Local/Remote ID Type as NAME.
Once the router is behind a NAT device, we have to select Aggressive Mode as Exchange Mode and select NAME as Local/Remote ID Type, otherwise, the VPN tunnel can’t be established.
· Specify the local/remote ID as you like. Here we specify the local ID as 123 and remote ID as 321.
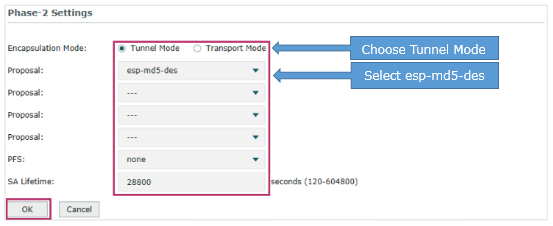
(3) In the Phase-2 Settings section, configure the IKE phase-2 parameters. Click OK.
· Specify Encapsulation Mode as Tunnel Mode.
· Select esp-md5-des as the proposal.
Once the router is behind a NAT device, the proposal cannot be specified as ah-md5 or as –sha1, otherwise, the VPN tunnel can’t be established.

The configuration of Router A is similar to Router B.
(1) Choose the menu VPN > IPSec > IPSec Policy and click Add to load the following page on the VPN router. Configure the basic parameters for the IPsec policy.
(2) Click Advanced Settings to load the following page. In the Phase-1 Settings section, configure the IKE phase-1 parameters.
(3) In the Phase-2 Settings section, configure the IKE phase-2 parameters. Click OK.
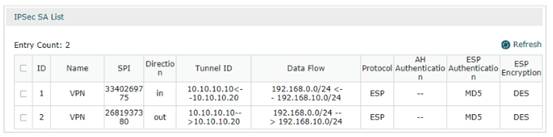
Regardless of Router A and Router B, choose the menu VPN > IPsec > IPsec SA to load the following page. If the IPsec VPN tunnel is established successfully, it will be shown in the list.
A fost util acest FAQ?
Părerea ta ne ajută să îmbunătățim acest site.