


How to configure DNS override on Omada Gateway
Contents
Introduction
Omada Gateway Added Support for DNS Override functionality (introduced in SDN5.15). When DNS Override is enabled, the Gateway intercepts all DNS requests to the desired DNS server. This article takes Controller mode as an example.
Requirements
- Omada Software/ Hardware Controller or Omada Central (v5.15.20 or above)
- Omada Gateway which adapts to Controller V5.15 or above
Configuration
Step 1. In Site View, navigate to Settings > Services > DNS Proxy.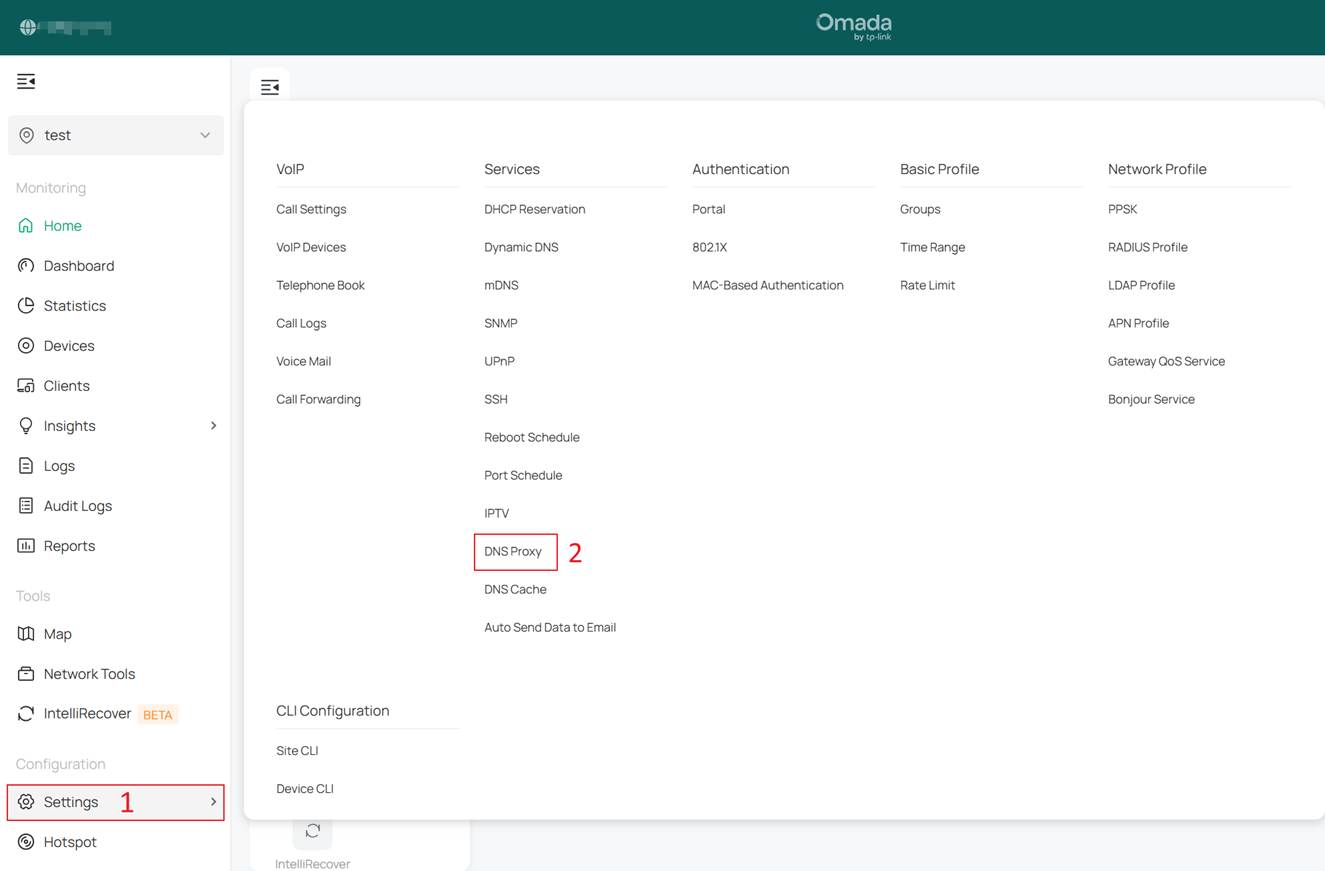
Step 2. To configure the DNS Override rule, click Enable and select DNS Override as Proxy Type.
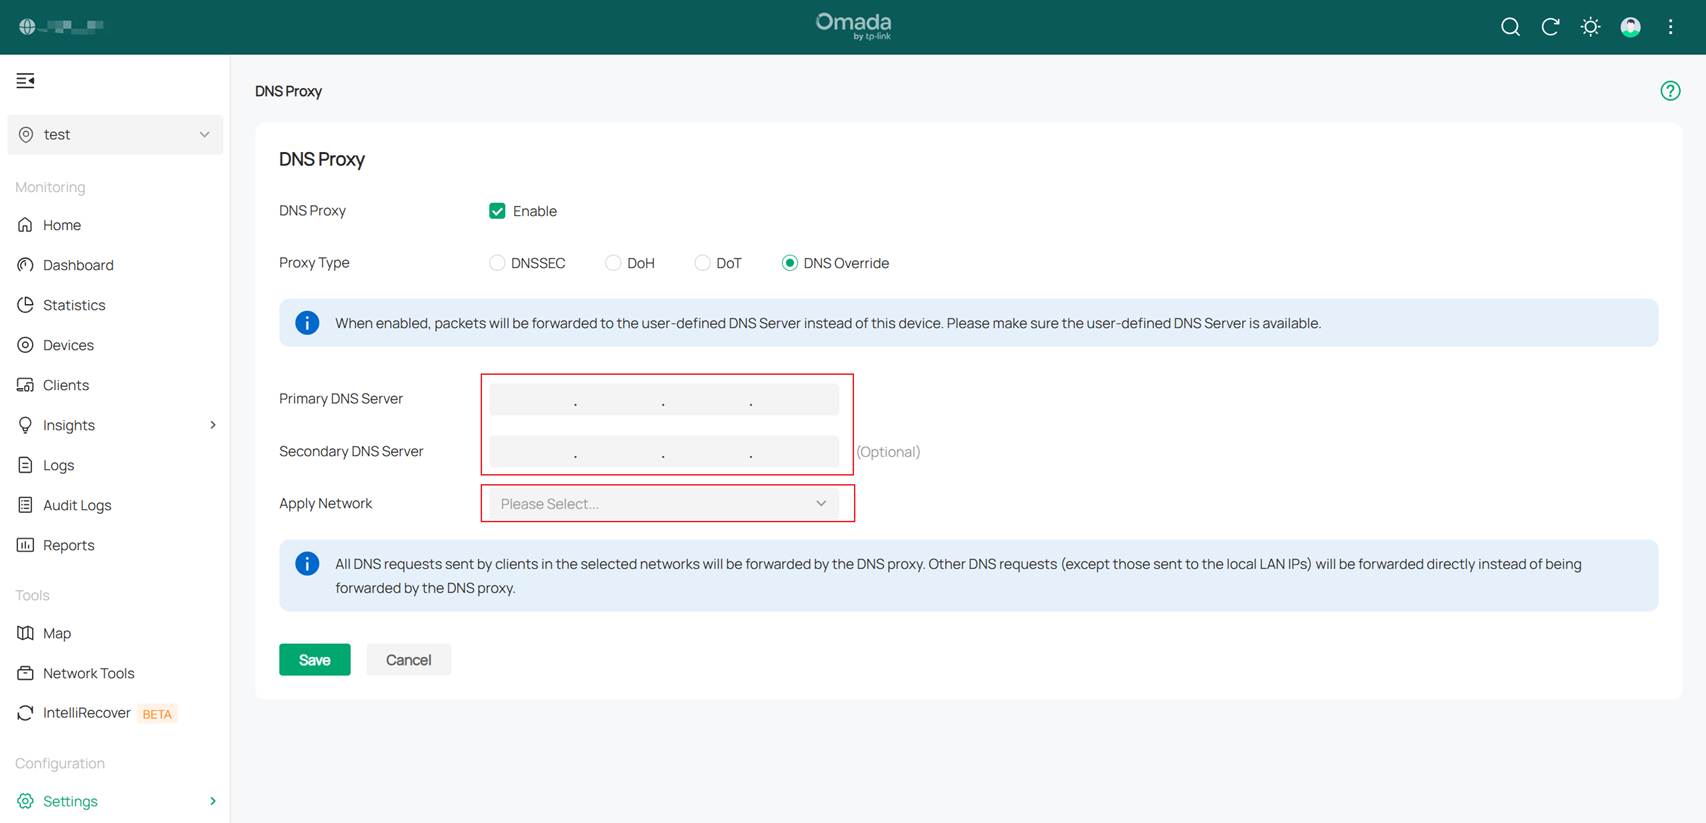
Fill in Primary DNS server (mandatory) and Secondary DNS server (optional) according to your desired DNS server IP address.
Select the desired Network to apply the override rule in Apply Network.
Note:
- The Apply Network option only takes effect for DNS requests sent by clients to other DNS servers (i.e., addresses other than the Gateway’s own LAN port IP). DNS requests directed to the Gateway’s LAN port IP would not be affected by DNS Override.
- DNS requests from LAN networks that are not selected will be forwarded directly without being intercepted.
Conclusion
This article explained the configuration steps for the DNS Override feature on Omada Gateway series devices running SDN5.15 or above firmwares.
Get to know more details of each function and configuration please go to Download Center to download the manual of your product.
Est-ce que ce FAQ a été utile ?
Vos commentaires nous aideront à améliorer ce site.


