Comment configurer la gestion du stockage sur carte Micro SD sur les caméras VIGI
Contenu
Introduction
Cet article explique comment configurer la gestion du stockage d'une carte micro SD sur une caméra VIGI. Vous apprendrez à formater la carte, à sélectionner le flux d'enregistrement, à activer ou désactiver l'écrasement automatique et à configurer les paramètres d'enregistrement audio et d'expiration.
Exigences
- Caméra VIGIL
- Carte Micro SD
- PC
Configuration
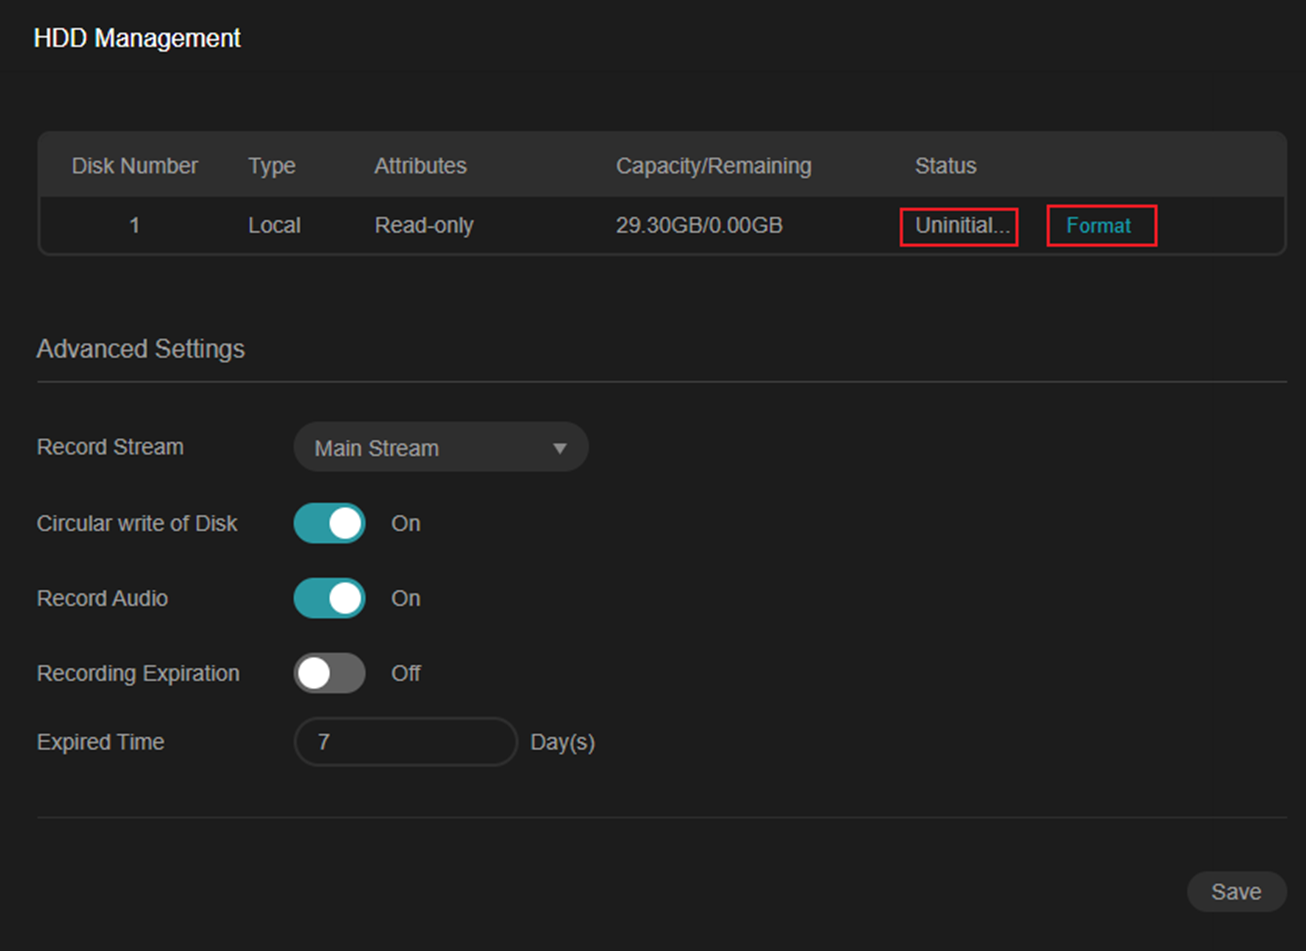
Étape 1. Allumez la caméra et connectez-la au réseau. Connectez-vous à l'interface de gestion Web de la caméra via son adresse IP. Accédez à Paramètres > Stockage > Gestion du stockage .
Remarque : si la carte micro SD est utilisée pour la première fois, son état indique « Non initialisé » . Cliquez sur « Formater » pour la préparer à l'utilisation.
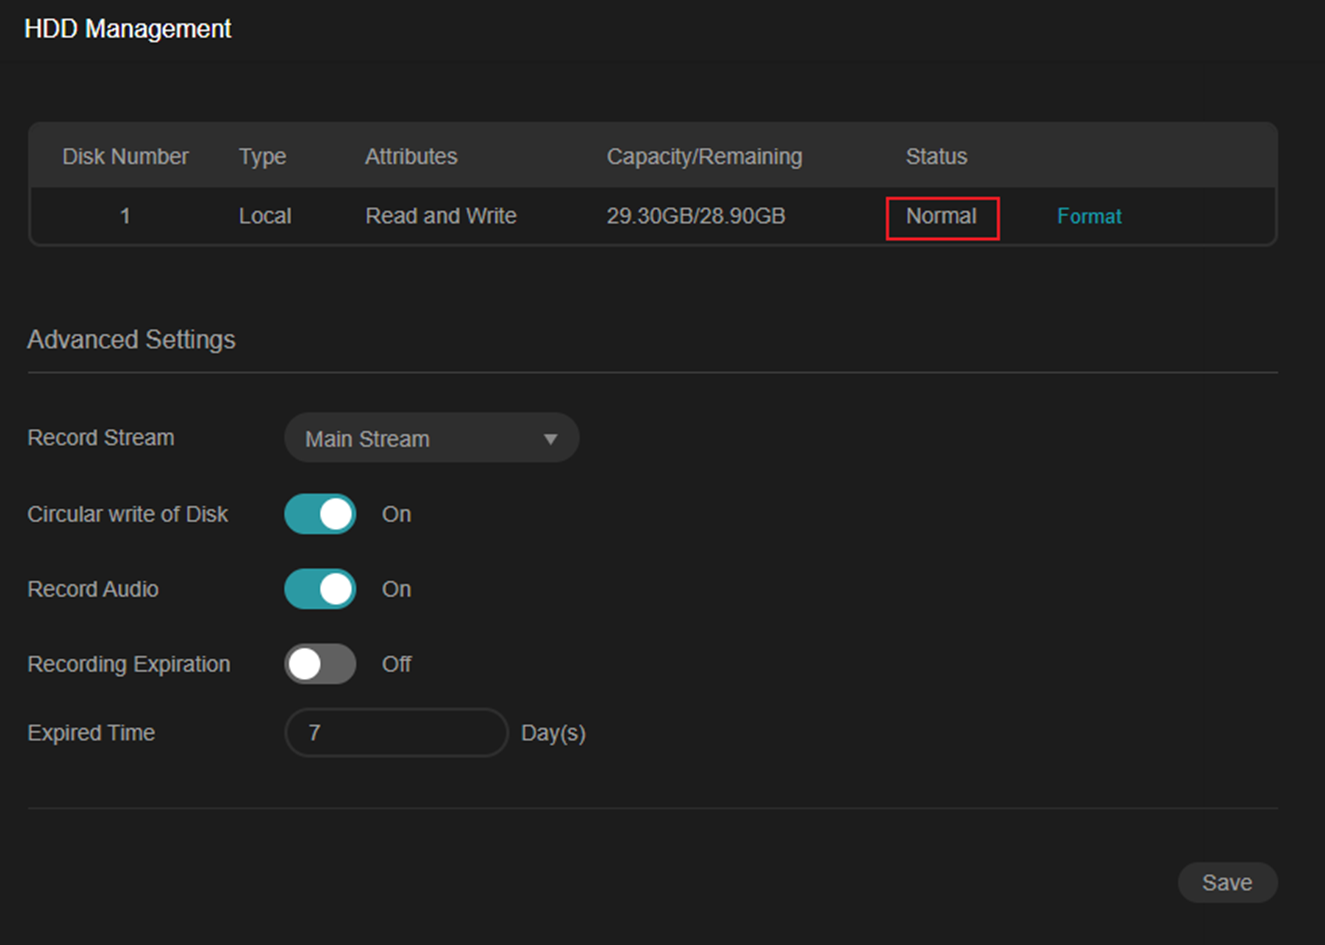
Après le formatage, l'état affichera « Normal » et les attributs « Lecture » et « Écriture » . La capacité restante sera affichée, indiquant que la carte est prête pour l'enregistrement .
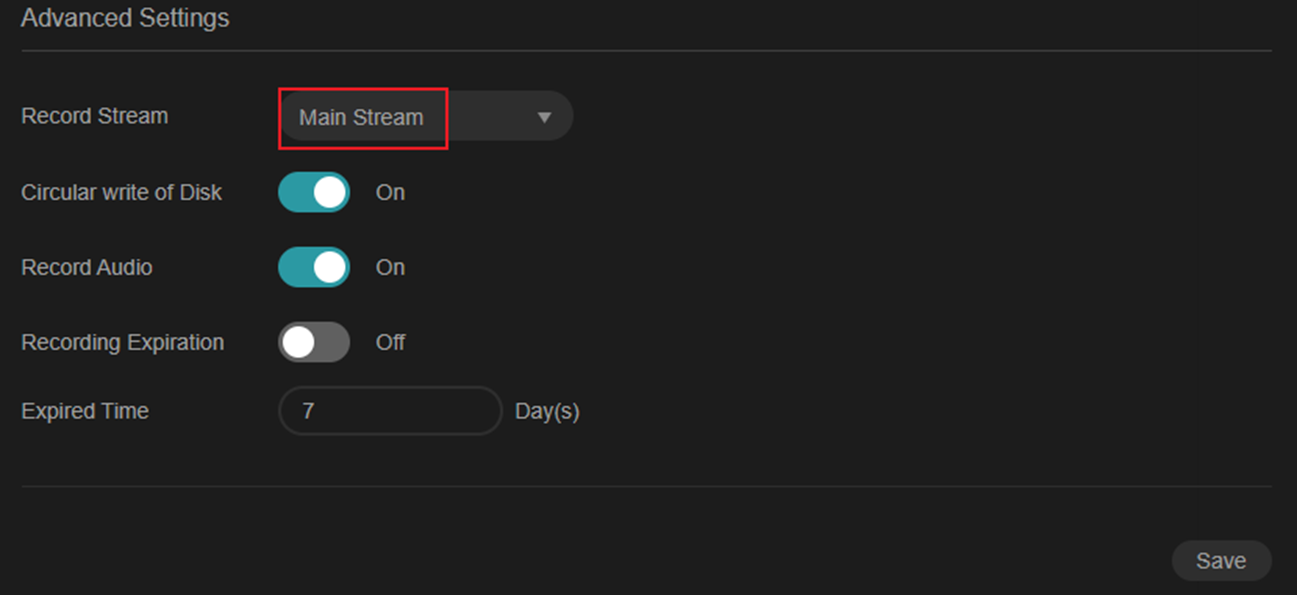
Étape 2. Accédez à Gestion du stockage > Paramètres avancés > Flux d’enregistrement.
L'option par défaut est Main Stream .
Cliquez sur le menu déroulant pour sélectionner le type de flux souhaité.
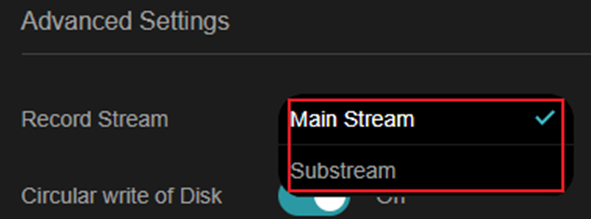
- Flux principal : offre la résolution et la fréquence d'images les plus élevées prises en charge par l'appareil, nécessitant davantage de stockage et de bande passante.
- Sous-flux : utilise une résolution inférieure, économisant ainsi de la bande passante et de l'espace de stockage.
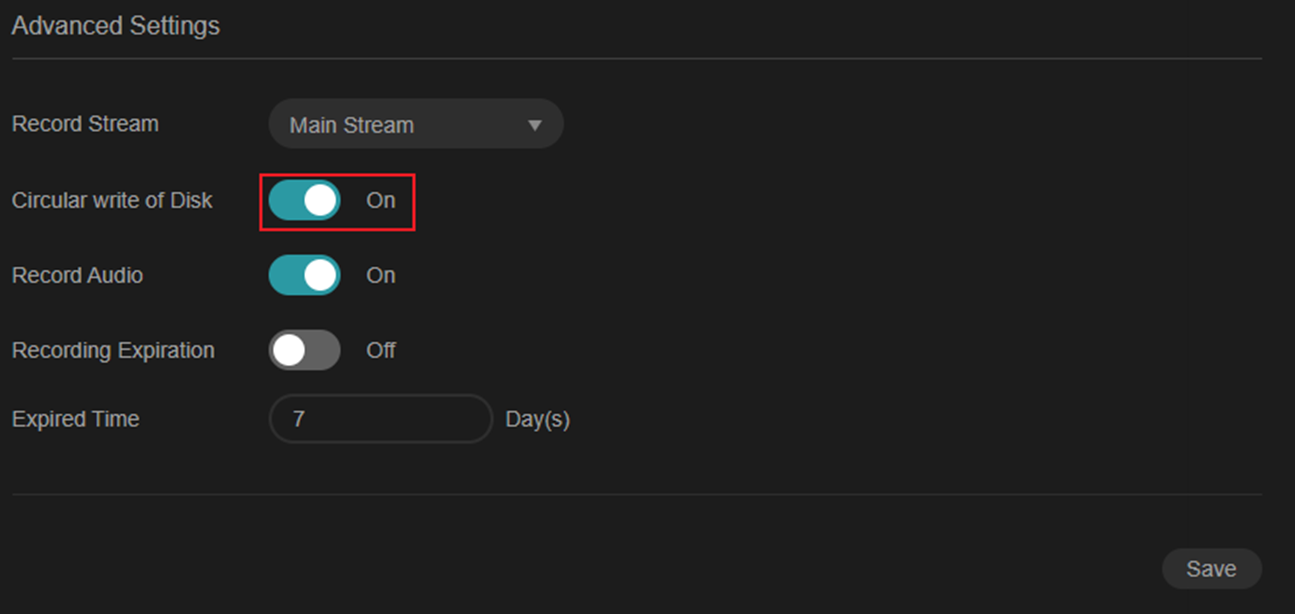
Étape 3. Accédez à Gestion du stockage > Paramètres avancés > Écriture circulaire sur disque .
Lorsque cette option est activée, la caméra écrase les enregistrements les plus anciens lorsque la carte est pleine.
Lorsqu'elle est désactivée, l'enregistrement s'arrête lorsque la carte est pleine.
Paramètre par défaut : l'écriture circulaire sur disque est activée, ce qui signifie que la caméra écrase automatiquement les enregistrements les plus anciens lorsque le stockage est plein.
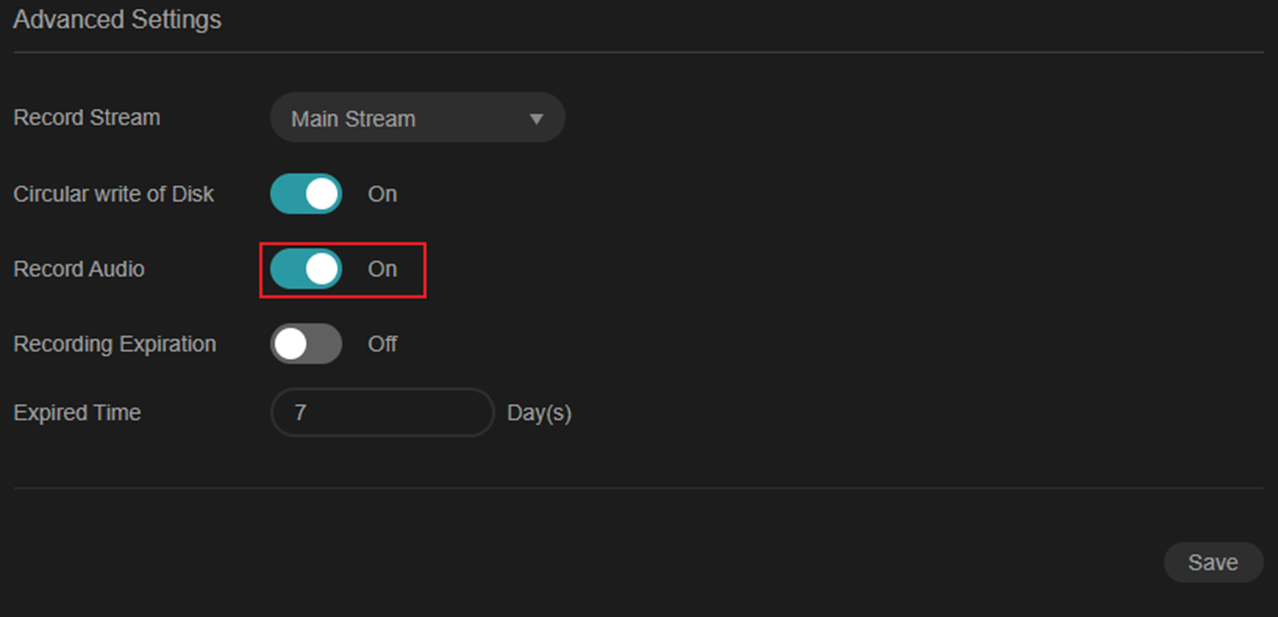
Étape 4. Accédez à Gestion du stockage > Paramètres avancés > Enregistrement audio . Après avoir activé cette fonction, la caméra VIGI avec microphone enregistrera simultanément l'audio et la vidéo.
Paramètre par défaut : l'enregistrement audio est activé pour les modèles avec microphone intégré. L'audio sera donc enregistré en même temps que la vidéo. La disponibilité peut varier selon le pays ou la région.
Remarque : les caméras sans microphone n’affichent pas cette option.
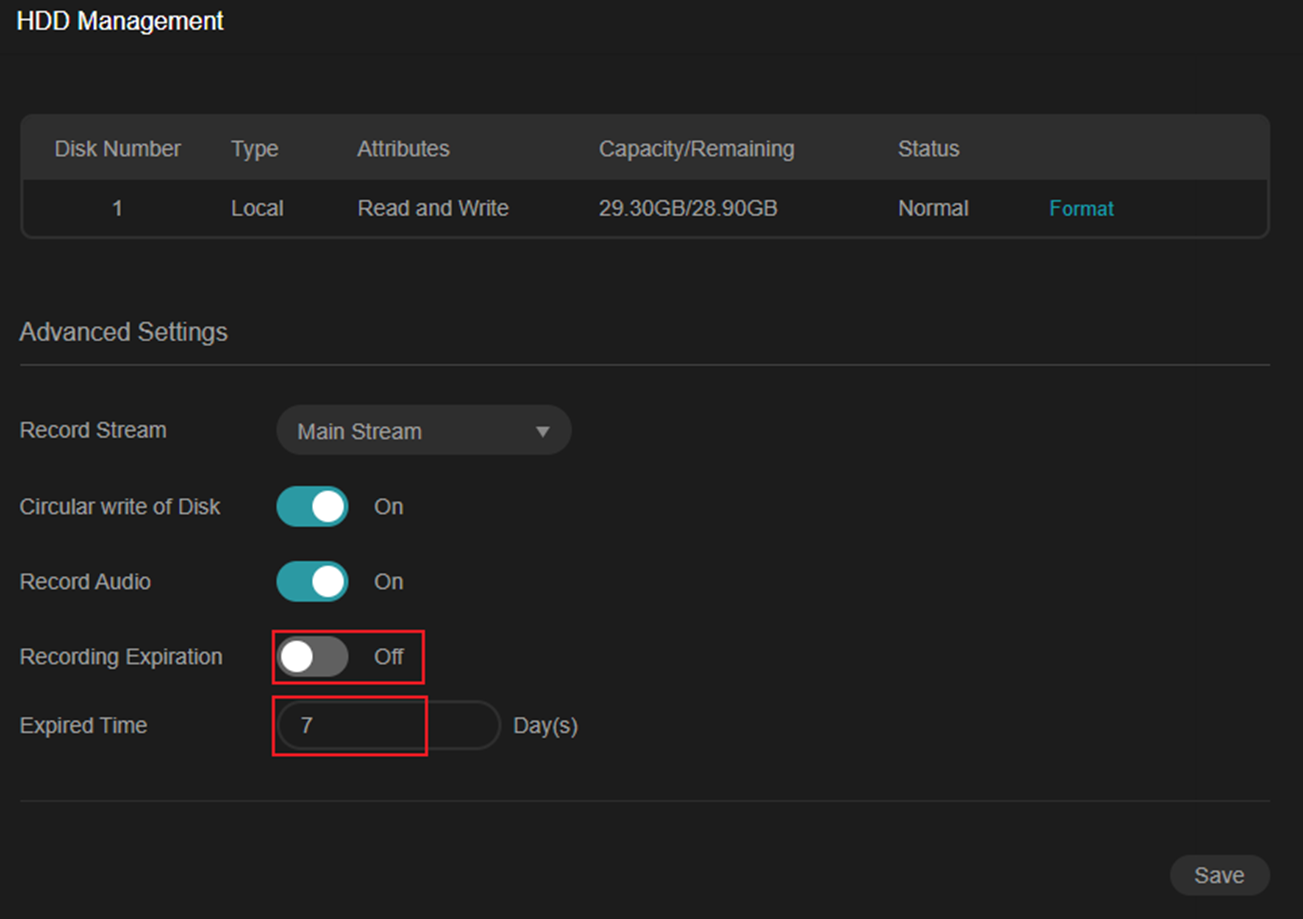
Étape 5. Accédez à Gestion du stockage > Paramètres avancés > Expiration de l'enregistrement .
Paramètre par défaut : l'expiration de l'enregistrement est désactivée, les enregistrements sont donc conservés jusqu'à ce que la carte micro SD soit pleine ou écrasée.
Lorsque cette option est activée, définissez la période d'expiration (de 1 à 90 jours). La valeur par défaut est de 7 jours. Cliquez sur Enregistrer pour appliquer les modifications. Activez cette option pour supprimer automatiquement les enregistrements dépassant la période d'expiration définie, libérant ainsi de l'espace de stockage sans intervention manuelle.
Remarque : les enregistrements supprimés ne peuvent pas être récupérés.
Conclusion
Une fois la configuration terminée, vérifiez les paramètres via la lecture dans l'application VIGI, VMS ou d'autres clients pris en charge. Assurez-vous que le flux d'enregistrement, les paramètres audio et le délai d'expiration correspondent à vos besoins.
Pour en savoir plus sur chaque fonction et configuration, veuillez vous rendre dans le Centre de téléchargement pour télécharger le manuel de votre produit.
Est-ce que ce FAQ a été utile ?
Vos commentaires nous aideront à améliorer ce site.


