Comment partager vos appareils Omada Guard sur Omada Central
Contenu
Objectif
Omada Central prend en charge plusieurs comptes pour une gestion multiniveau. Cet article explique comment partager vos appareils Omada Guard avec différents comptes et différents niveaux de gestion sur Omada Central.
Exigences
- Omada Central
- Caméras et NVR Omada Guard
Introduction
Pour partager vos appareils Omada Guard dans Omada Central, vous devez envoyer manuellement une invitation à un identifiant TP-Link enregistré, définir ses rôles pour le site souhaité, puis cet identifiant TP-Link deviendra le compte de gestion avec des autorisations de gestion spécifiques pour le site Omada.
Configuration
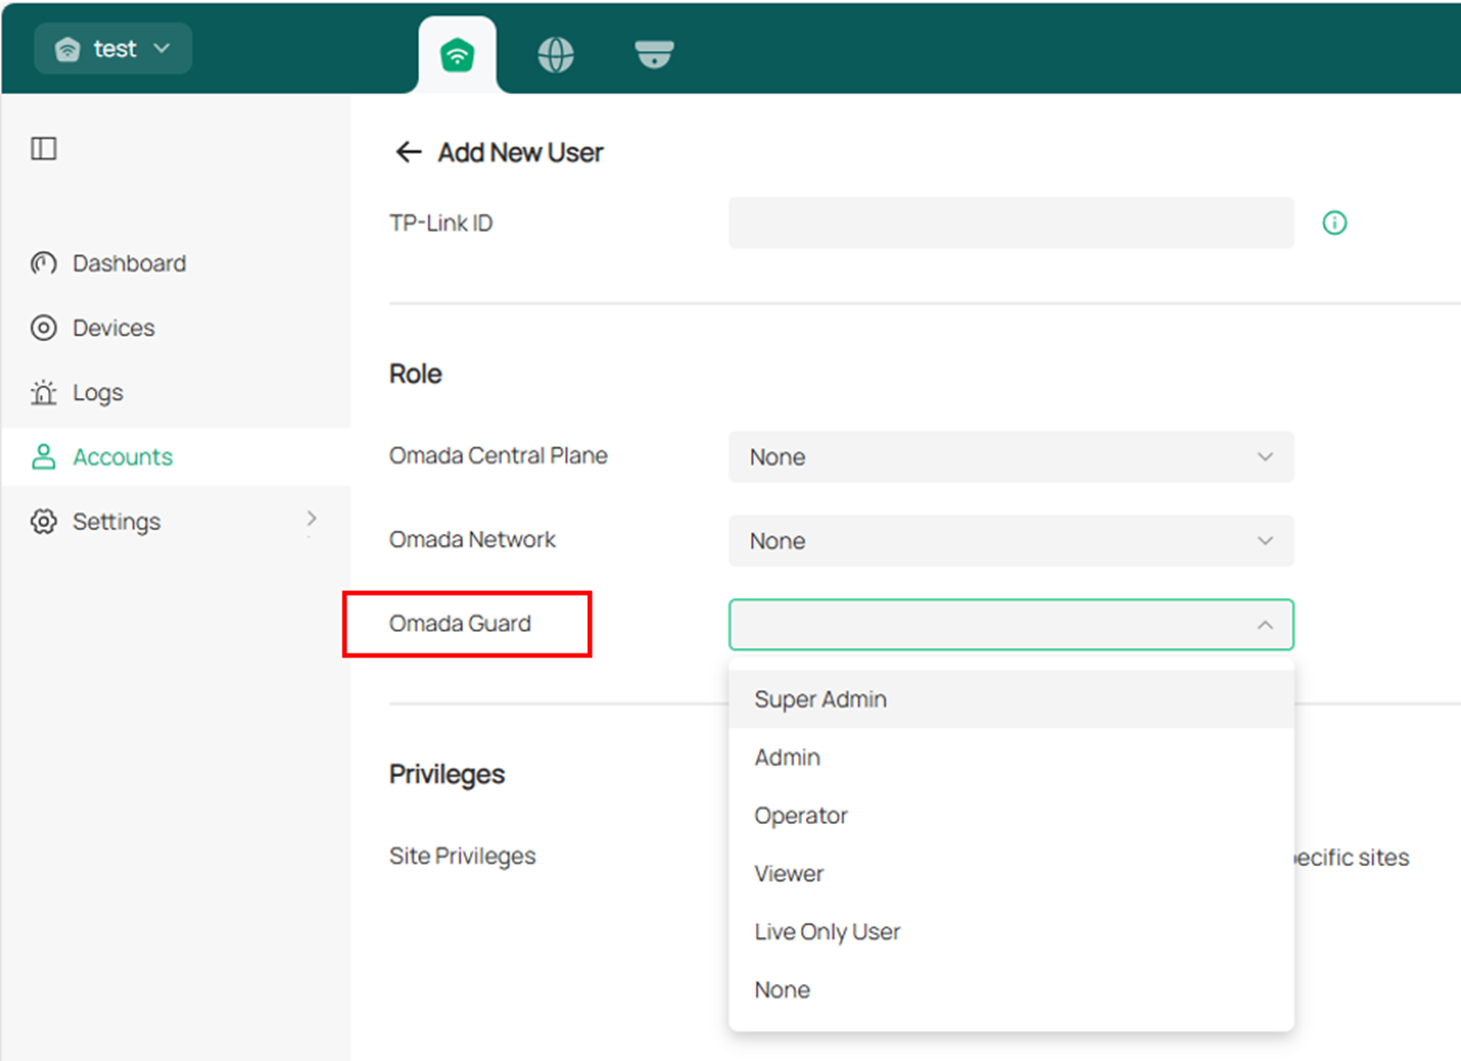
Étape 1. Connectez-vous au portail Web Omada Central (https://omada.tplinkcloud.com/) et accédez à Omada Central Plane > Comptes > Ajouter un nouvel utilisateur .

Étape 2. Saisissez ensuite l'identifiant TP-Link avec lequel vous souhaitez partager le contenu et définissez son rôle. Omada Guard propose six rôles ; vous pouvez également définir les rôles Omada Central Plane et Omada Network si nécessaire.
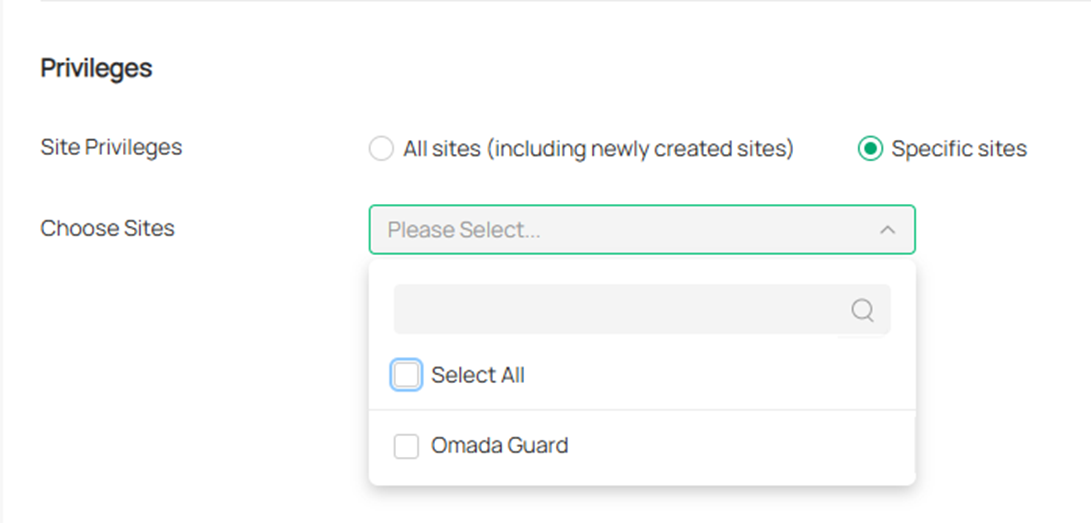
Vous pouvez également choisir le site que vous souhaitez partager dans les Options Privilèges .
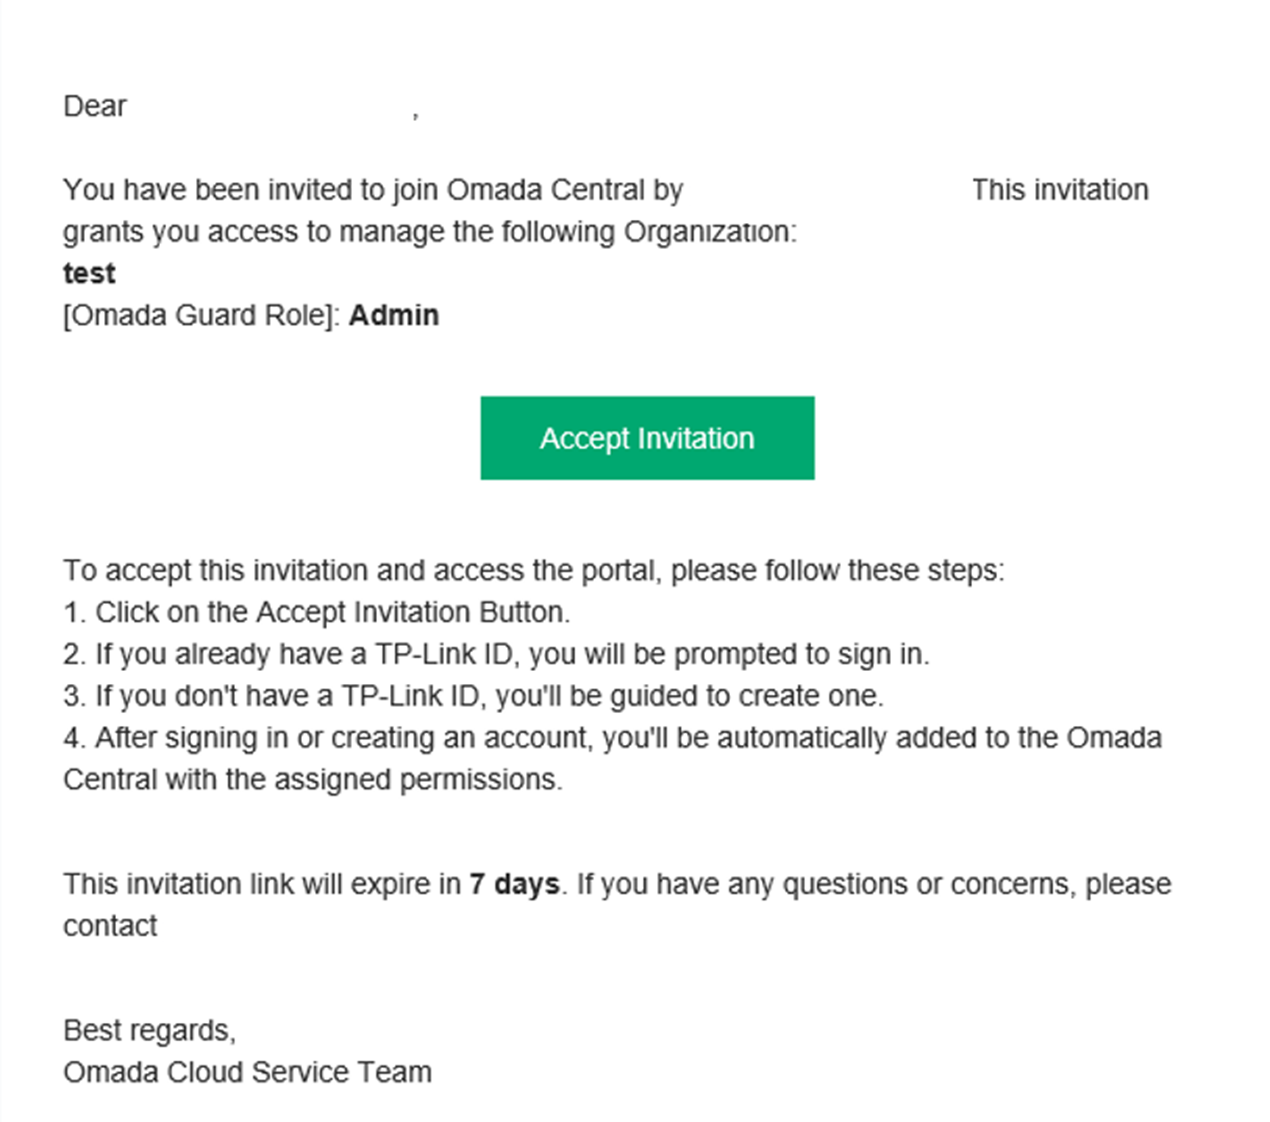
Étape 3. Après avoir défini les rôles et les privilèges, cliquez sur « Inviter » pour envoyer une invitation à l'identifiant TP-Link que vous avez ajouté. Après avoir envoyé l'invitation, l'invité doit consulter sa boîte de réception et accepter l'invitation. Il peut ensuite se connecter à Omada Guard avec son niveau de gestion défini et son identifiant TP-Link.
Conclusion
Vous avez maintenant partagé avec succès vos appareils Omada Guard avec un autre compte sur Omada Central.
Pour en savoir plus sur chaque fonction et configuration, veuillez vous rendre dans le Centre de téléchargement pour télécharger le manuel de votre produit.
Est-ce que ce FAQ a été utile ?
Vos commentaires nous aideront à améliorer ce site.