Comment configurer la fonction de défense active sur les caméras VIGI
Contenu
Configuration de la défense active dans l'interface utilisateur Web IPC
Configuration de la défense active dans l'application VIGI
Objectif
Cet article présente les configurations d'Active Defense via l'interface web et l'application, ainsi que des configurations spécifiques telles que le type de son et le volume des alarmes sonores.
Exigences
- VIG IPC
- Interface utilisateur Web VIGI
- Application VIGI
Introduction
La fonction de défense active utilise des algorithmes d'apprentissage profond ou des dispositifs d'alarme externes pour déclencher en temps réel des signaux lumineux et sonores puissants, dissuadant ainsi les intrus. Elle prend également en charge les messages vocaux personnalisés créés par l'utilisateur.
Configuration
Configuration de la défense active dans l'interface utilisateur Web IPC
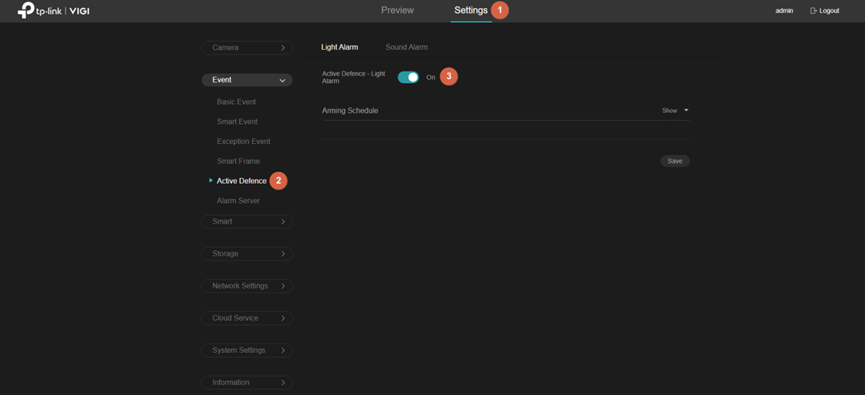
Connectez-vous à l'interface web de gestion de l'IPC et accédez à Paramètres > Événement > Défense active . Choisissez Alarme lumineuse ou Alarme sonore , puis activez le bouton.
Si le bouton est vert  , cela signifie que l'alarme lumineuse/sonore est activée.
Si le bouton est gris  , cela signifie que l'alarme lumineuse/sonore est désactivée.
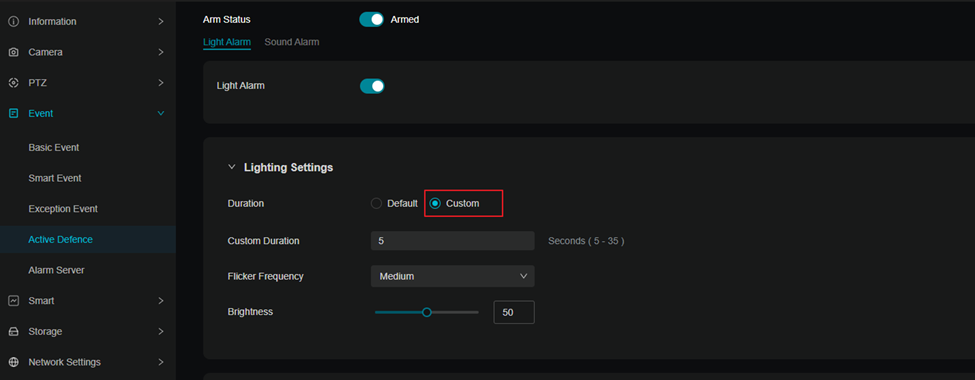
Alarme lumineuse
Étape 1. Alarme lumineuse personnalisable. Trouvez le bouton « Personnalisé » dans l’alarme lumineuse.
Configurez davantage d'attributs de l'alarme lumineuse.
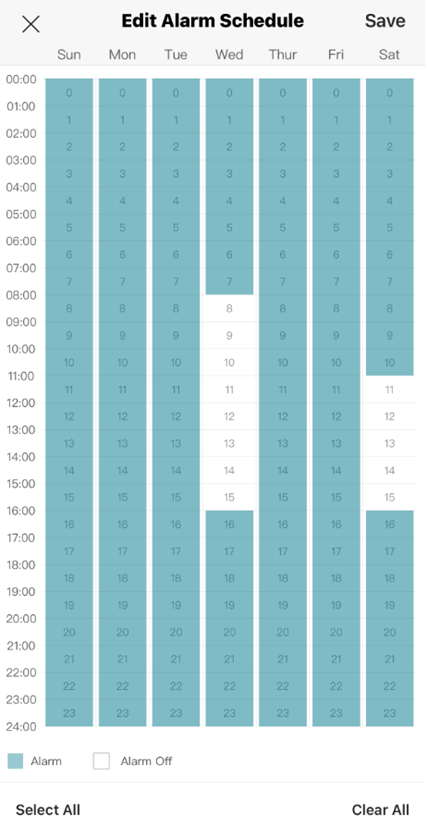
Étape 2. Définir la plage horaire d'enregistrement. Deux méthodes sont possibles :
(1) Tracer la période d'enregistrement continu directement sur la chronologie à l'aide de la souris.
(2) Cliquer sur la chronologie et accéder à la page d'édition pour des réglages plus précis. Vous pouvez personnaliser le point temporel.
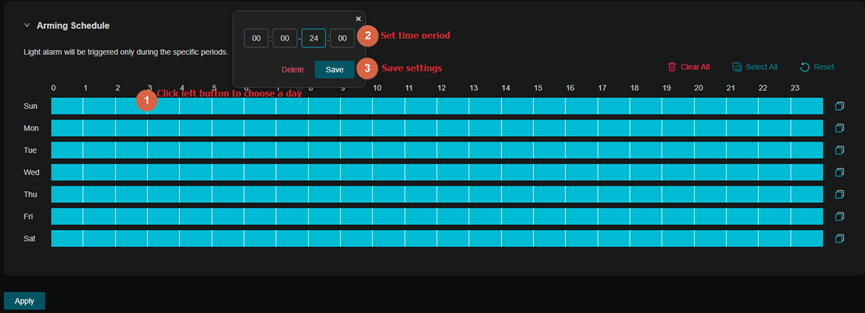
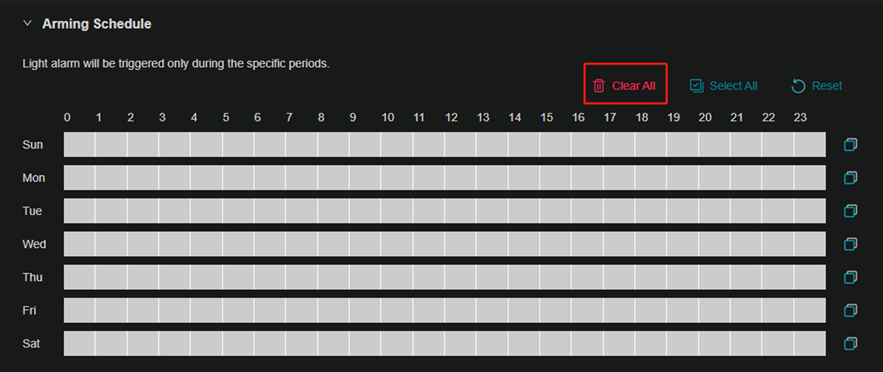
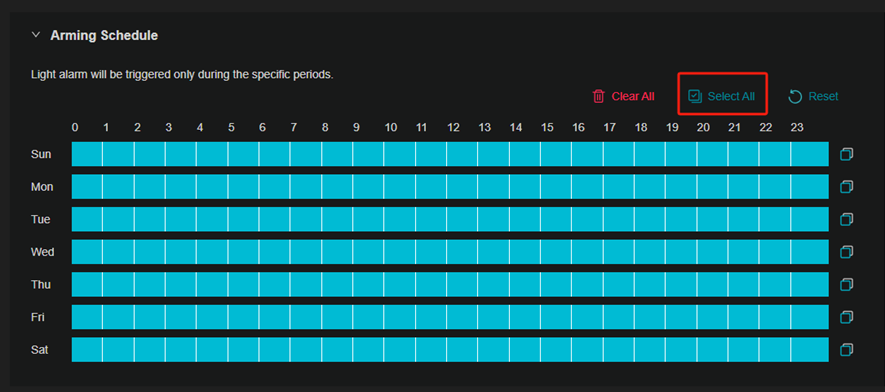
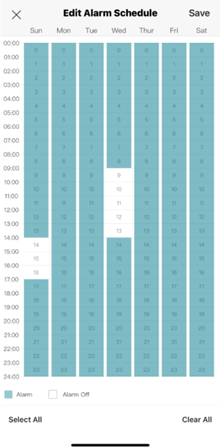
Étape 3. Après avoir configuré une journée, vous pouvez utiliser la fonction de copie de la planification pour copier les heures d'armement sur d'autres jours.
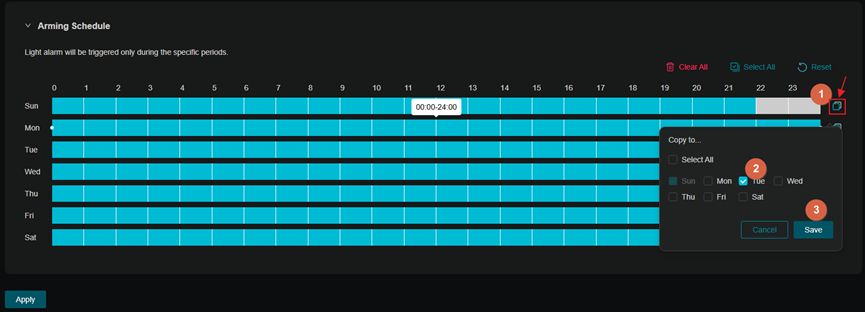
La chronologie est entièrement sélectionnée par défaut. Vous pouvez l'effacer en cliquant sur « Tout effacer » , la sélectionner entièrement avec « Tout sélectionner » ou la rétablir à son état par défaut avec « Réinitialiser » .
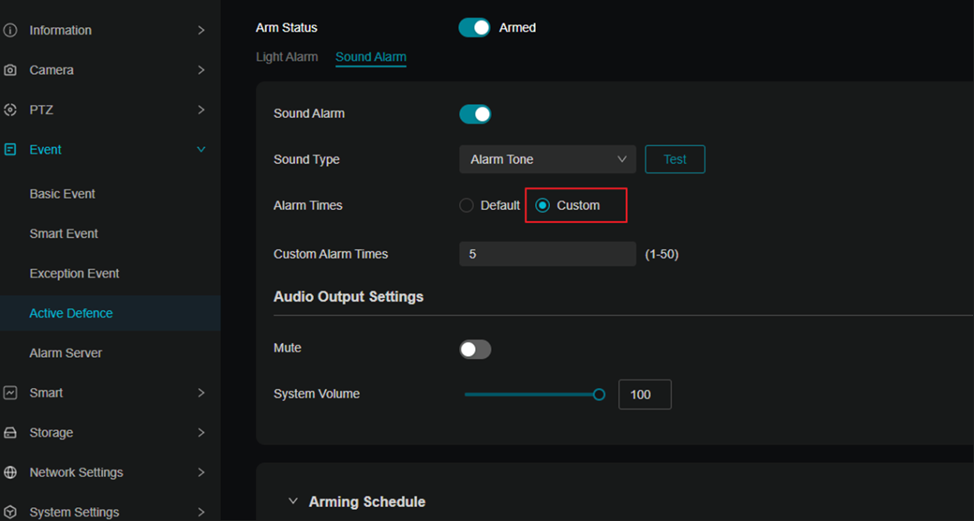
Alarme sonore
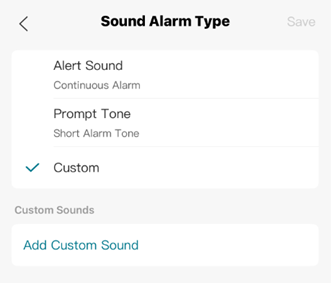
Étape 1. Dans l'alarme sonore, vous pouvez choisir le type de son et modifier le volume.
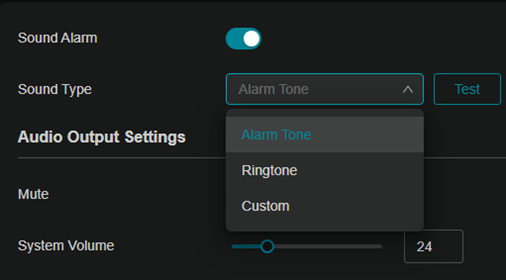
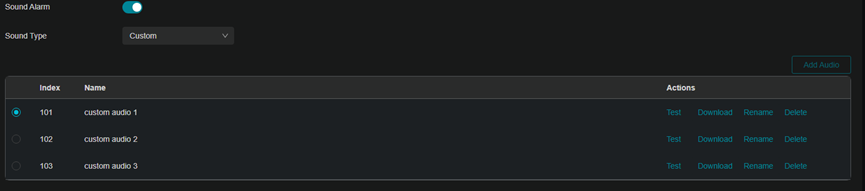
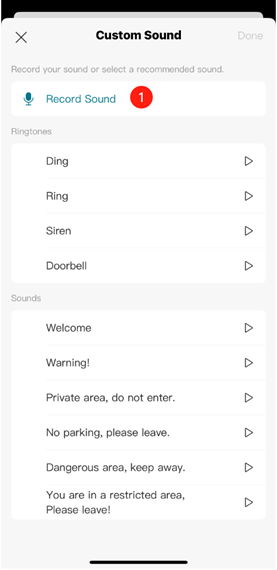
Sound Alarm permet également de sélectionner des types de voix personnalisés et d'importer des fichiers audio personnalisés. Choisissez Type de son > Personnalisé et importez l'audio.
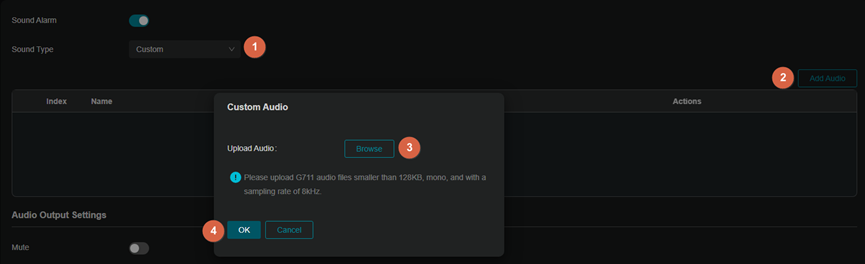
Étape 2. Après avoir téléchargé le fichier audio, vous pouvez le sélectionner, l'écouter, le télécharger, le renommer et le supprimer.
Remarque : Vous pouvez importer jusqu’à 3 fichiers audio personnalisés. Veuillez utiliser le format audio suivant :
G711 : audio mono, taille du fichier ≤ 128 Ko, fréquence d'échantillonnage = 8 kHz.
WAV : audio mono, durée ≤ 15 secondes, taille du fichier ≤ 256 Ko, fréquence d'échantillonnage = 8 kHz.
MP3 : audio mono, durée ≤ 15 secondes, taille du fichier ≤ 128 Ko, débit d'encodage (débit binaire) ≤ 64 kbps.
Étape 3. Vous pouvez également personnaliser les horaires des alarmes sonores. Accédez aux paramètres des alarmes sonores et sélectionnez le mode Personnalisé . Définissez ensuite les horaires des alarmes selon vos besoins.
Étape 4. Définir la plage horaire de visée. La procédure de réglage est identique à celle de l'alarme lumineuse.

Configuration de la défense active dans l'application VIGI
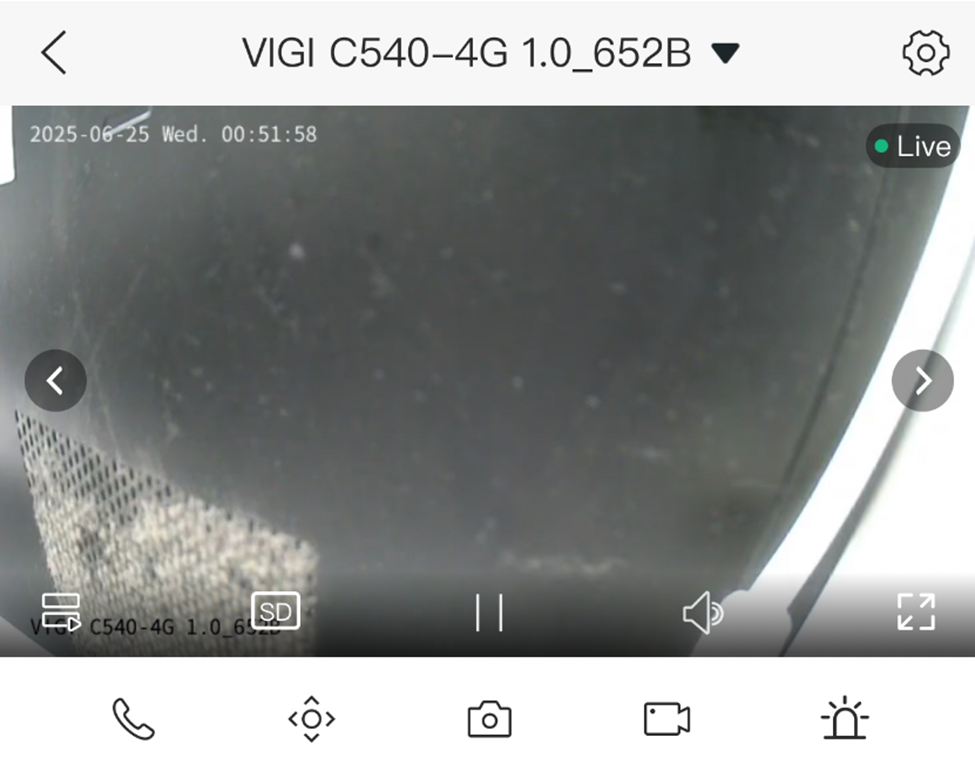
Étape 1. Appuyez sur votre appareil photo et accédez à la page Live View . Ensuite, appuyez sur  l'icône .
Étape 2. Appuyez sur Défense active et activez l' état d'armement .
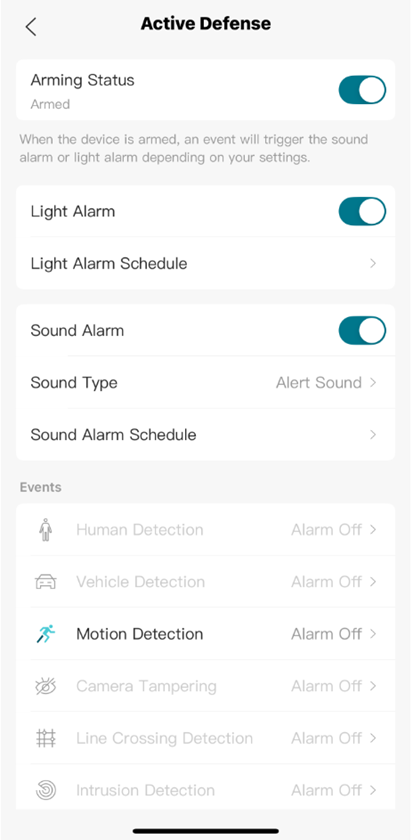
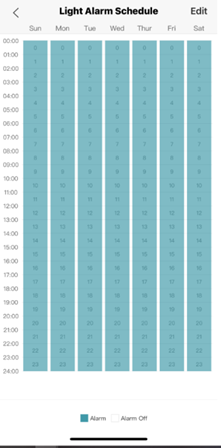
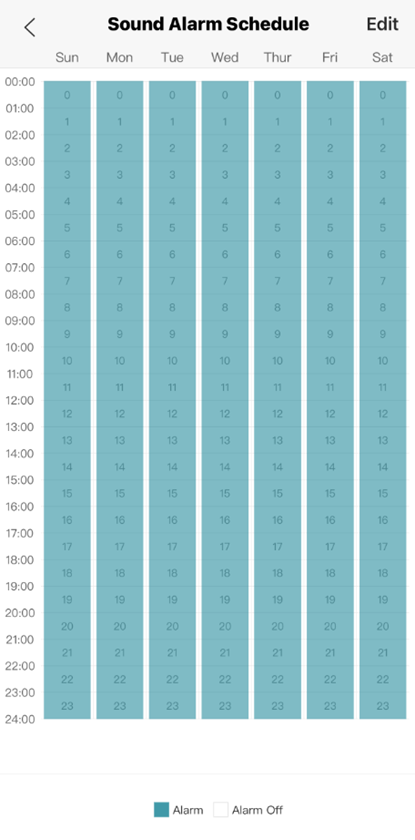
Étape 3. Activez l'alarme lumineuse et accédez à la programmation de l'alarme lumineuse . Définissez la programmation de l'alarme. La plage horaire est entièrement sélectionnée par défaut.
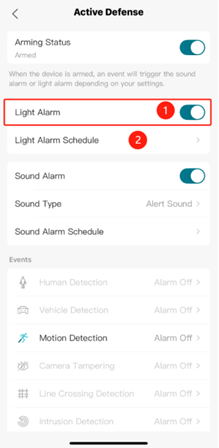
Étape 4. Retournez à Défense active . Activez l'alarme sonore et accédez à Type de son , puis choisissez le mode d'alerte souhaité.
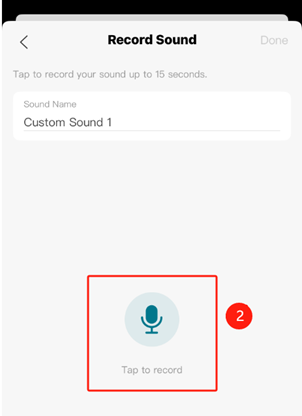
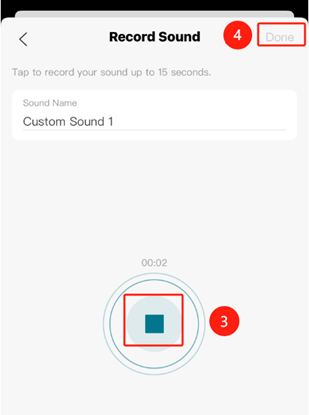
Dans le mode Personnalisé , vous pouvez personnaliser l'audio ou enregistrer votre propre audio.
Étape 3. Accédez à la programmation des alarmes sonores et définissez la programmation. La plage horaire est entièrement sélectionnée par défaut.
Conclusion
Vous pouvez désormais configurer plus facilement la défense active sur la caméra VIGI via l'interface Web et l'application VIGI.
Pour en savoir plus sur chaque fonction et configuration, veuillez vous rendre dans le Centre de téléchargement pour télécharger le manuel de votre produit.
Est-ce que ce FAQ a été utile ?
Vos commentaires nous aideront à améliorer ce site.


