How to configure Facebook Wi-Fi on Archer C50
Introduce to Facebook Wi-Fi
Facebook Wi-Fi is a free Captive Authentication Portal. When this feature enabled, customers who connected to the guest Wi-Fi will be redirected to your Facebook page, and they will not have the internet access unless they pass the authentication. This kind of feature is widely used on some bars, cafes, restaurants and supermarkets for advertisement, feedback collecting, etc.
Configure Facebook Wi-Fi on Archer C50
1. Login to the web management interface of Archer C50. You can refer to this How do I log into the web-based Utility (Management Page) of TP-Link wireless router?
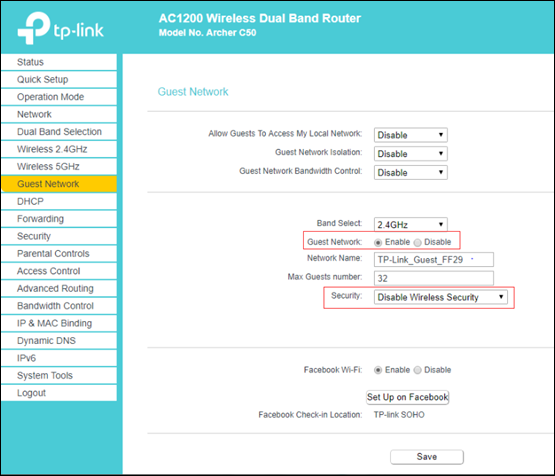
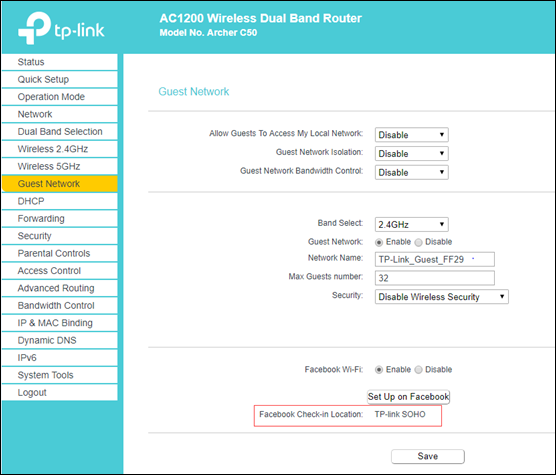
2. Go to Guest Network, enable it and configure other parameters as your requirements. Normally Security is configured as Disable Wireless Security in this scenario, since we don’t want to limit customer via password connections but Facebook authentication.
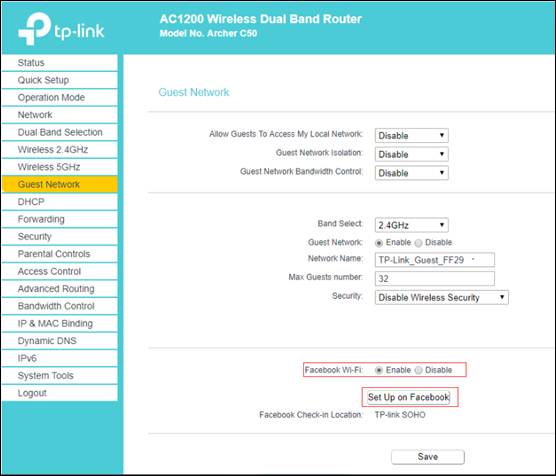
3. Enable Facebook Wi-Fi and click on Set up on Facebook.
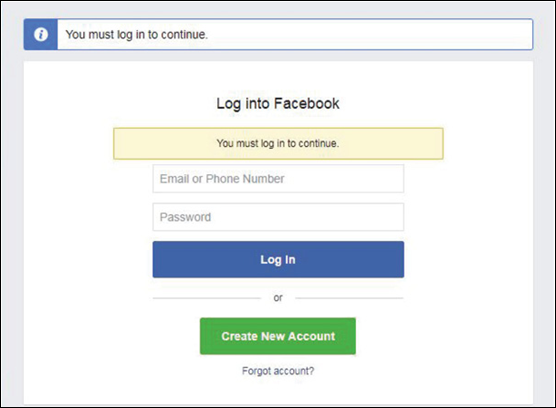
4. Login your Facebook account or you can create a new one.
5. After login, choose a local business Page or create a new one.
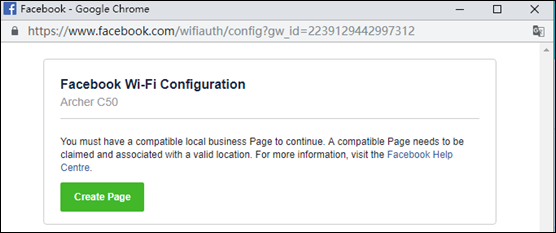
Follows are the way to create a new Facebook Page:
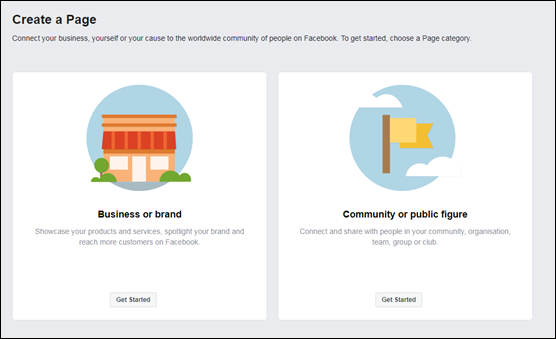
- Click on the Create Page firstly.
- Choose Business or brand as the Page category.
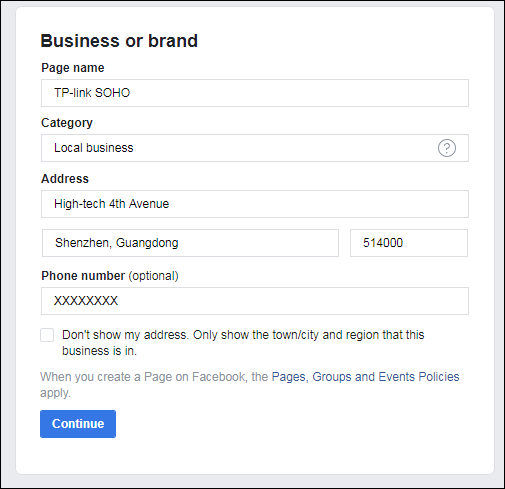
- Fill in the required information and click Continue.
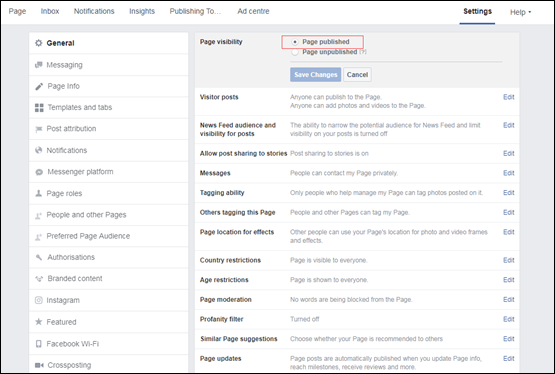
- Go to the Settings page and make sure that Page Visibility is set as Page published, so that users can access your Facebook page.
- Then you have finished the creation the Facebook Page.
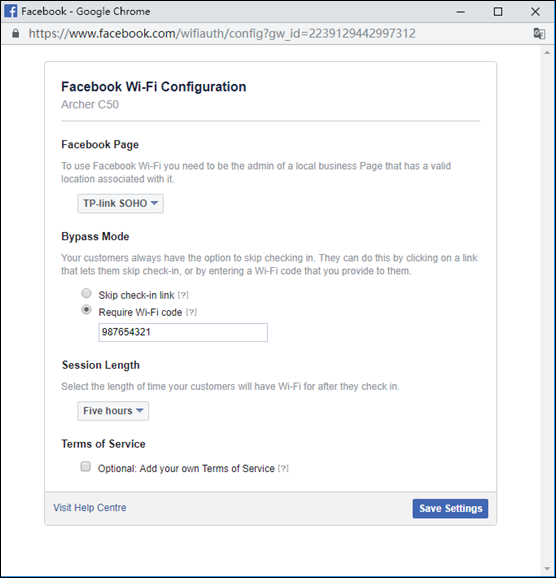
6. Then choose the Facebook Page and configure the required parameters according to the help information on the page. For example, select Facebook Page as TP-Link SOHO, set Bypass Mode as Require Wi-Fi code, and set Session Length as Five hours. Click Save Settings.
7. After the Facebook Page is successfully configured, the name of your Facebook Page will be displayed on Facebook check-in Location.
Test the Configuration Result
After all the configurations are completed, you can follow the steps below to test whether the Facebook Portal works normally.
1. Enable the Wi-Fi feature of your mobile phone.
2. Search and connect to the SSID of Guest Network.
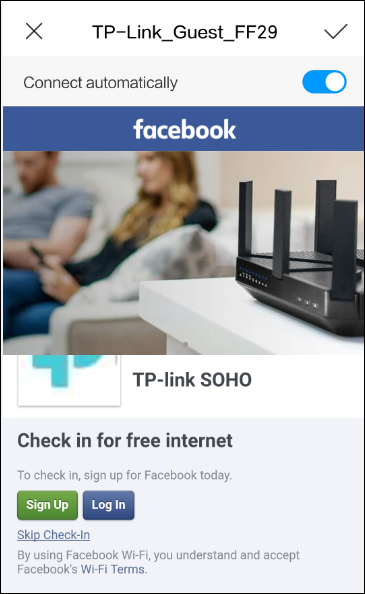
3. The default web browser on the mobile phone will pop up and the Facebook authentication page will appear.
Note: Generally, the web browser pops up automatically. But if the web browser does not pop up, you can manually launch the web browser and visit any http website. Then the authentication page will appear.
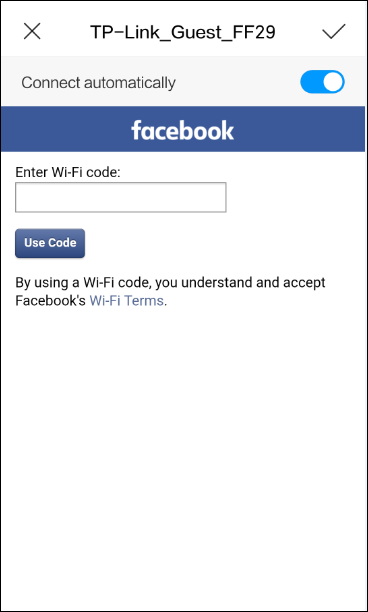
4. To pass the authentication, log in with a Facebook account or choose Use Wi-Fi Code Instead. For example, you can choose Use Wi-Fi Code Instead.
5. Enter the Wi-Fi code and click on Use Code.
6. After authenticated, you will be redirected to the authentication result page, and you can stay on this page or continue browsing.
7. If all the steps are completed, it shows that the Facebook Wi-Fi works normally.
Get to know more details of each function and configuration please go to Download Center to download the manual of your product.
¿Es útil esta faq?
Sus comentarios nos ayudan a mejorar este sitio.