


How to access TP-Link JetStream Managed Switch via the Console port
You can use the console cable to connect your PC to the console port of the TP-Link JetStream managed Switch and then manage the switch with the CLI.
Follow the steps below to manage the switch via the console port:
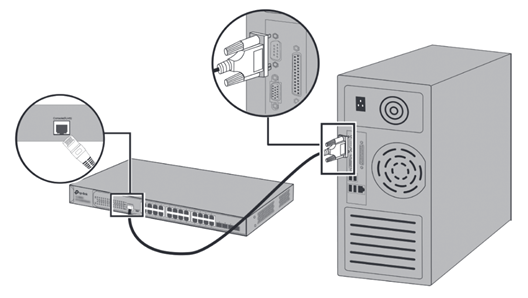
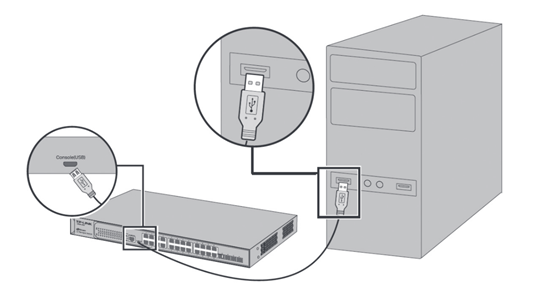
Step 1. Connect your computer to the switch.
If your computer has a serial port (COM), connect it to the console port (RJ45) of the switch, with the RJ45 console cable.
If you only have USB ports on your computer, you can get a USB-to-RS232 cable. You need to install the RS232 driver for the cable, which is provided by your cable vendor.
You can also choose a Micro-USB cable that supports data transfer to connect your computer to the switch. Then for Windows computers, click here to download and install the TP-Link USB Console Driver then continue. For Mac, please follow FAQ 3177.
Note: If you need to enter the BootUtil menu to reset the switch or recover the password, please refer to FAQ 3146. We recommend an RJ45 Console cable or USB-to-RS232 cable, as it might be more difficult to enter the BootUtil menu with a Micro-USB cable. If you still cannot enter the BootUtil after several attempts, you may get a USB-to-RS232 cable.
Step 2. Install a Terminal Emulator.
For Windows computers, you need to install a terminal emulator, such as Putty, Tera Term. Go to the official website to download the installer and follow the prompts to install the terminal emulator.
Note: If you use the Micro-USB cable, we recommend “Tera Term”, which you can download and install from the official website.
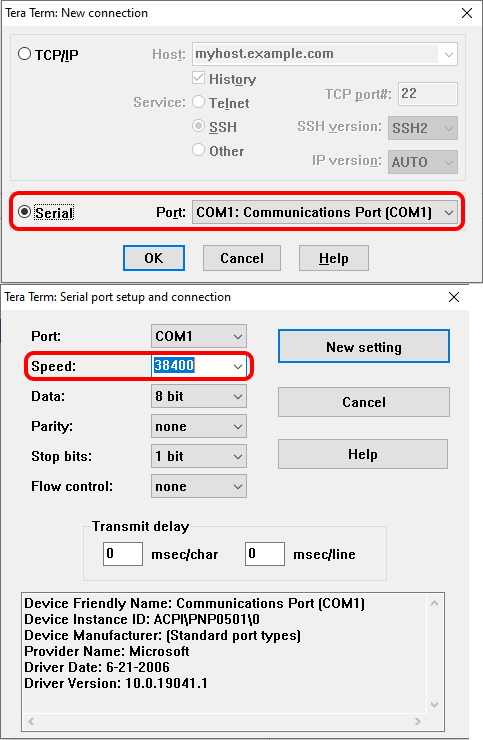
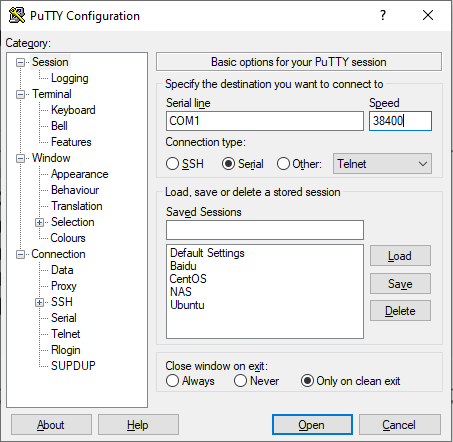
Step 3. Launch and Configure the Terminal Emulator.
Run your terminal emulator with the following serial parameters
- Baud Rate: 38400bps
- Data Bits: 8
- Parity: None
- Stop Bits: 1
- Flow Control: None
For Tera Term, choose the serial port, then go to Setup – Serial Port, set the speed to 38400, then click “New setting”.
For Putty, select Serial, change the Speed to 38400, and then click “Open”.
Step 4 Launching the CLI
Enter the username and password, then you can manage the switch. Please refer to the User Guide, and CLI Reference Guide, which can be found on the support page for your switch model.
Is this faq useful?
Your feedback helps improve this site.


TP-Link Community
Still need help? Search for answers, ask questions, and get help from TP-Link experts and other users around the world.