


How to Manage CAPs at Different Sites across the Internet Using TP-LINK AC Controller (with NAT Port Forwarding)
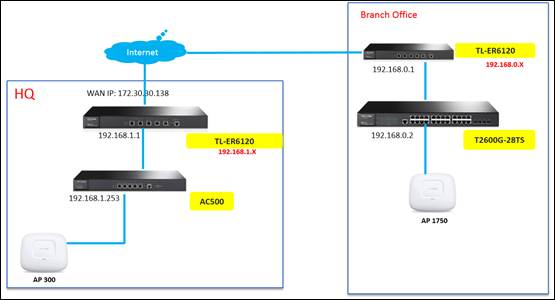
As shown below, HQ and Branch Office are in different sites. In HQ, there are TP-Link AC controller AC500, CAP300 and TL-ER6120 (VPN Router). In branch office, there are TL-ER6120 (VPN router), CAP1750 and TP-Link layer 3 switch T2600G-28TS.
Note: None of TP-LINK SMB Router supports DHCP Option60 and Option138 at present, so we use TP-Link layer 3 switch T2600G-28TS which supports DHCP Option60 and option138 as the DHCP Server in Branch Office instead of TL-ER6120. If your gateway router or the DHCP Server you have built supports Option60 and Option138, then TP-Link layer 3 switch T2600G-28TS is not necessary in this network topology.
This document will introduce how to manage CAPs at different sites across Internet using TP-LINK AC controller (with NAT port forwarding).
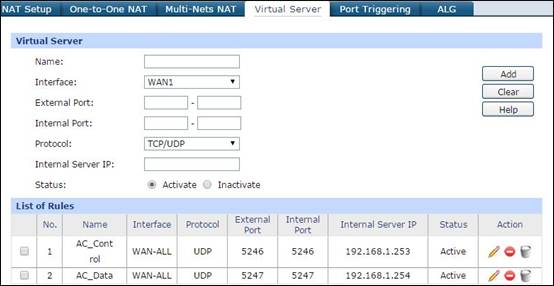
Step 1: Configure Virtual Server (UDP: 5246 and 5247) for AC controller AC500 on TL-ER6120 at HQ.
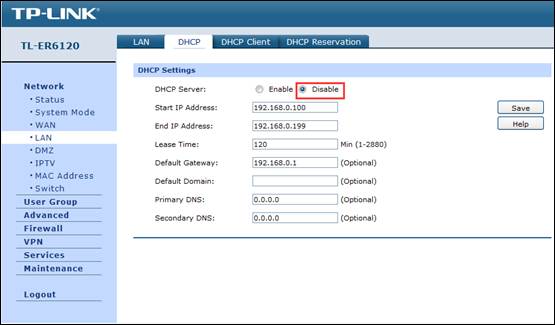
Step 2: Disable DHCP function on TL-ER6120 at Branch Office to avoid DHCP assignment to CAP1750. (If your router’s DHCP Server function supports DHCP Option60 and Option138, you can use your Router as the DHCP Server instead of T2600G-28TS, which means T2600G-28TS can be deleted from your network topology.)
Step 3: Configurations on AC controller AC500
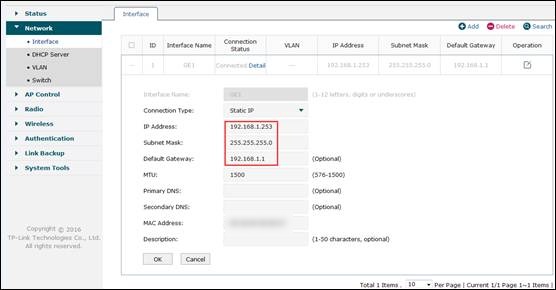
3.1 Change the IP address of default gateway on AC500 as 192.168.1.253
Step 4: Configurations on T2600G-28TS
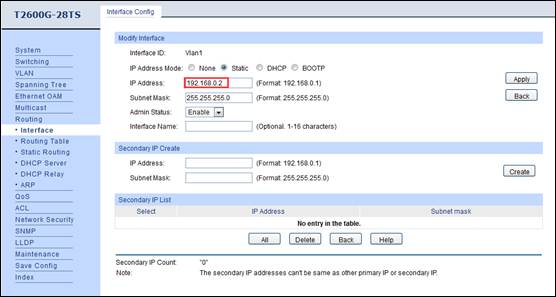
4.1 Change the interface IP address of VLAN1 on T2600G-28TS to avoid conflict with TL-ER6120’s LAN IP.
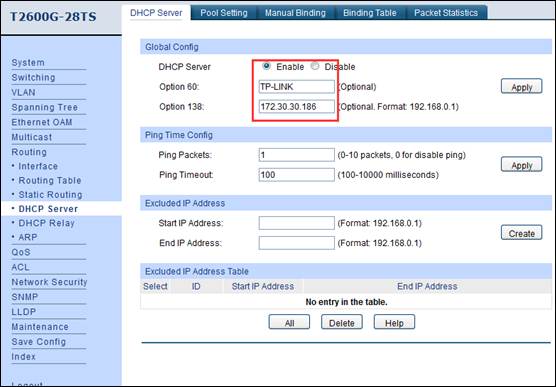
4.2 Enable DHCP Server function, and set DHCP Option60 as TP-LINK while Option138 as the TL-ER6120’s WAN IP (172.30.30.186).
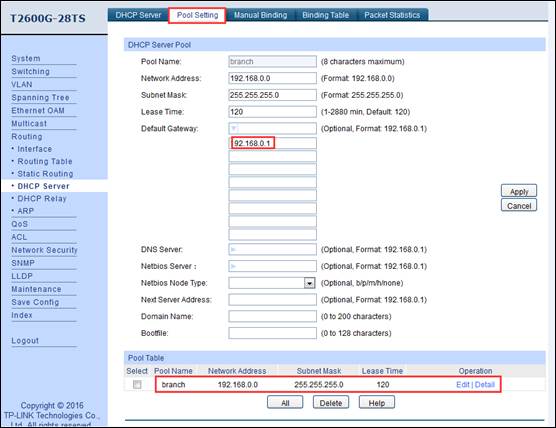
4.3 Configure DHCP address Pool for 192.168.0.0/24, and set the default gateway IP address as 192.168.0.1.
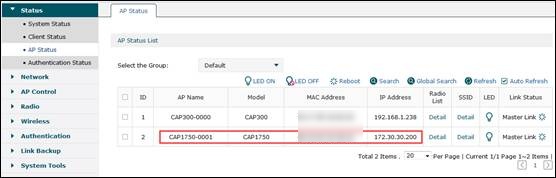
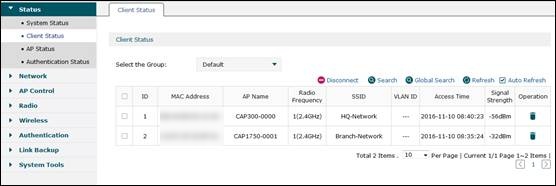
Step 5: After all configurations, we can check CAP’s status in AC controller’s AP Status page. Here the following screenshot shows the CAP300 in HQ and CAP1750 at branch office managed by AC controller through NAT port forwarding.
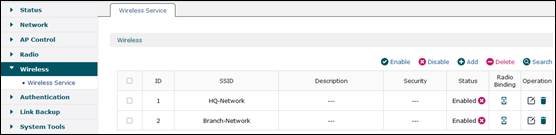
5.1 Create two SSIDs. One is for HQ and the other one is for Branch Office.
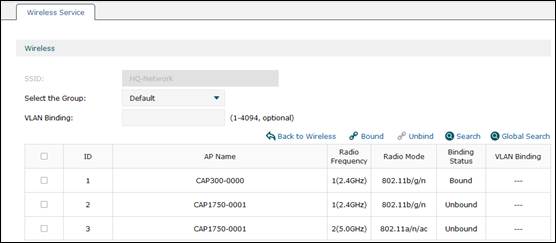
5.2 Bind SSID “HQ-Network” to CAP300 and Bind SSID “Branch-Network” to CAP1750.

5.3 After all configurations, you can test if you can go to Internet normally through HQ and Branch Office’s wireless networks, and check if AC controller can successfully manage CAPs in HQ and at branch office.
Is this faq useful?
Your feedback helps improve this site.
1.0_1505290145255s.jpg)
1.0_1505290425728l.jpg)
TP-Link Community
Still need help? Search for answers, ask questions, and get help from TP-Link experts and other users around the world.