


How to Configure Web Authentication (Local Authentication Server & Local Web Server) on TP-Link CAP/AC Serial Products
TP-LINK AC controller supports multiple kinds of portal authentication methods. This article will introduce how to configure Web Authentication (Local Authentication Server & Local Web Server) on TP-Link CAP/AC serial products.
Step 1. Go to “Redirect Page”, add one entry, and the “Authentication Type” should be “Web Authentication”.

Step 2. Go to “Web Authentication” page, create one entry, and the “Authentication Server Type” should be “Local Authentication Server”. “Success Redirect URL” means the webpage the guest will be redirected to after passing the portal authentication.

Step 3: Go to “User Management” page, and add the User Management information. Here we create one username/password entry, which is “admin/admin”. This user account can only be used by one client, if you want this account to be shared by more clients, modify “Maximum Users” number.

Step 4: After all configurations, you can use your wireless client to connect to CAP’s wireless network and there will be a pop-up portal authentication webpage when you try to open any HTTP website as shown in the picture below. Input the user account, and you can go to Internet. (Note: HTTPS website is not supported to redirect to pop-up authentication webpage, so you can only use HTTP website to get the pop-up portal authentication page)

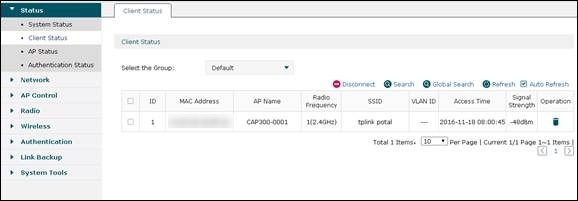
Step 5: You can check your wireless client device’s status in “Client Status” Page.
Is this faq useful?
Your feedback helps improve this site.
1.0_1505290145255s.jpg)
1.0_1505290425728l.jpg)
TP-Link Community
Still need help? Search for answers, ask questions, and get help from TP-Link experts and other users around the world.