How to Upgrade TP-Link Switch Using tpNMS

tpNMS
Recent updates may have expanded access to feature(s) discussed in this FAQ. Visit your product's support page, select the correct hardware version for your device, and check either the Datasheet or the firmware section for the latest improvements added to your product. Please note that product availability varies by region, and certain models may not be available in your region.
TPNMS is an SNMP based software designed for TP-Link switches, and we can use it to upgrade a number of switches with the same model number or upgrade different TP-Link switches at the same time, so it can be used for switch batch upgrading. This article will illustrate how to use tpNMS to upgrade TP-Link switches.
Note: Upgrading firmware with TPNMS will need a telnet connection between TPNMS host and the target switch, so it is very import to double check if you have enabled SNMP and telnet function on the TP-Link switches. TP-Link Smart Switches (named by T1600 and TL-SG2XXX or TL-SL2XXX) are enabled with telnet by default with username and password both “admin”. For TP-Link 3/5/T serial switches, please refer to “CLI Guide” to enable the telnet and set username and password via CLI.
Here I will take T1600G-28PS as an instance to illustrate step by step TPNMS firmware upgrade.
Step 1
Connect your TPNMS host to T1600G-28PS and configure the IP parameters, test that your TPNMS host can telnet and log in to the switch with the factory default login username “admin” and password “admin”. If login failed, you should check if you have enabled “telnet service” on your windows computer or if you have enabled telnet on TP-Link Managed Switches.
Step 2
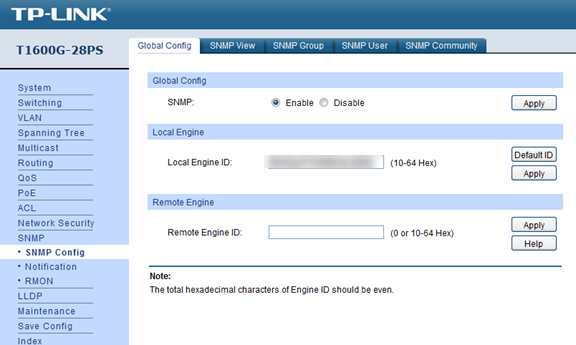
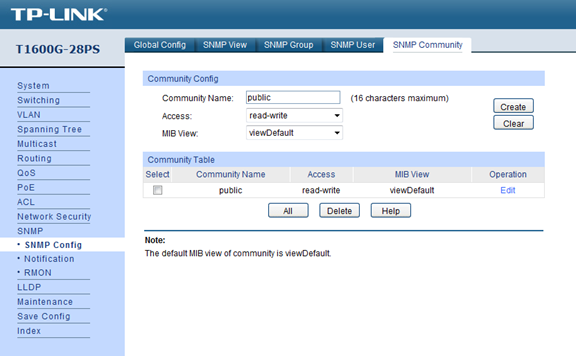
Enable switch SNMP function, here I enable T1600G-28PS SNMP_V1.
Step 3
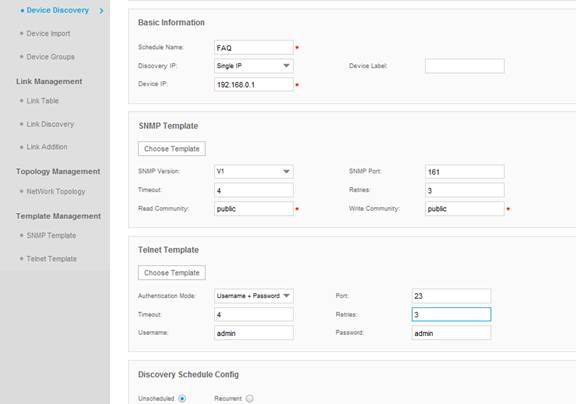
Log in to the NMS page and go to “Device Discovery” and “Add” a new “Discovery Profile”, as illustrated below, you have to configure “Telnet Template” and choose the “Authentication Mode” as “Username + Password”
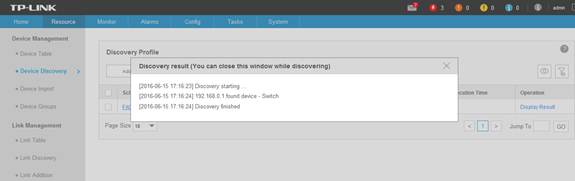
Step 4
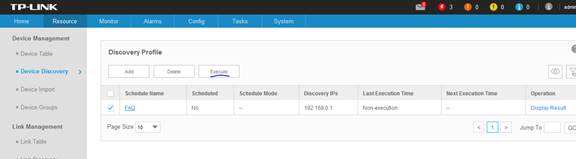
“Execute” the “Discovery Profile”, and we can find TPNMS has found T1600G-28PS.
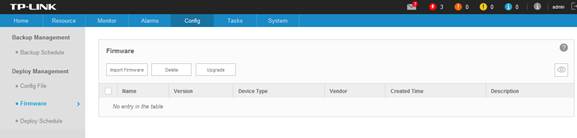
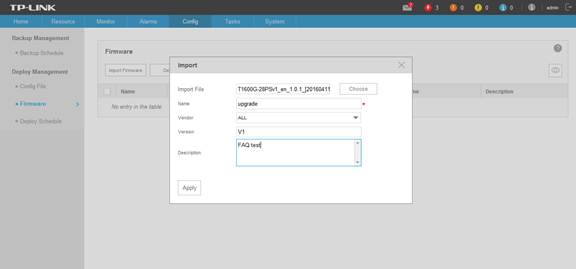
Step 5
Go to “Config”---“Firmware” and import the firmware for T1600G-28PS on your Local TPNMS host.
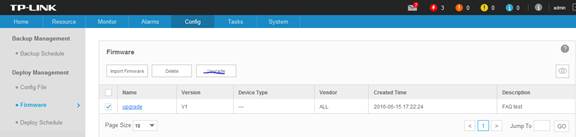
Step 6
Check the Firmware and click on “Upgrade”, on the pop out window, fill in the target.
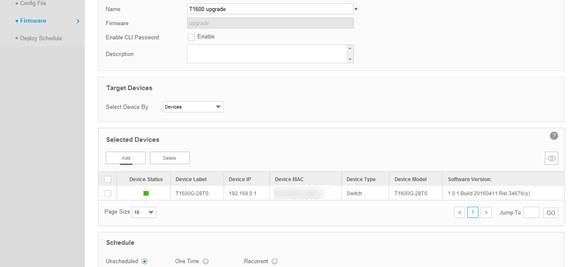
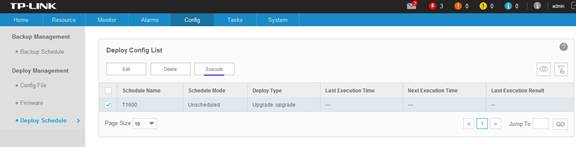
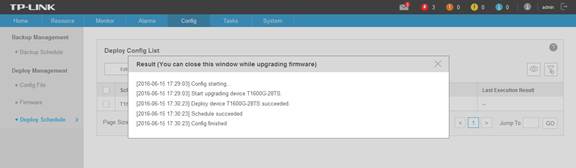
Step 7
Go to “Deploy Schedule” and click on “Execute”, the the firmware upgrade process will start….
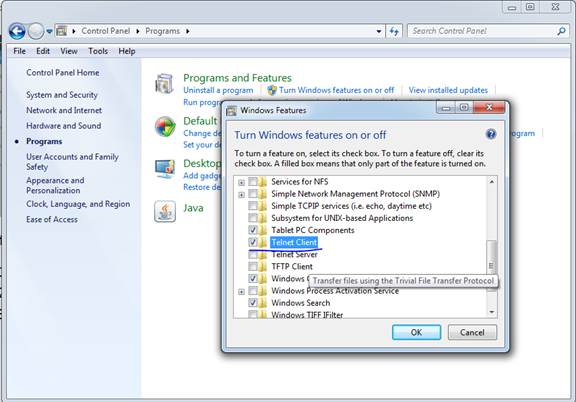
PS: If the upgrade process failed, please check
- If the firmware file is the right one for the model number.
- If you have configured TPNMS telnet template(refer to “step 3”).
- If your windows computer has enabled “Telnet client” in “Control Panel”—“Programs”.
Is this faq useful?
Your feedback helps improve this site.
What’s your concern with this article?
- Dissatisfied with product
- Too Complicated
- Confusing Title
- Does not apply to me
- Too Vague
- Other
Thank you
We appreciate your feedback.
Click here to contact TP-Link technical support.
Recommend Products

TP-Link Community
Still need help? Search for answers, ask questions, and get help from TP-Link experts and other users around the world.
This website uses cookies to improve website navigation, analyze online activities and have the best possible user experience on our website. You can object to the use of cookies at any time. You can find more information in our privacy policy . Don’t show again
Your Privacy Choices
This website uses cookies to improve website navigation, analyze online activities and have the best possible user experience on our website. You can object to the use of cookies at any time. You can find more information in our privacy policy . Don’t show again
Basic Cookies
These cookies are necessary for the website to function and cannot be deactivated in your systems.
TP-Link
SESSION, JSESSIONID, accepted_local_switcher, tp_privacy_banner, tp_privacy_base, tp_privacy_marketing, tp_top-banner, tp_popup-bottom, tp_popup-center, tp_popup-right-middle, tp_popup-right-bottom, tp_productCategoryType
Youtube
id, VISITOR_INFO1_LIVE, LOGIN_INFO, SIDCC, SAPISID, APISID, SSID, SID, YSC, __Secure-1PSID, __Secure-1PAPISID, __Secure-1PSIDCC, __Secure-3PSID, __Secure-3PAPISID, __Secure-3PSIDCC, 1P_JAR, AEC, NID, OTZ
Zendesk
OptanonConsent, __cf_bm, __cfruid, _cfuvid, _help_center_session, _pendo___sg__.<container-id>, _pendo_meta.<container-id>, _pendo_visitorId.<container-id>, _zendesk_authenticated, _zendesk_cookie, _zendesk_session, _zendesk_shared_session, ajs_anonymous_id, cf_clearance
Analysis and Marketing Cookies
Analysis cookies enable us to analyze your activities on our website in order to improve and adapt the functionality of our website.
The marketing cookies can be set through our website by our advertising partners in order to create a profile of your interests and to show you relevant advertisements on other websites.
Google Analytics & Google Tag Manager
_gid, _ga_<container-id>, _ga, _gat_gtag_<container-id>
Google Ads & DoubleClick
test_cookie, _gcl_au