What Is the Wi-Fi PIN Code When Connecting Windows 7 to a TP-Link Wireless Router?
The Wi-Fi PIN code is an 8-digit router PIN found on the label at the bottom of your TP-Link router. It’s used as part of the WPS (Wi-Fi Protected Setup) process to connect a device to a wireless network without manually entering the Wi-Fi password. This guide covers two connection methods for an unsecured network: connect without completing the network setup, or use the router PIN code to set up your network with a name and Wi-Fi password.
Key Takeaways
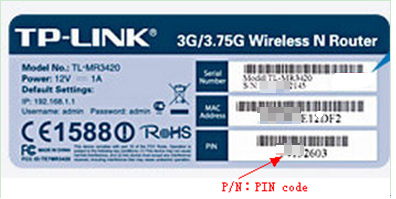
- The PIN code is an 8-digit number found on the label at the bottom of the TP-Link router.
- The PIN code is used as part of the WPS (Wi-Fi Protected Setup) process to connect a device to the wireless network without manually entering the Wi-Fi password.
- There are two methods when connecting via WPS: connecting to an unsecured network without setup, or using the PIN code to complete WPS setup.
- When using the PIN method, the router automatically generates a WPA2-Personal password for the wireless network. This password should be saved as it becomes the network's Wi-Fi key.
- If the wireless network is already secured, use the Wi-Fi password to connect.
Connecting to a TP-Link Router Using the Wi-Fi PIN Code
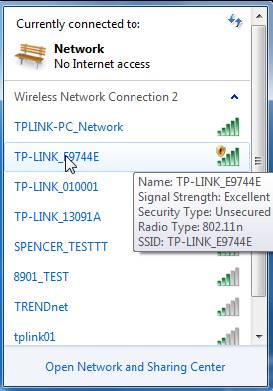
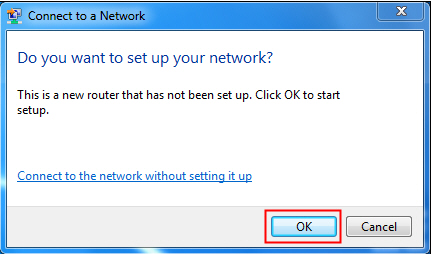
If your wireless router or access point has the QSS (Quick Security Setup) or called WPS (Wi-Fi Protected Setup) function and your computer with Windows 7 connects to the new unsecured wireless network for the first time, a small window will pop out.
If the wireless network is already secured, enter the Wi-Fi password directly.
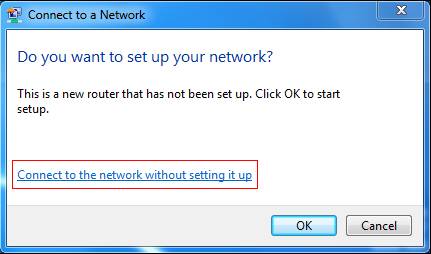
There are two methods to connect to your wireless network:
Method 1
Click Connect to the network without setting it up, then you will connect to the unsecured network.
Method 2
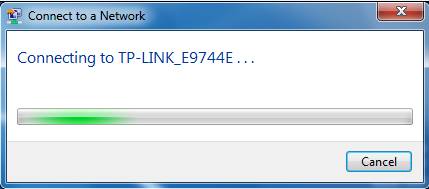
Click OK button, then the PIN Code window will appear.
Step 1. Enter the 8-digit PIN code found on the label at the bottom of your router.
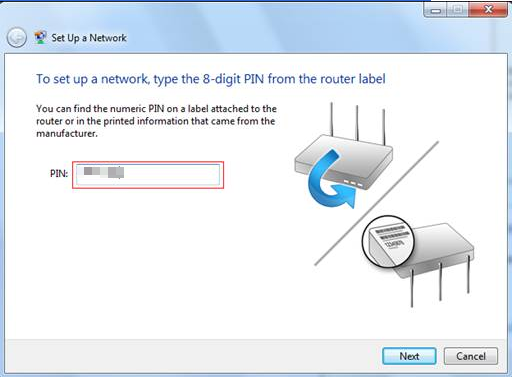
Step 2. Click Next, then type in your network name.
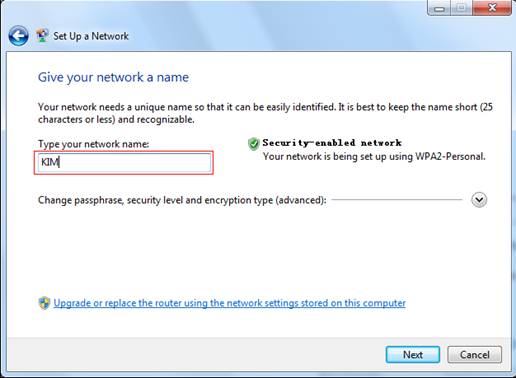
Step 3. Click Next. The router will automatically set a WPA2-Personal password for your wireless network. Save this password — it is your Wi-Fi network key.
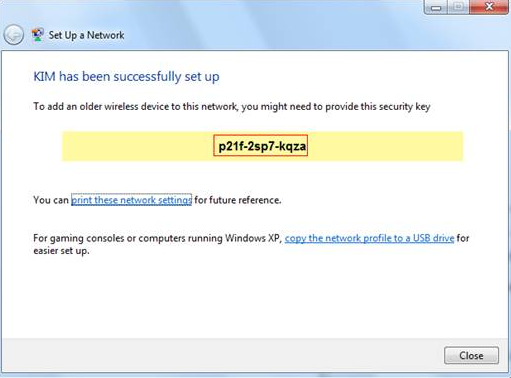
Step 4. Click Close. Your device is now connected to the wireless network.
To learn more about each function and configuration, please visit the Download Center to download the manual for your product.
Looking For More
Is this faq useful?
Your feedback helps improve this site.
TP-Link Community
Still need help? Search for answers, ask questions, and get help from TP-Link experts and other users around the world.